Threads Integration
To post on Threads, first create and configure a Threads application.
1. Create a Developer account
To create a Threads application, you must first have a Facebook developer account. If you don't already have one, go to the Facebook for Developers website and click Get Started in the top right corner. Follow the instructions to sign up for a developer account.
2. Create a new app
If you already have a Facebook application, we recommend reusing it for Threads instead of creating a separate app.
Once you have a developer account, go to the Facebook Developer Dashboard and click Create App in the top right corner.
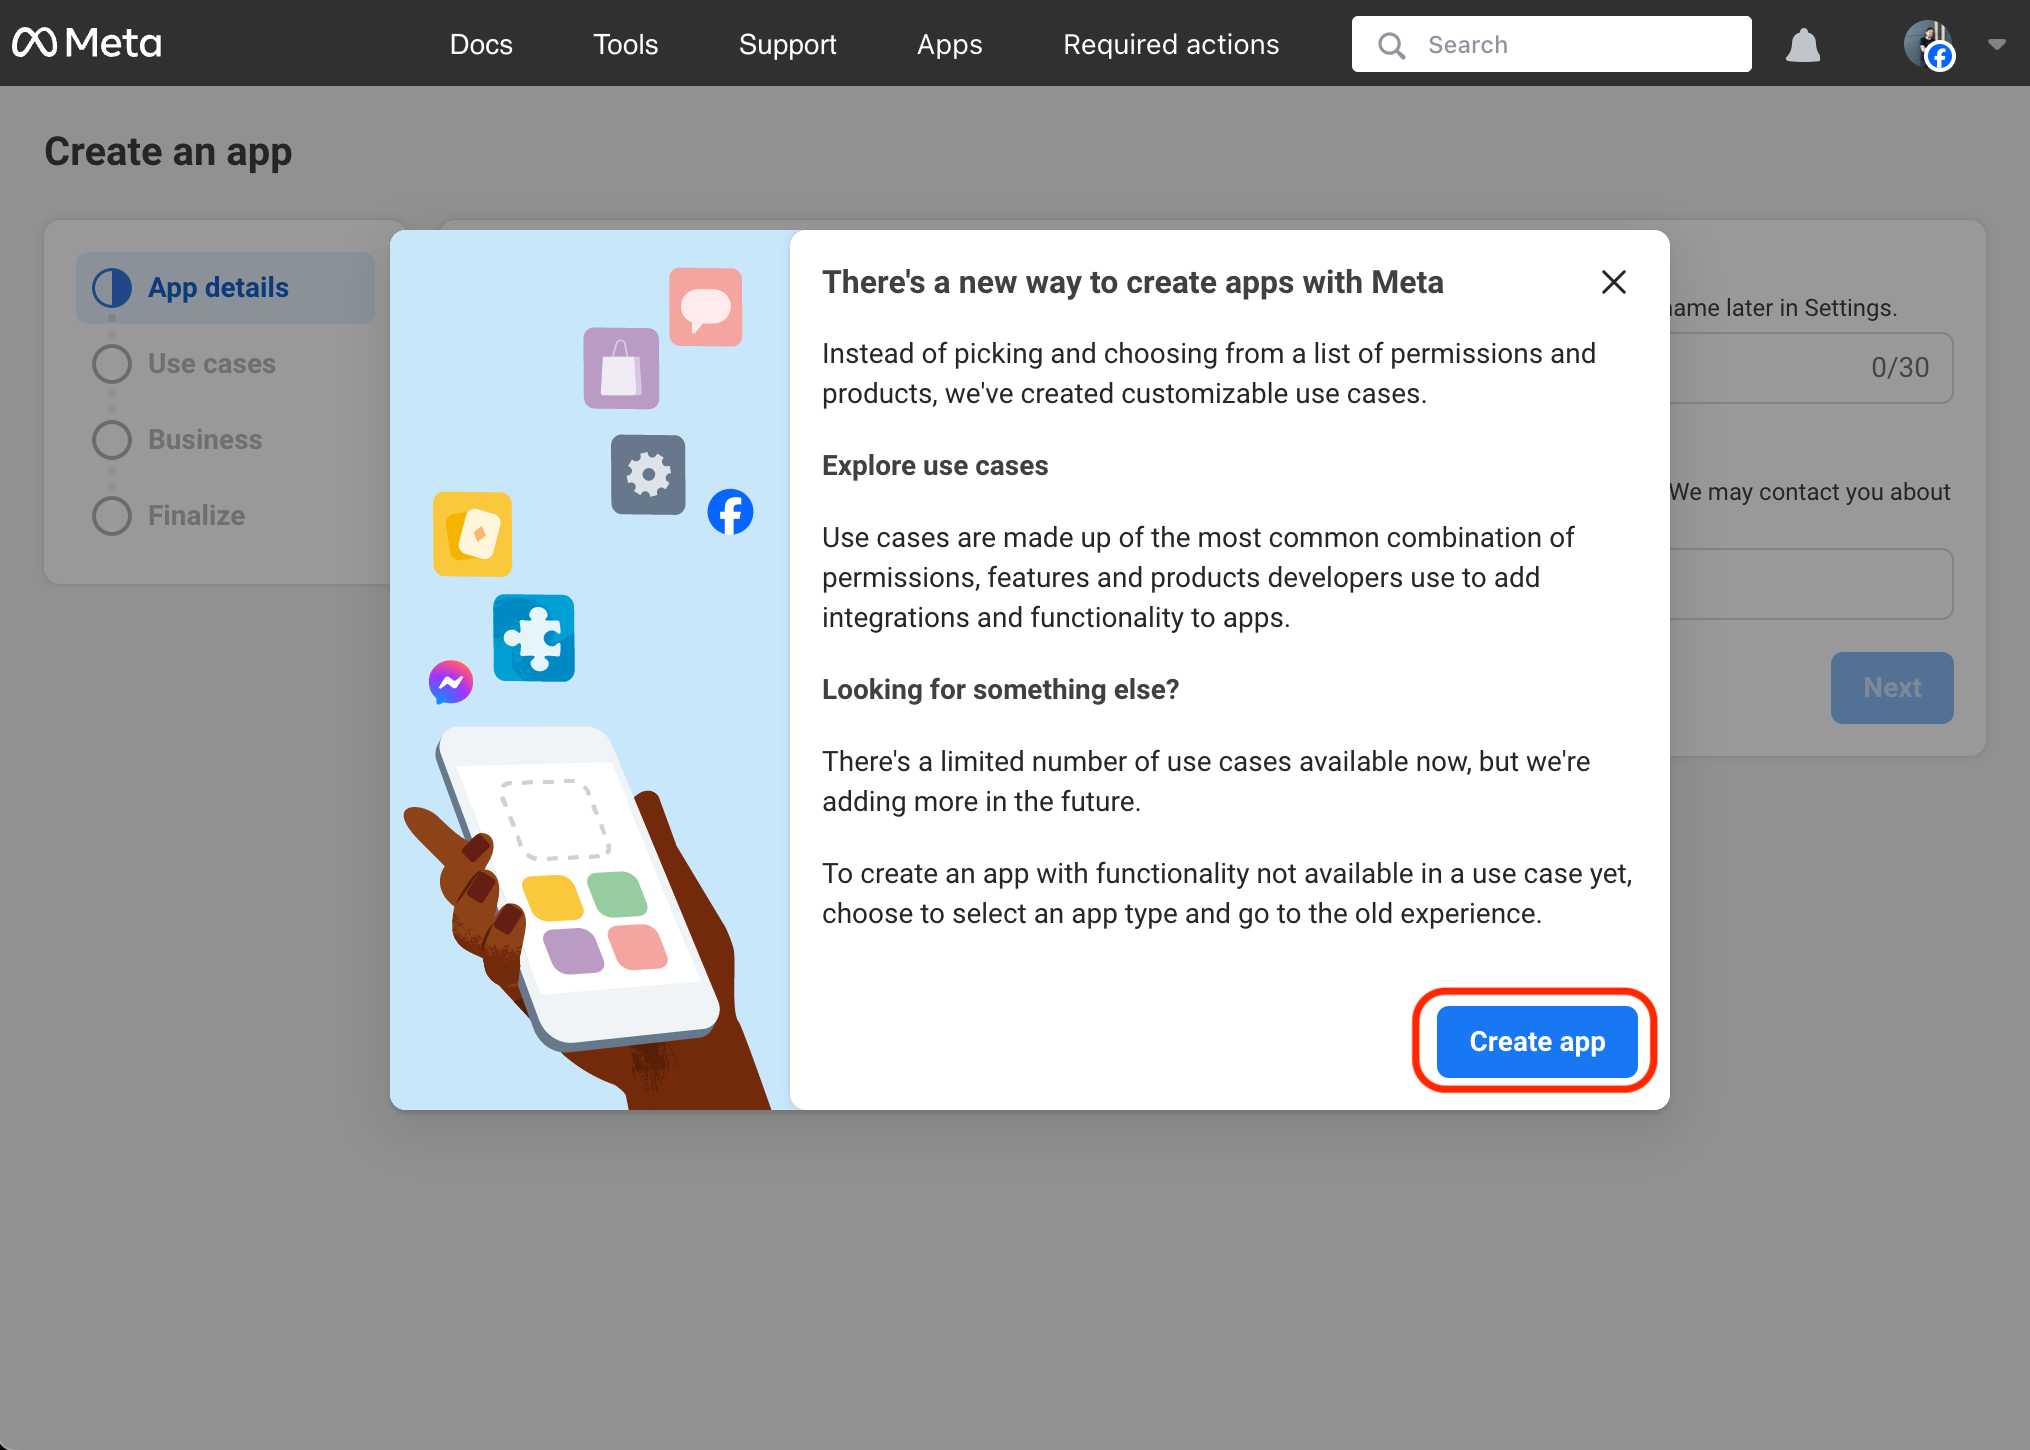
- Enter your application’s name and your email address.
- Select Access the Threads API as the use case.
- Select a business portfolio (optional).
- Review the details and click the Create app button.
Screenshots:
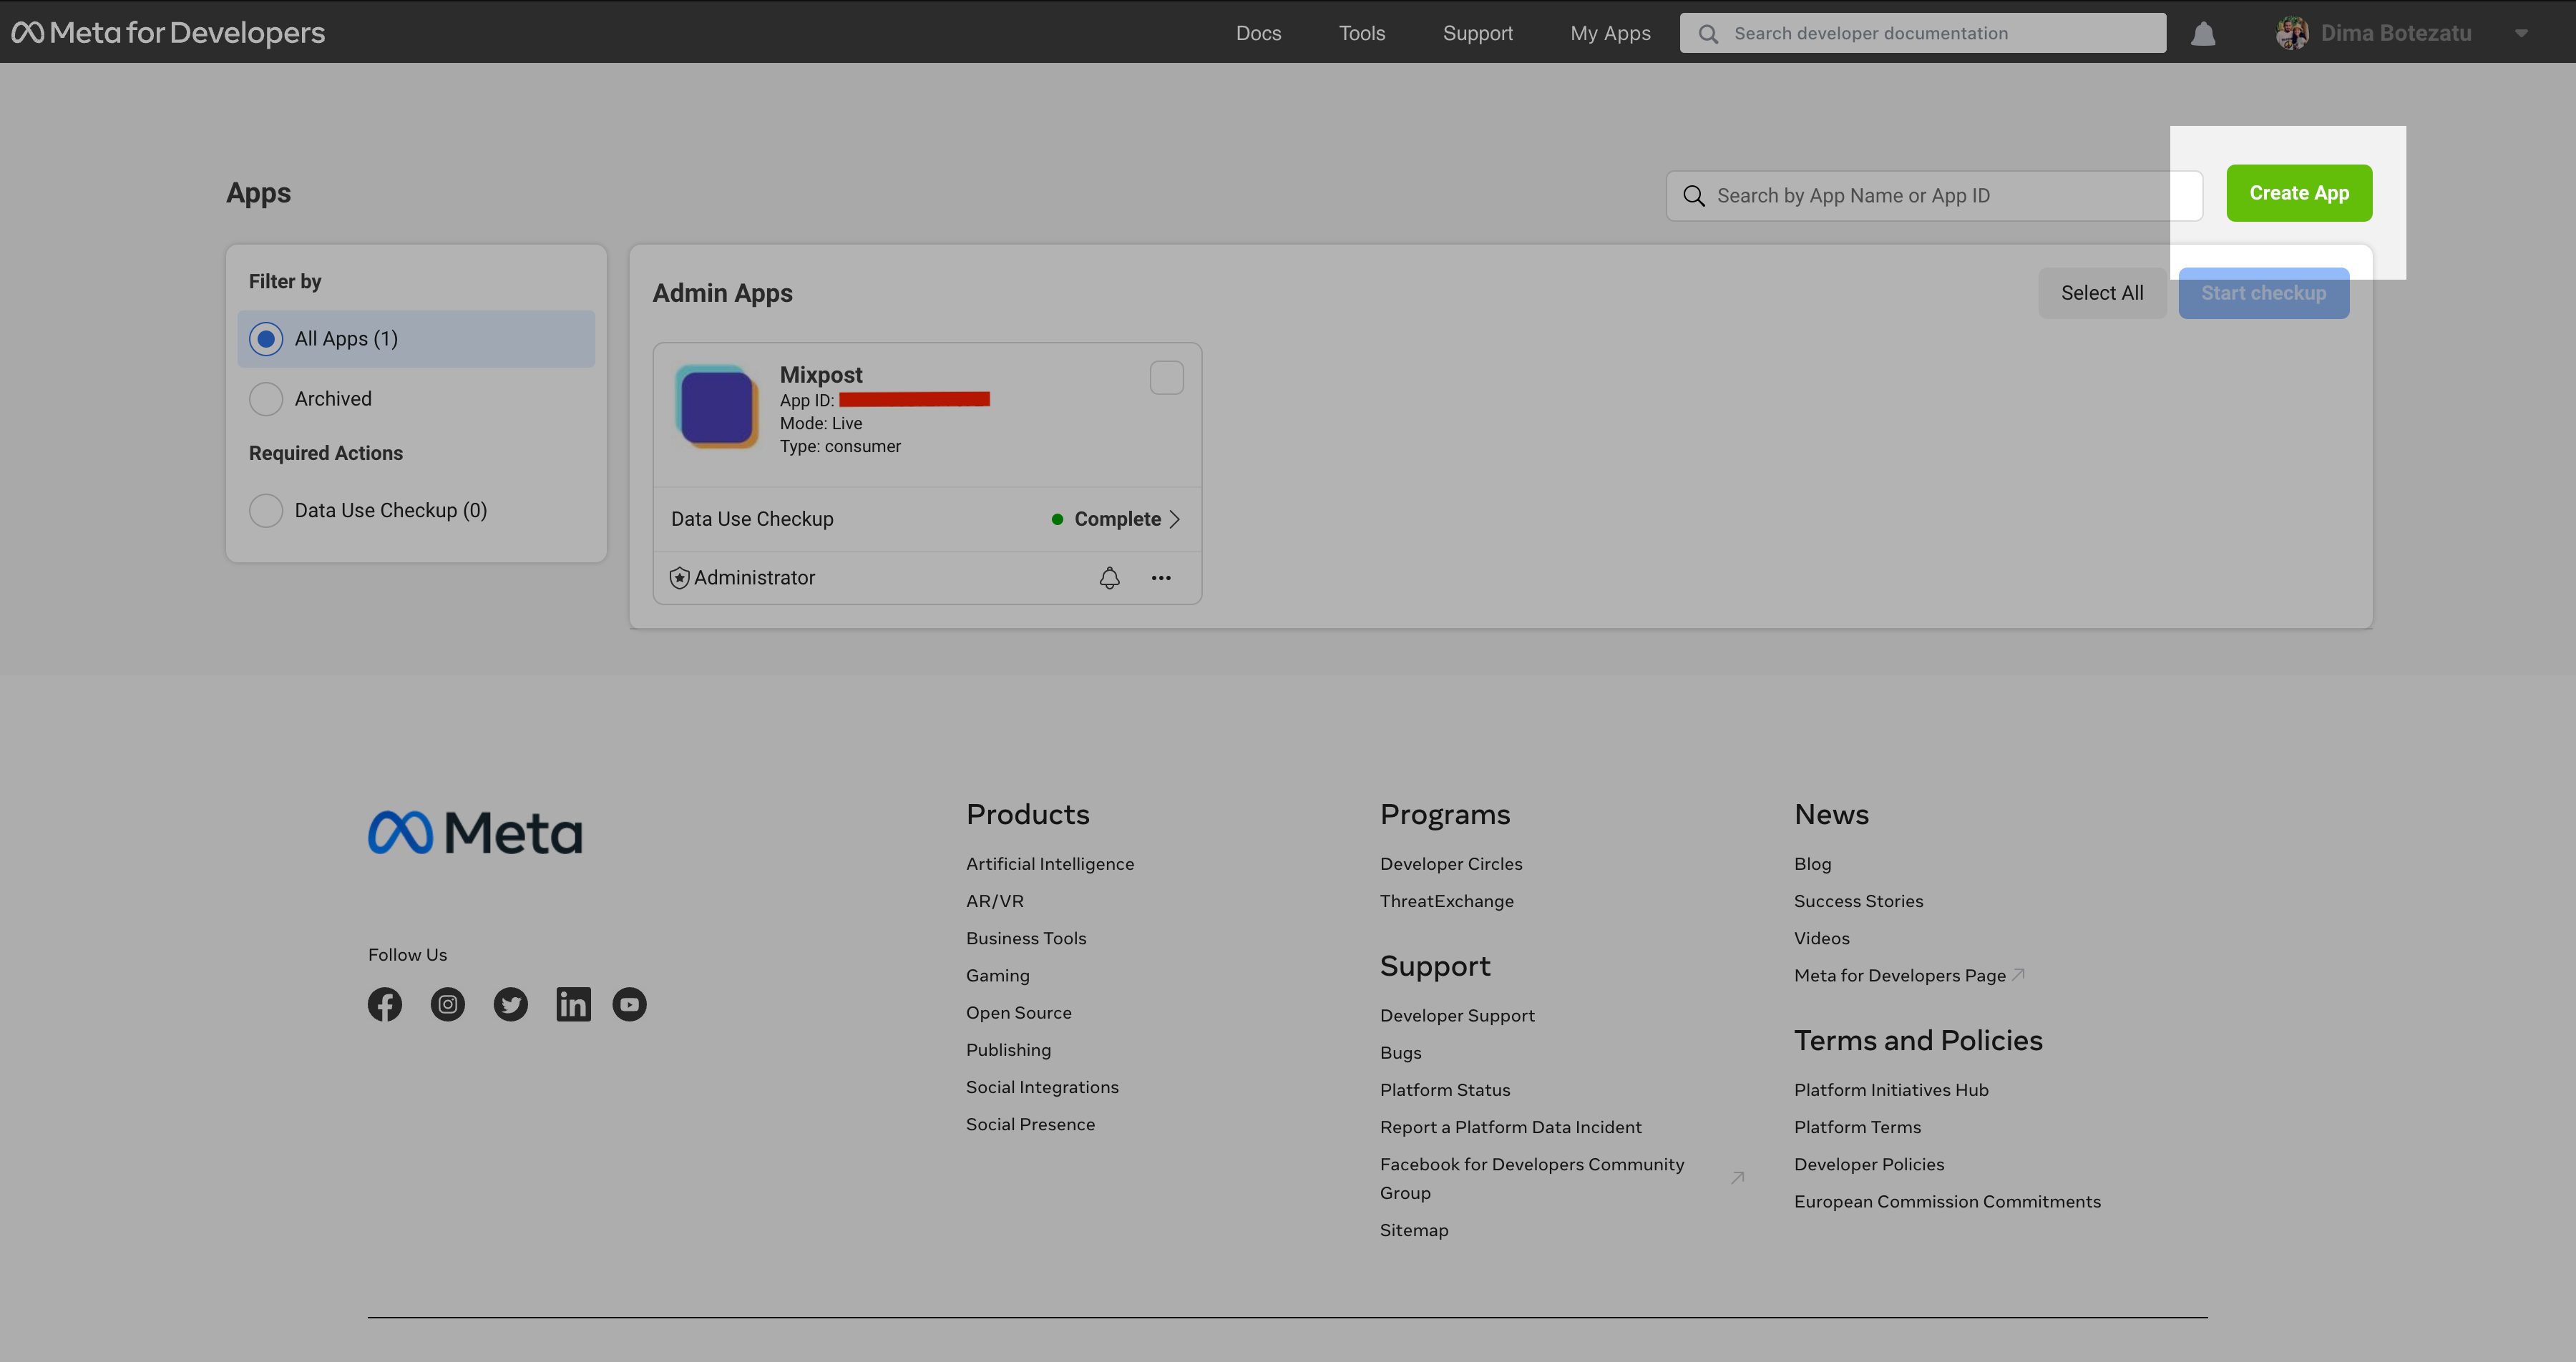


")

3. Add permissions
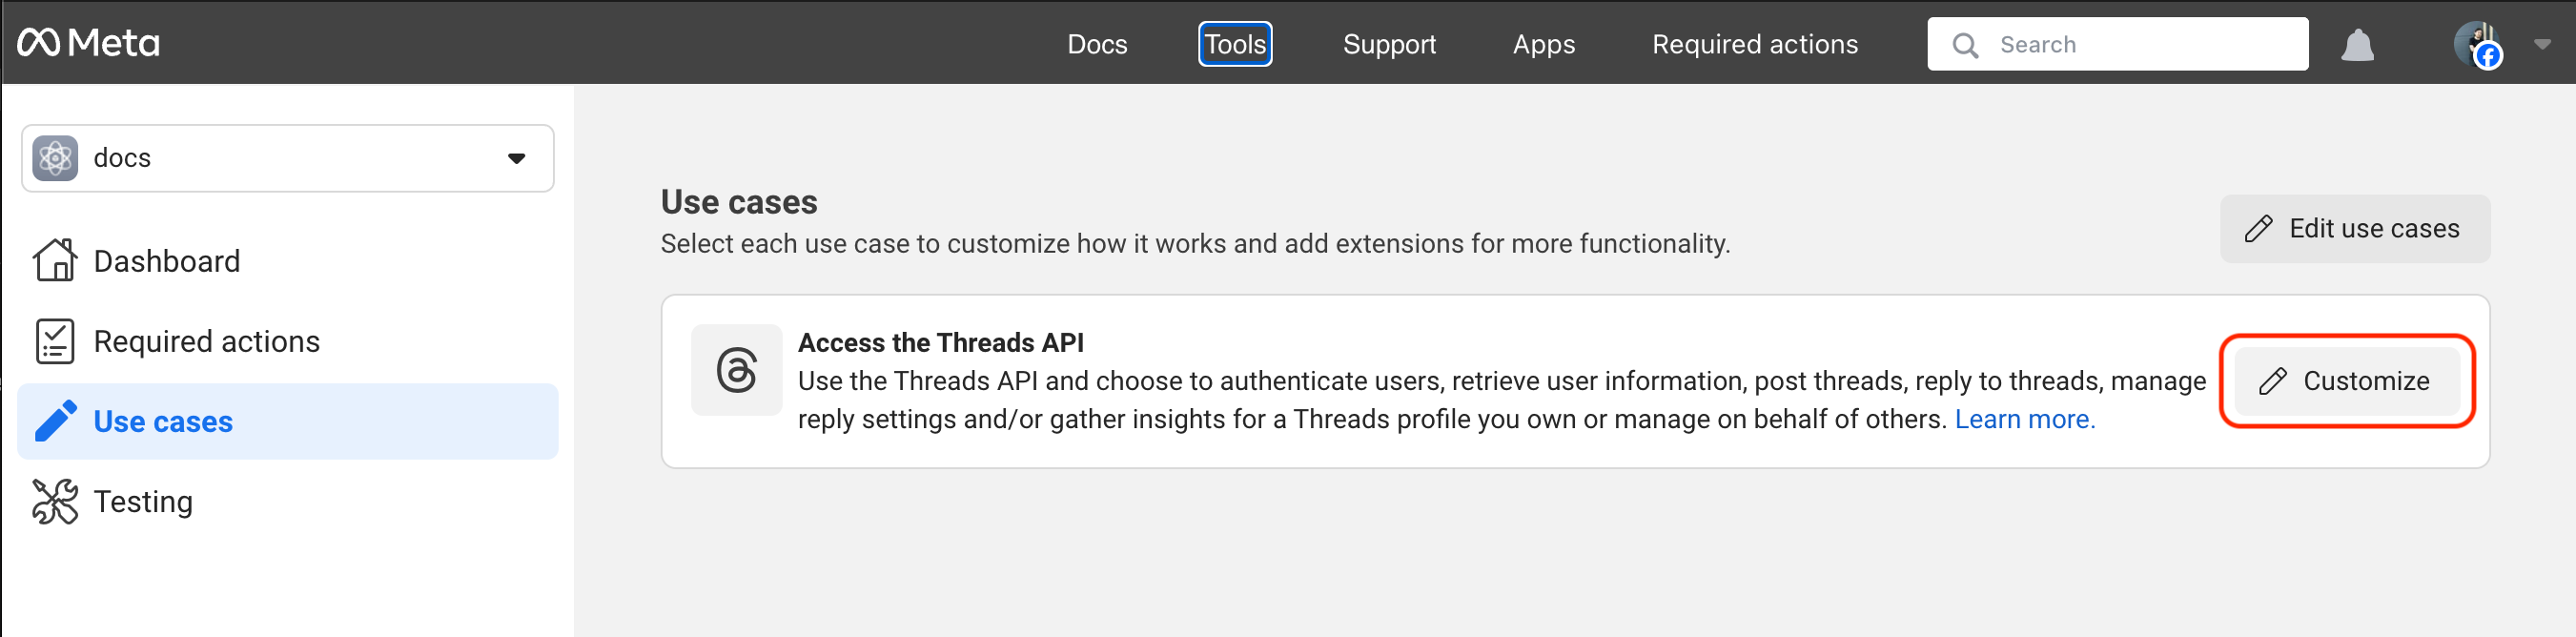
- Click the Uses cases link in the right menu.
- Click Customize button of the "Access the Threads API" use case.
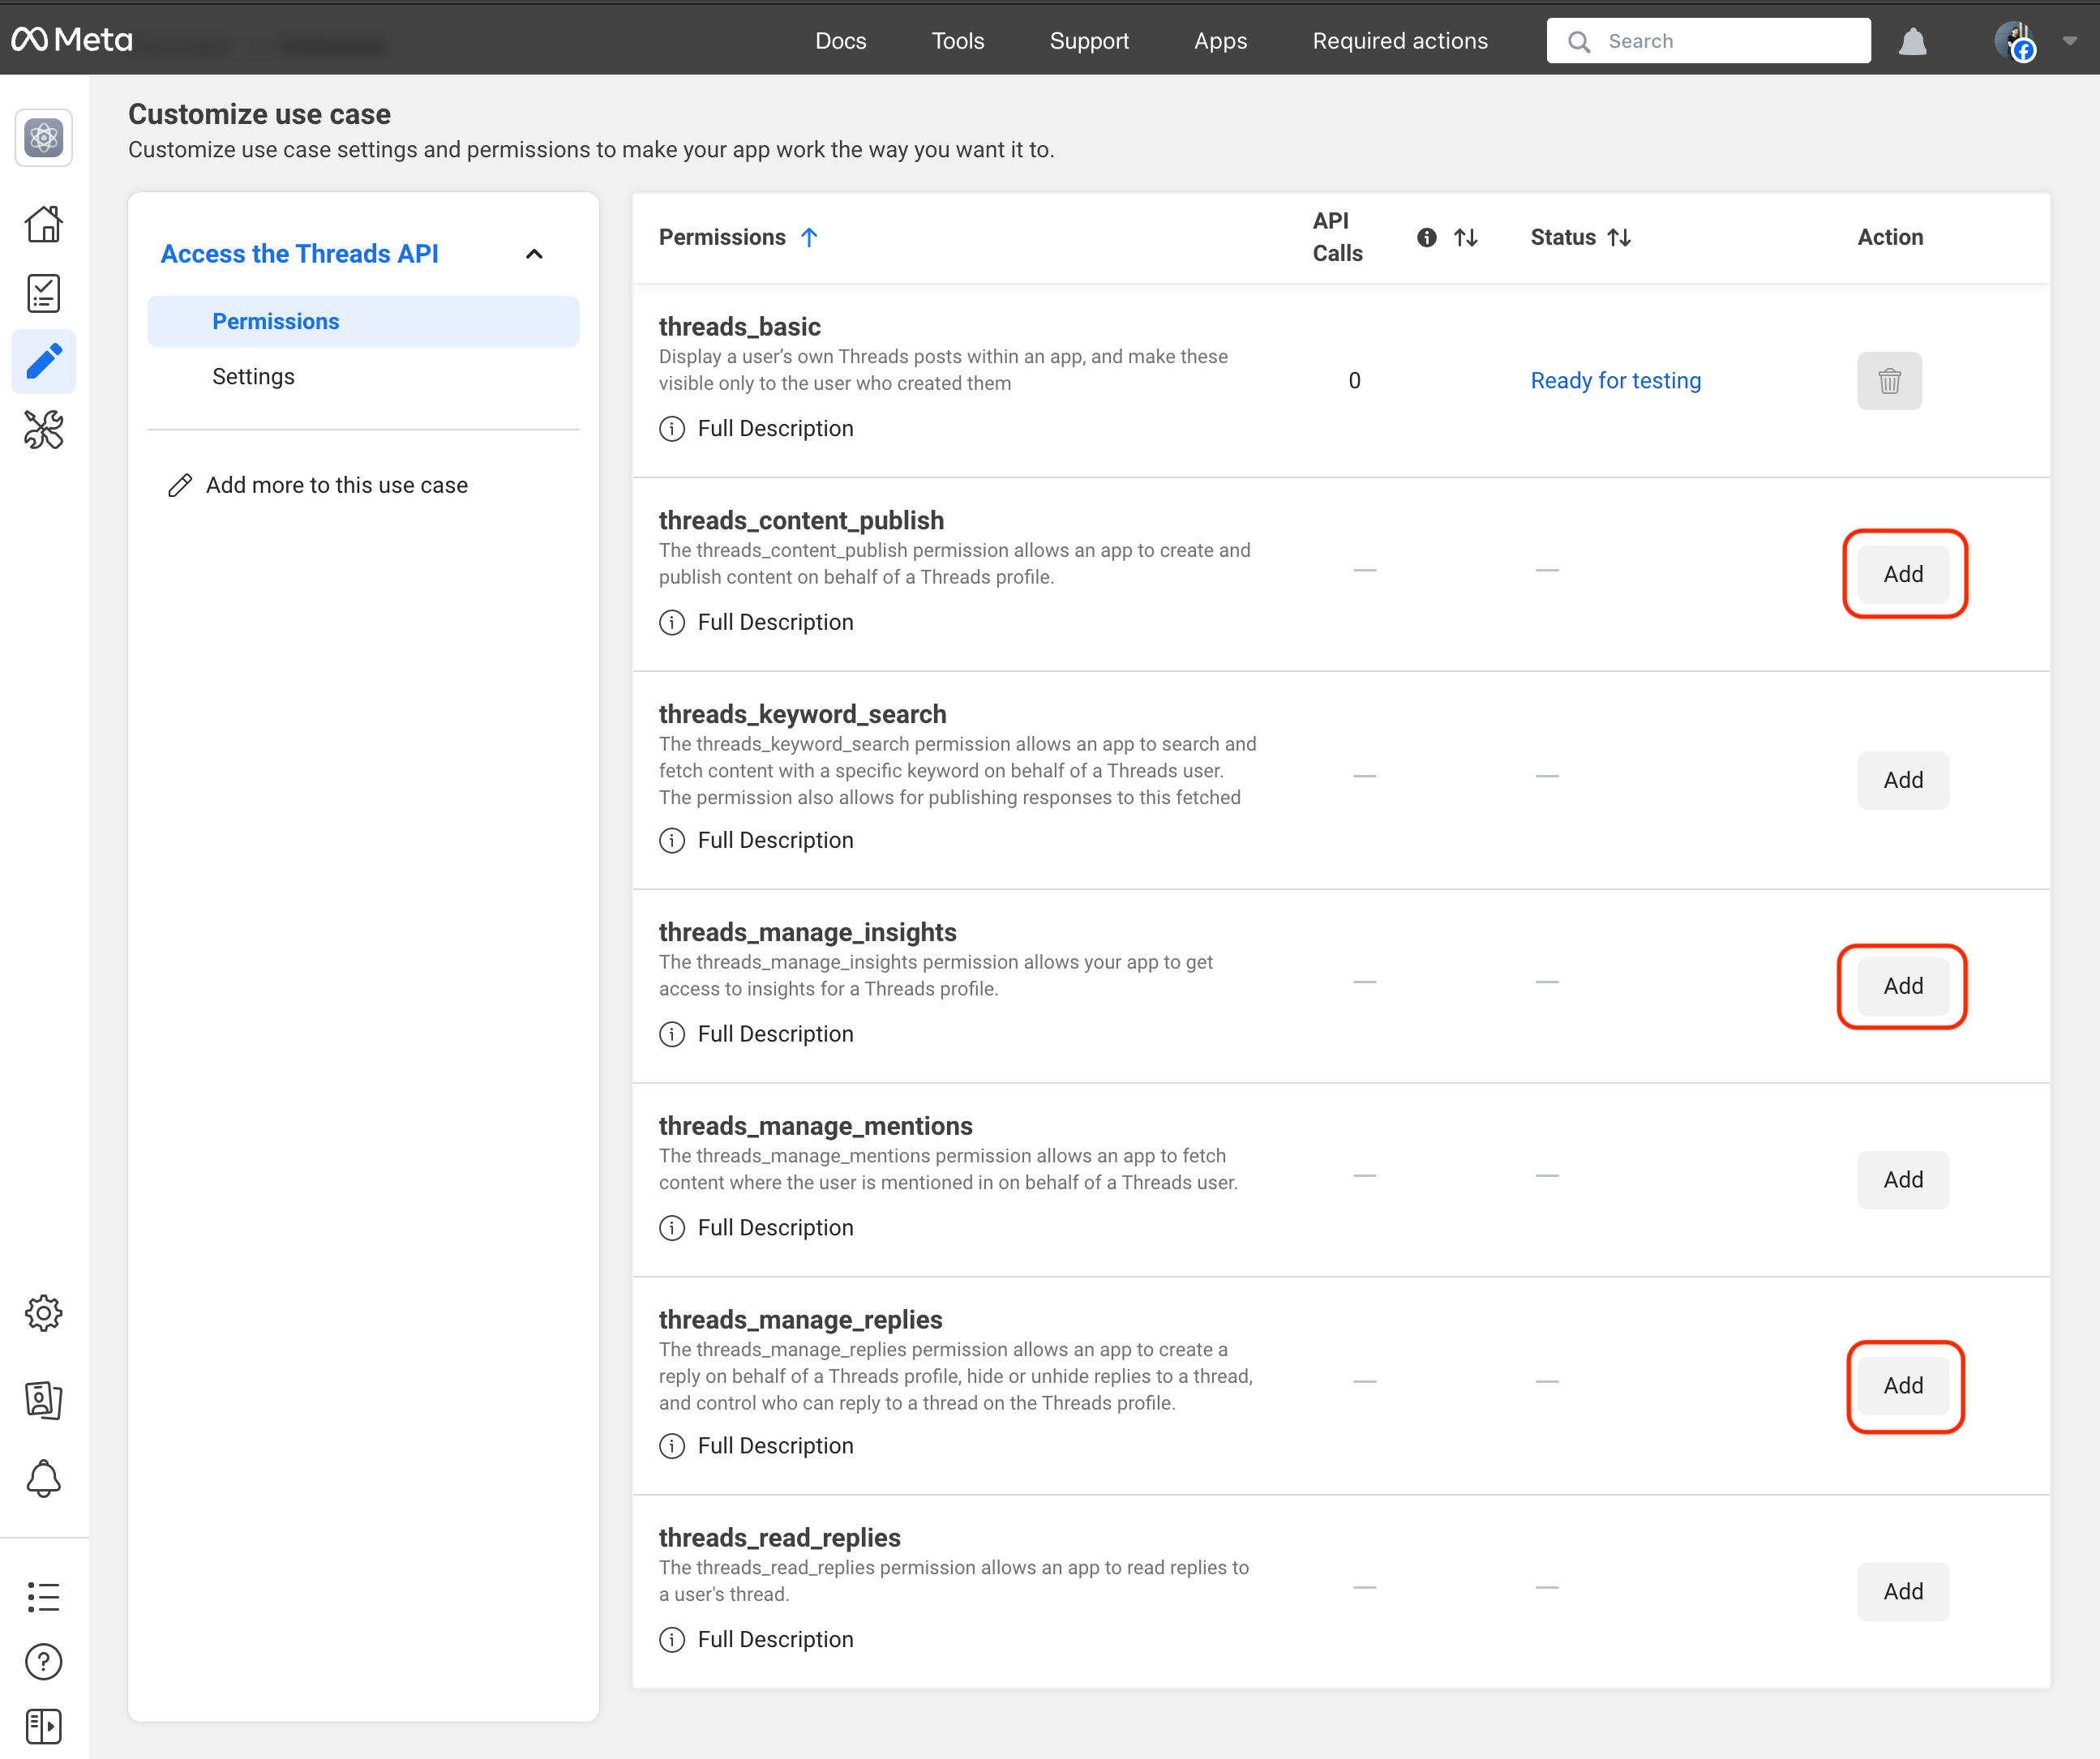
- Add the following permissions:
threads_content_publishthreads_manage_insightsthreads_manage_replies,threads_read_replies,threads_delete
Screenshots:
4. Configure redirect URLs
- Click the Uses cases link in the right menu.
- Click Customize button of the "Access the Threads API" use case.
- Click the Settings link in the right menu of "Access the Threads API" sidebar.
- Go to the Redirect Callback URLs field and enter the following url:
https://example.com/<MIXPOST_CORE_PATH>/callback/threads
When you enter the Redirect Callback URL, a drop down will appear under the URL. You have to select the dropdown for this to work. If you just type in the URL, it does not work - you must click on the dropdown.
- For Uninstall Callback URL and Delete Callback URL field, enter the following url:
https://example.com/<MIXPOST_CORE_PATH>/uninstall-callback/threads
Replace <MIXPOST_CORE_PATH> with your specified MIXPOST_CORE_PATH. If you have not altered the MIXPOST_CORE_PATH environment variable, use the default value: mixpost.
Note: For the Lite package, use the value mixpost, if this integration is supported in Lite.
Ensure to save the changes.
Screenshots:
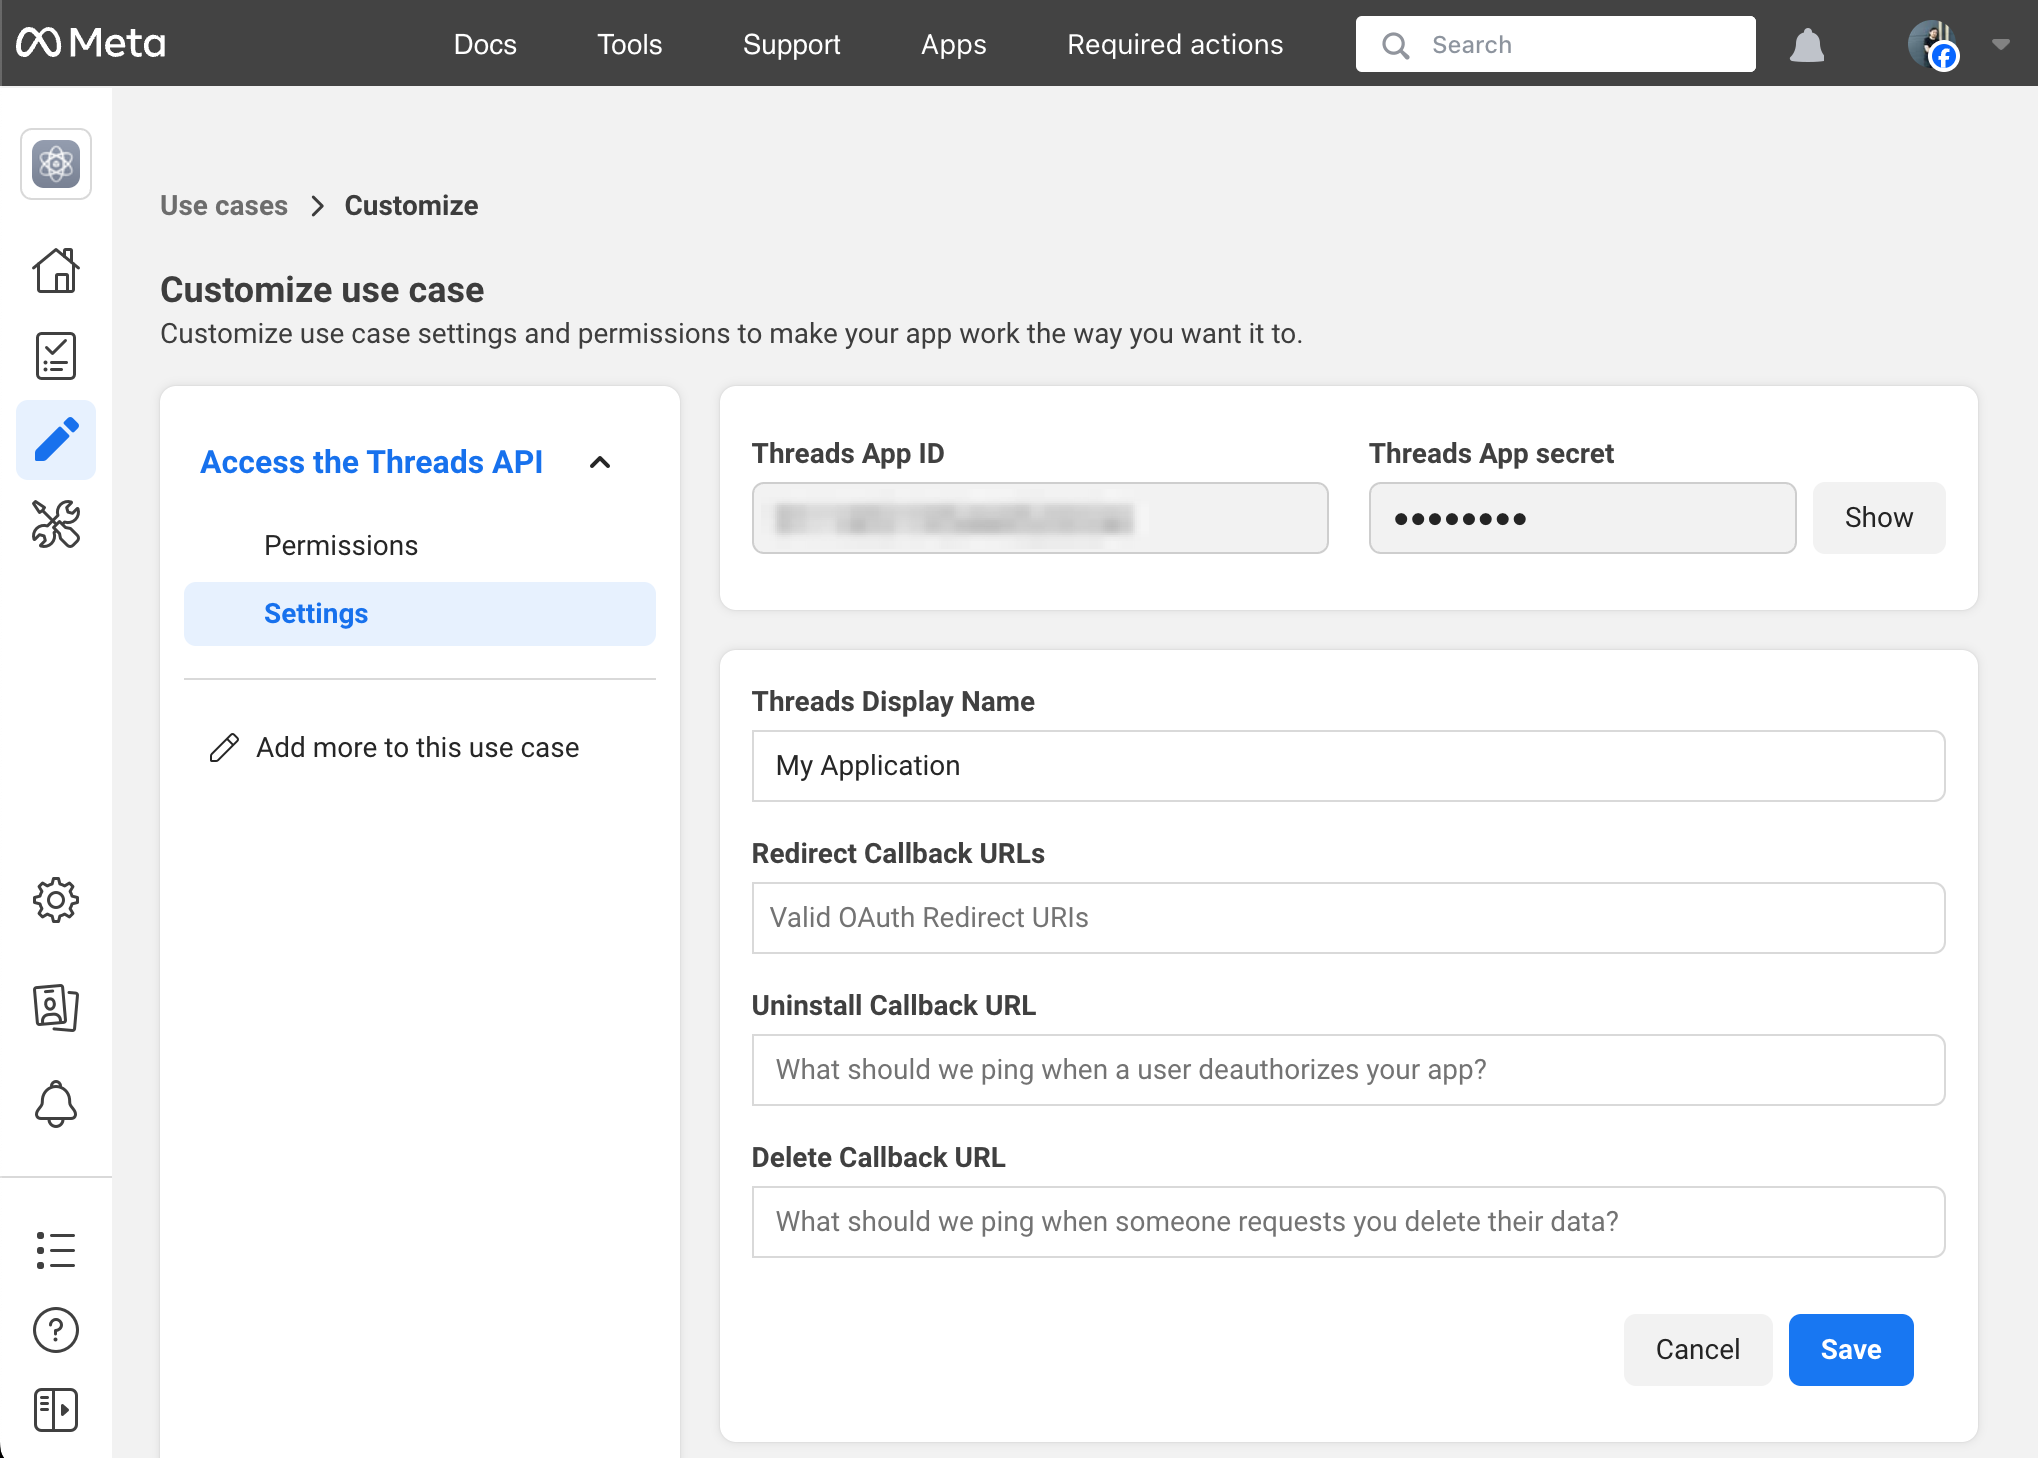
5. Copy the credentials to Mixpost
In the Dashboard page, you will find the Threads App ID and the hidden Threads App secret. Copy these credentials, then navigate to your Mixpost dashboard and paste them into the Threads third-party service form.
- Pro and Enterprise
- Lite
Navigate to the User Menu at the bottom left, click Admin Console, and then click on Services from the left sidebar.
Click on Services from the left sidebar.
6. Add Threads testers
Finally, include Threads profiles as testers for your Threads application.
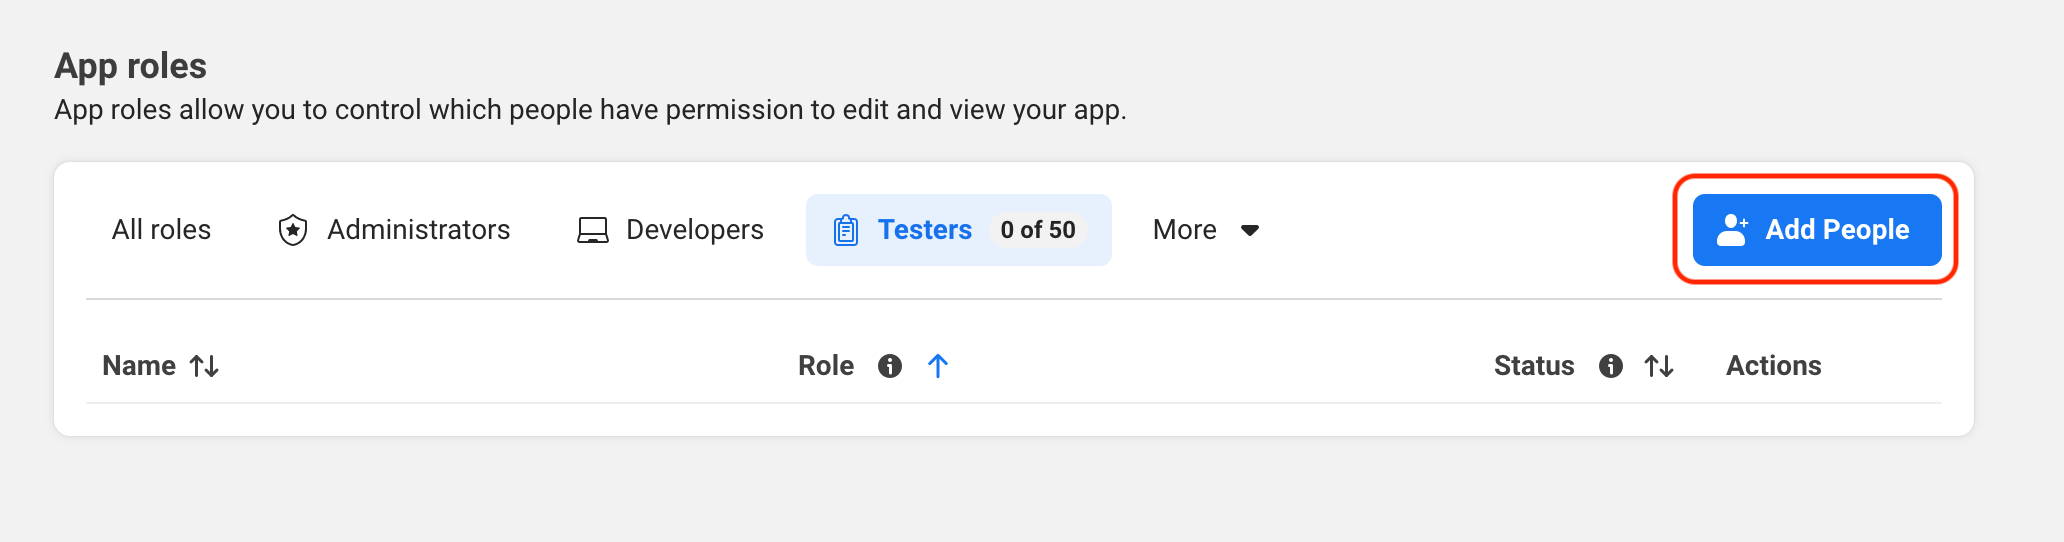
6.1 Add tester
- Click the App Roles -> Roles link in the right menu.
- Click on Add People button.
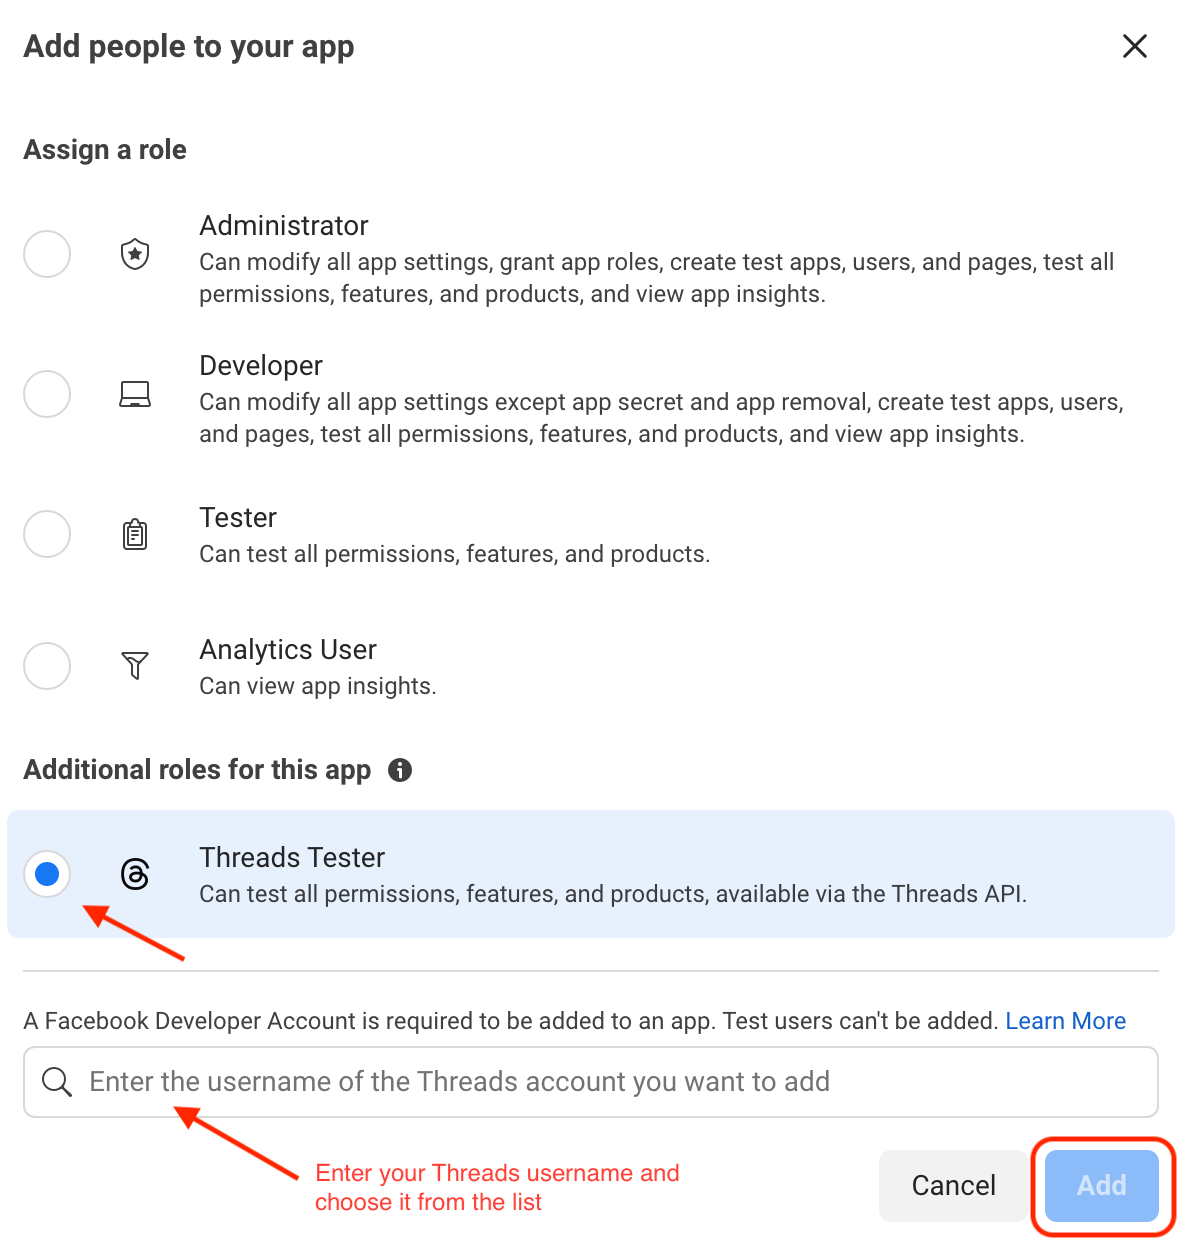
- Select Threads Tester
- Enter your Threads username and choose it from the list.
- Click on Add button.
Screenshots:
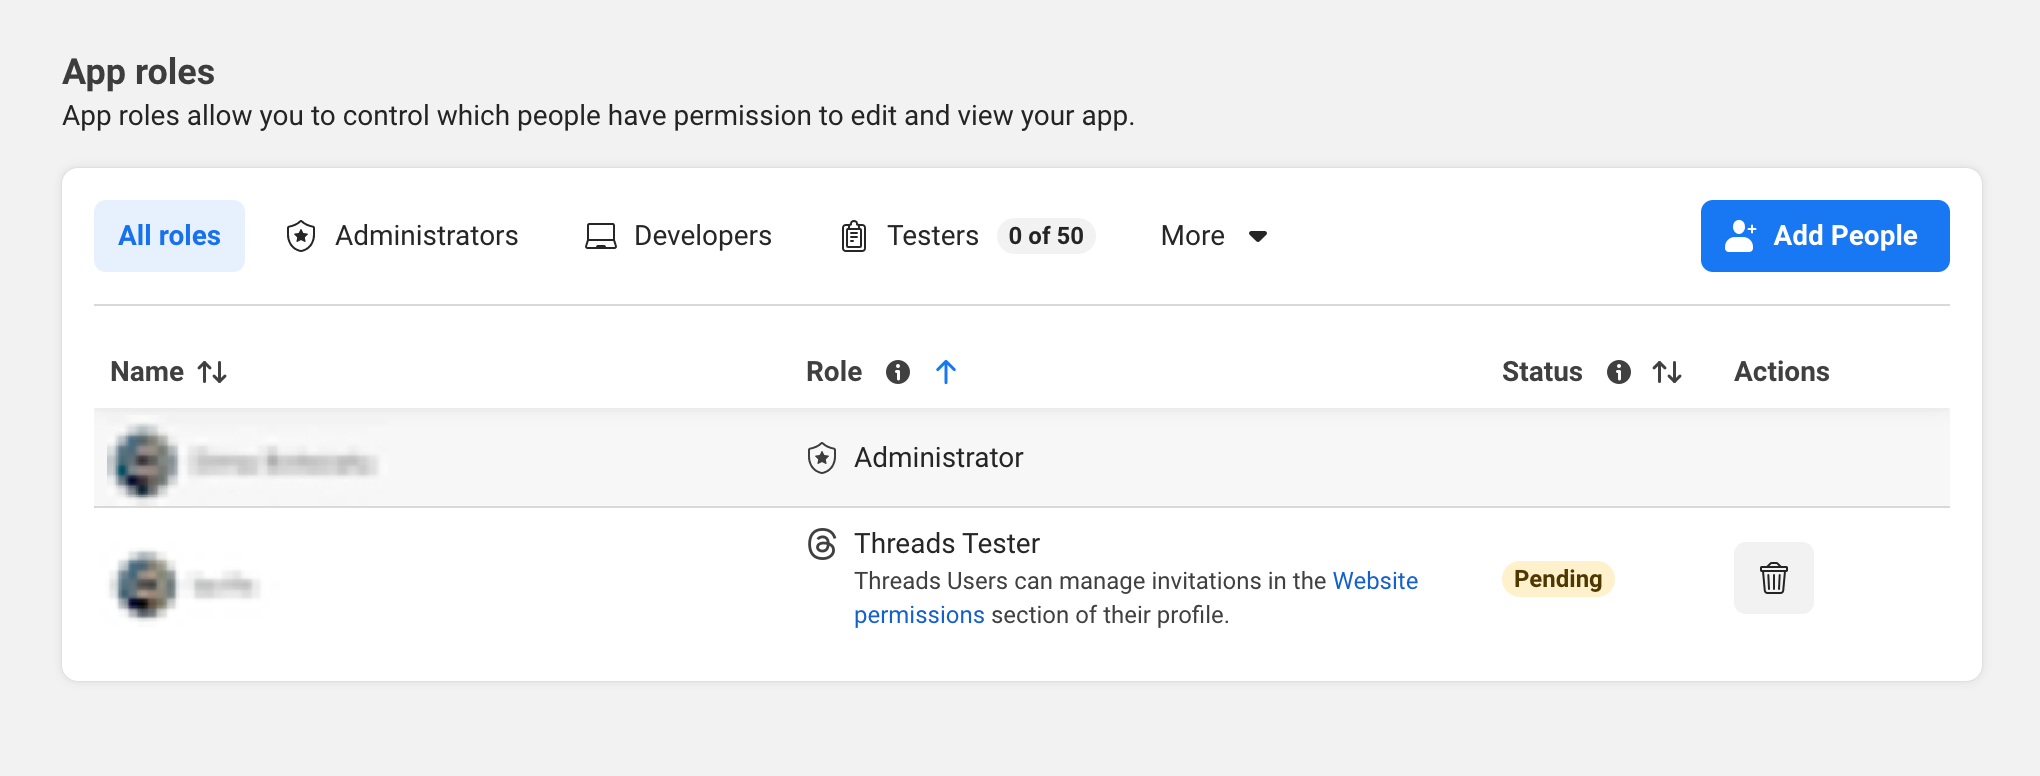
6.2 Accept invitation as a tester
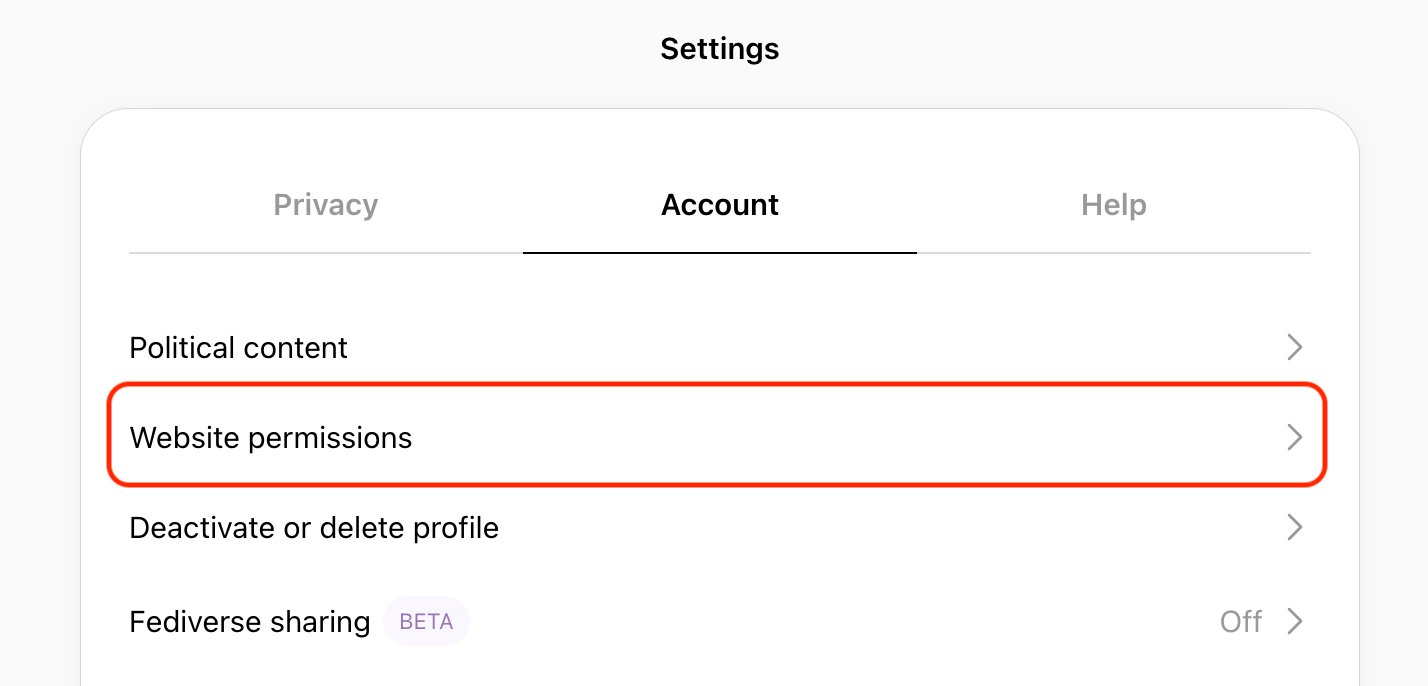
- Go to your Threads Account Settings page.
- Select Website permissions.
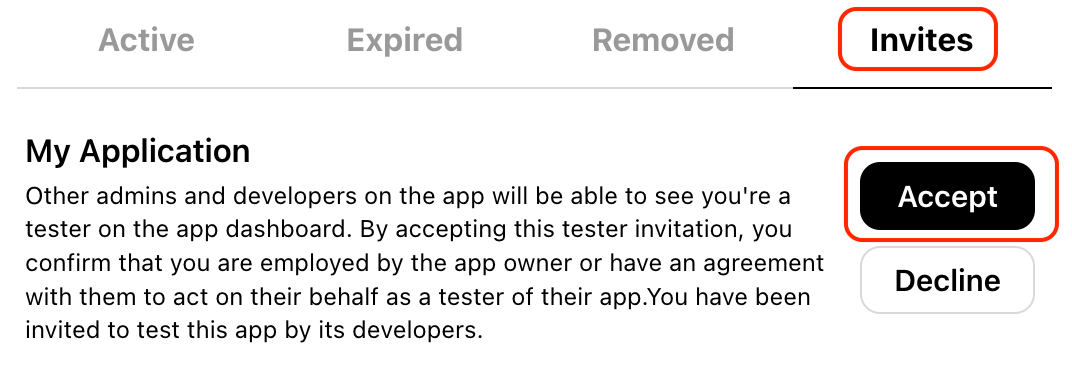
- Navigate to the Invites tab.
- Find your Threads application and accept the invitation.
Screenshots:
7. Finish customization
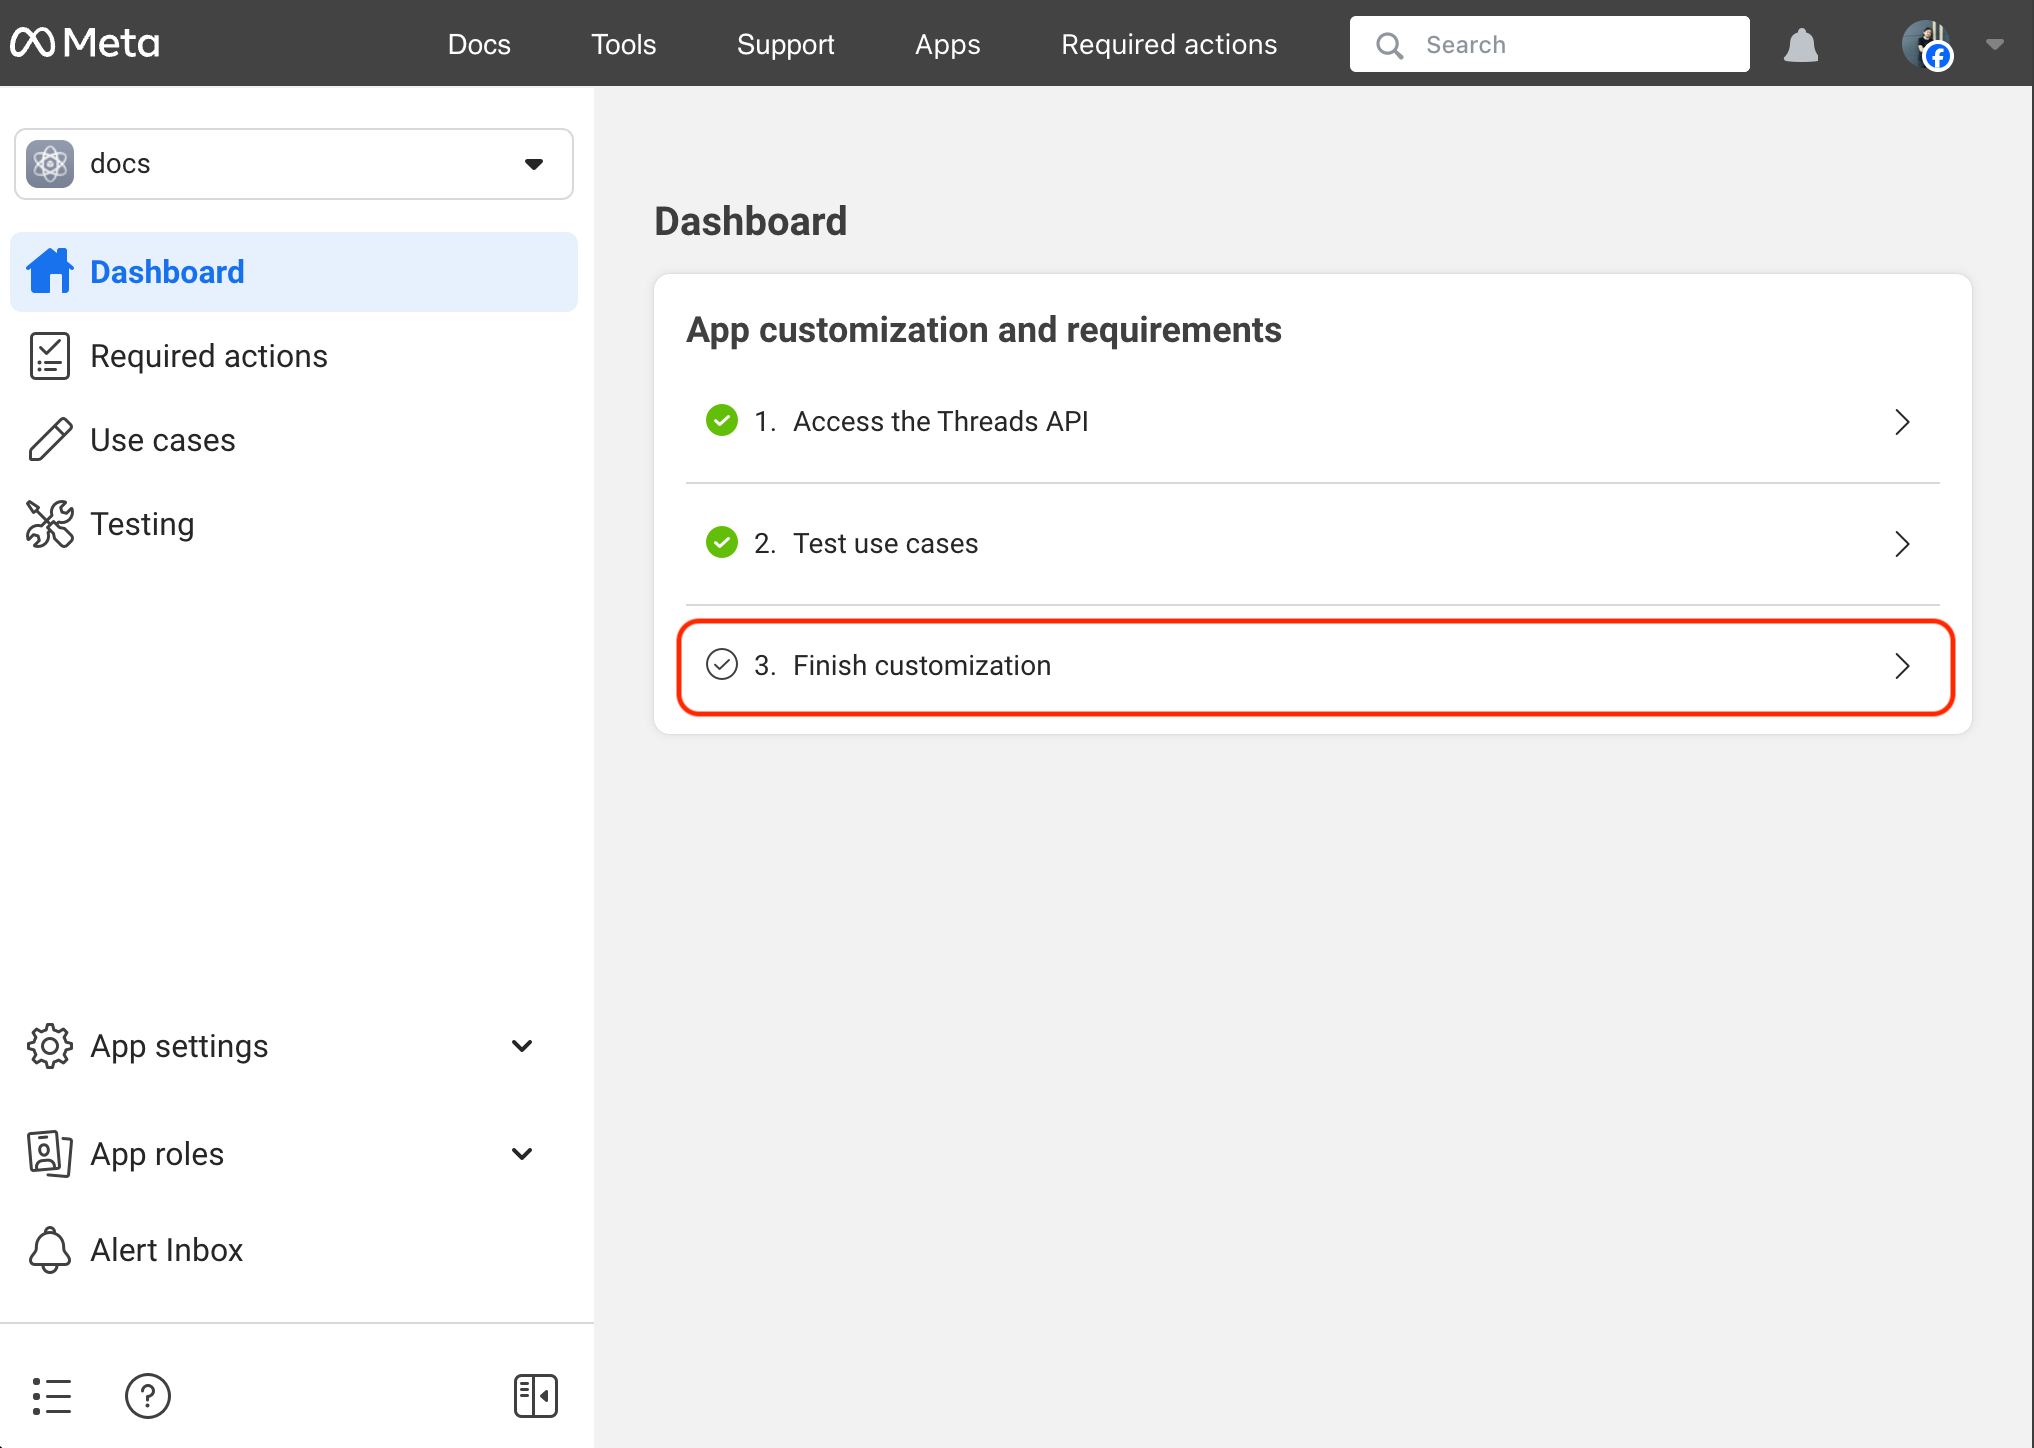
- Click the Dashboard link in the right menu.
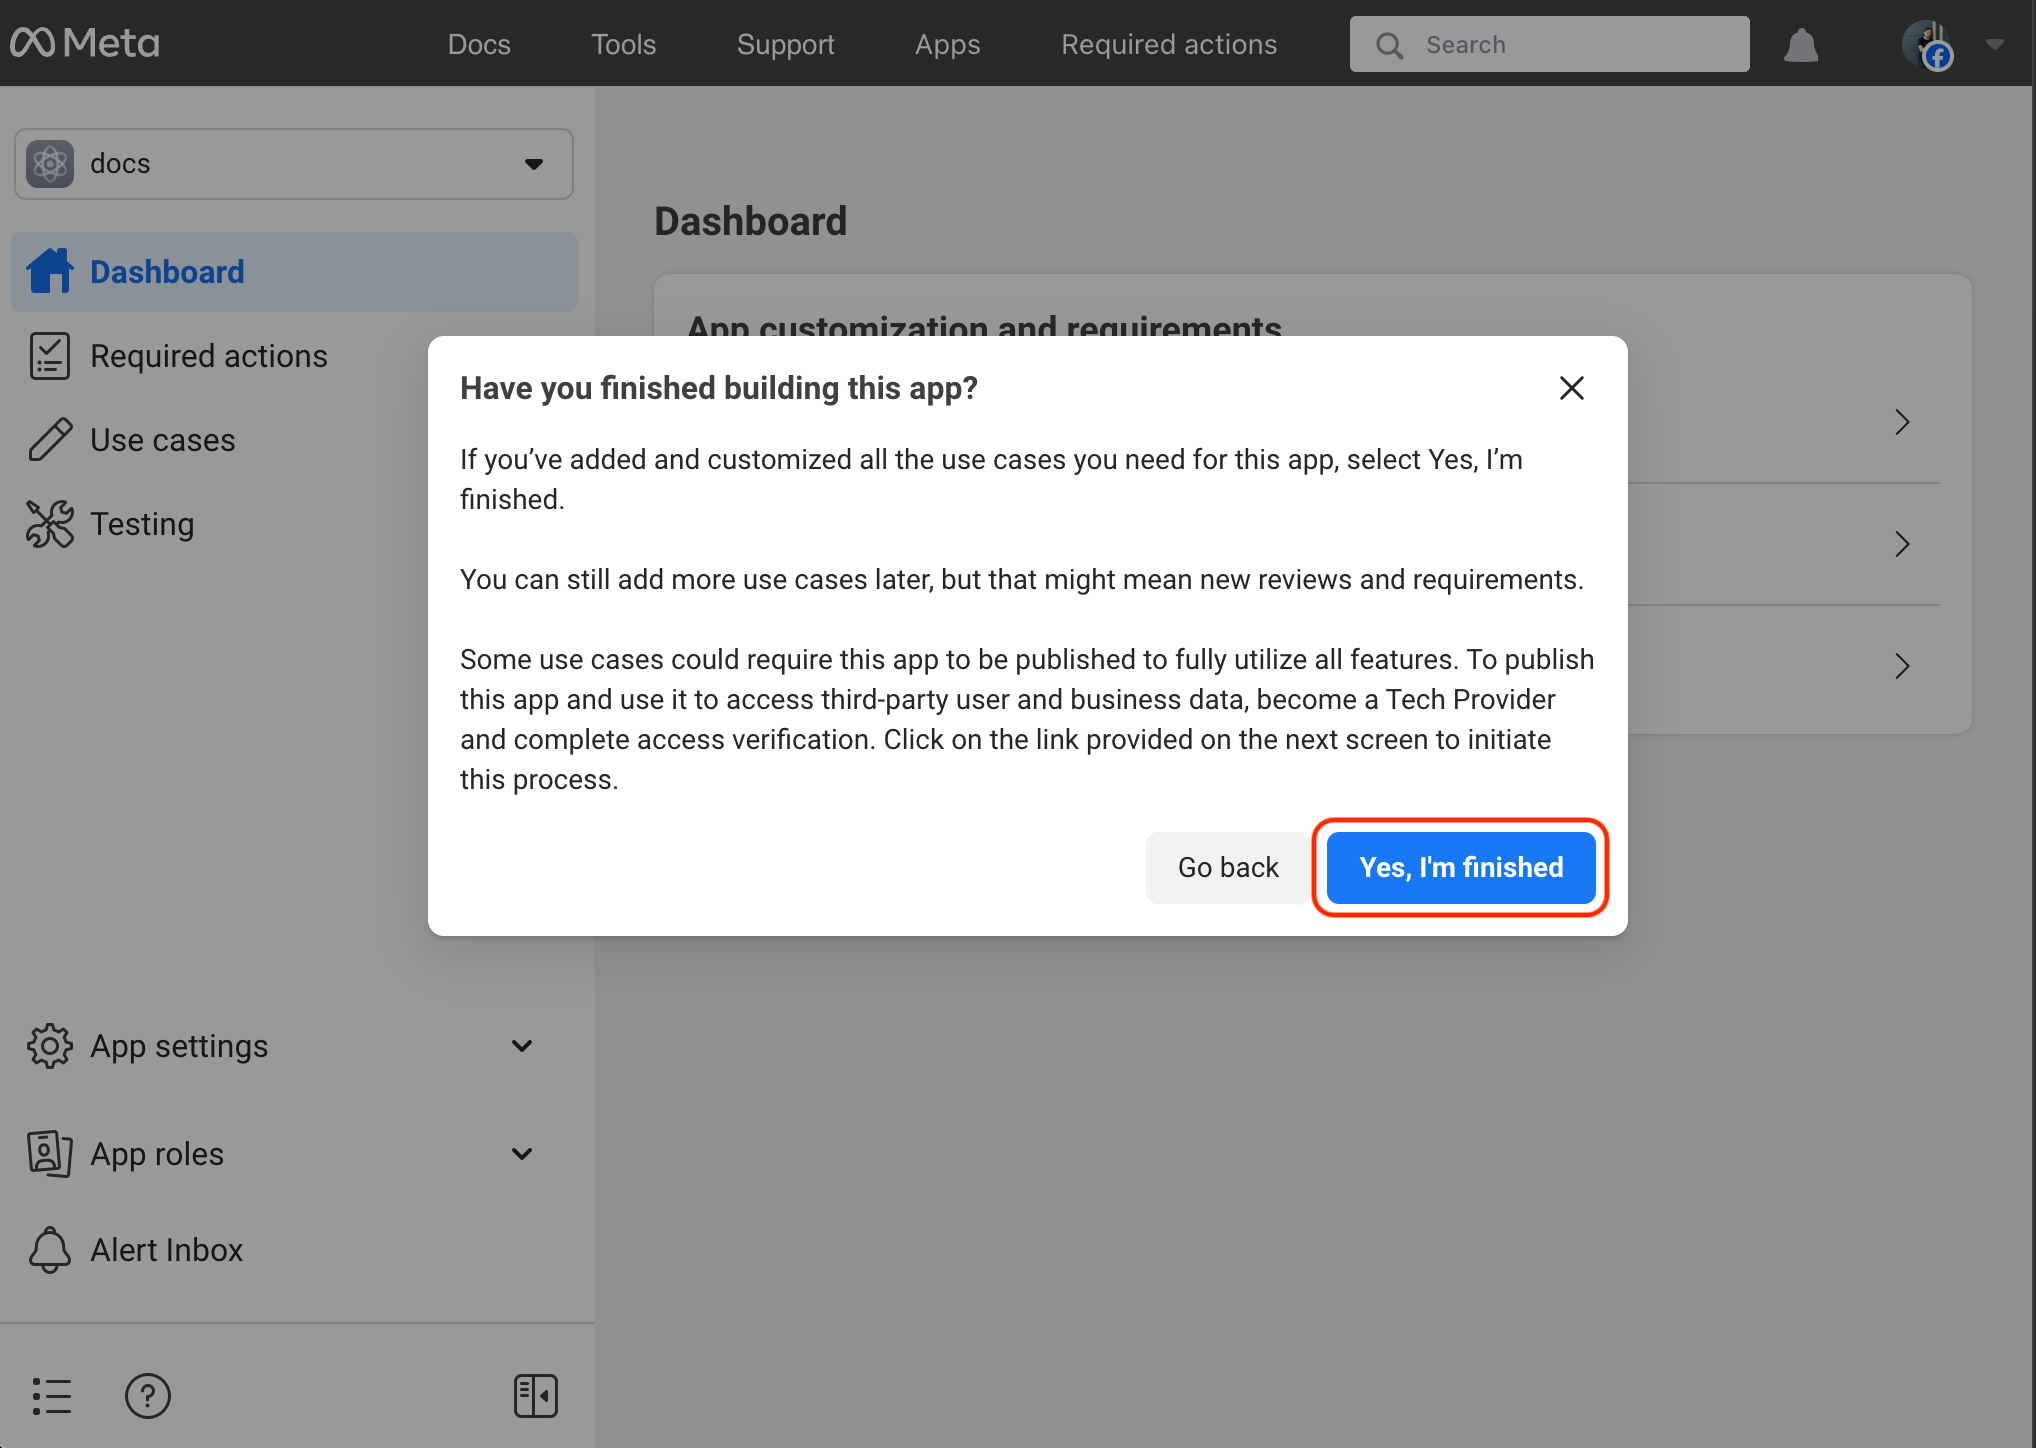
- Select Finish customization.
- Confirm by clicking the Yes, I'm finished button.
Screenshots:
8. Configure the Engagement (optional)
The Engagement brings Threads replies (comments on your posts) and mentions into Mixpost's Inbox in real time. Threads delivers these through Meta webhooks, which you configure once at the app level — unlike Facebook and Instagram, there is no per-account subscription.
The Engagement must be enabled in your Mixpost installation for the Webhook Verify Token field and the inbox-webhook endpoint to be available.
8.1 Set a Webhook Verify Token in Mixpost
- Open the Threads third-party service form in Mixpost (the same form where you pasted the App ID and secret in step 5).
- In the Webhook Verify Token field, click the generate button (or enter your own random string). This is a shared secret that Meta will send back to Mixpost during the handshake.
- Save the service.
- Pro and Enterprise
- Lite
Navigate to the User Menu at the bottom left, click Admin Console, and then click on Services from the left sidebar.
Click on Services from the left sidebar.
8.2 Add the webhook in the Meta dashboard
- In the Facebook Developer Dashboard, open your app.
- Click the Use cases link in the right menu, then click Customize on the "Access the Threads API" use case.
- Open the Webhooks section.
- Set the Callback URL to:
https://example.com/<MIXPOST_CORE_PATH>/inbox-webhook/threads
- Set the Verify token to the exact same value you saved in Mixpost in step 8.1.
- Click Verify and save. Meta calls your callback URL to confirm the token matches.
Replace <MIXPOST_CORE_PATH> with your specified MIXPOST_CORE_PATH. If you have not altered the MIXPOST_CORE_PATH environment variable, use the default value: mixpost.
Note: For the Lite package, use the value mixpost, if this integration is supported in Lite.
8.3 Subscribe to the webhook fields
After the callback is verified, subscribe to the fields that feed the Inbox:
replies— replies/comments on your Threads postsmentions— posts that mention your connected account
Ensure the threads_manage_replies and threads_read_replies permissions (step 3) are added — without them, reply webhooks are not delivered.
9. Done
You can test by adding your Threads profile to Mixpost and scheduling posts.
- Pro and Enterprise
- Lite
Navigate to a workspace, then select Social Accounts from the left sidebar and click Add Account.
Lite package does not support this social platform. Unlock Pro features