Paddle Billing Integration Guide
Paddle is a popular platform for selling software and other digital goods. Here's a step-by-step guide to help you integrate Paddle with Mixpost Enterprise and get started with processing payments.
1. Create an account
- Production: If you haven’t already, visit Paddle's website and sign up for an account.
- Sandbox (only for testing): If you haven’t already, visit Paddle's sandbox website and sign up for an account.
We recommend to use a Sandbox account first and testing the integration. If everything is fine, you can switch to a production Paddle account.
2. Default payment link
Before processing checkout payments using Paddle, you should define your application's default payment link in your Paddle checkout settings dashboard. We recommend setting the URL of the Mixpost instance.
3. Configure webhooks
3.1 Webhook URL
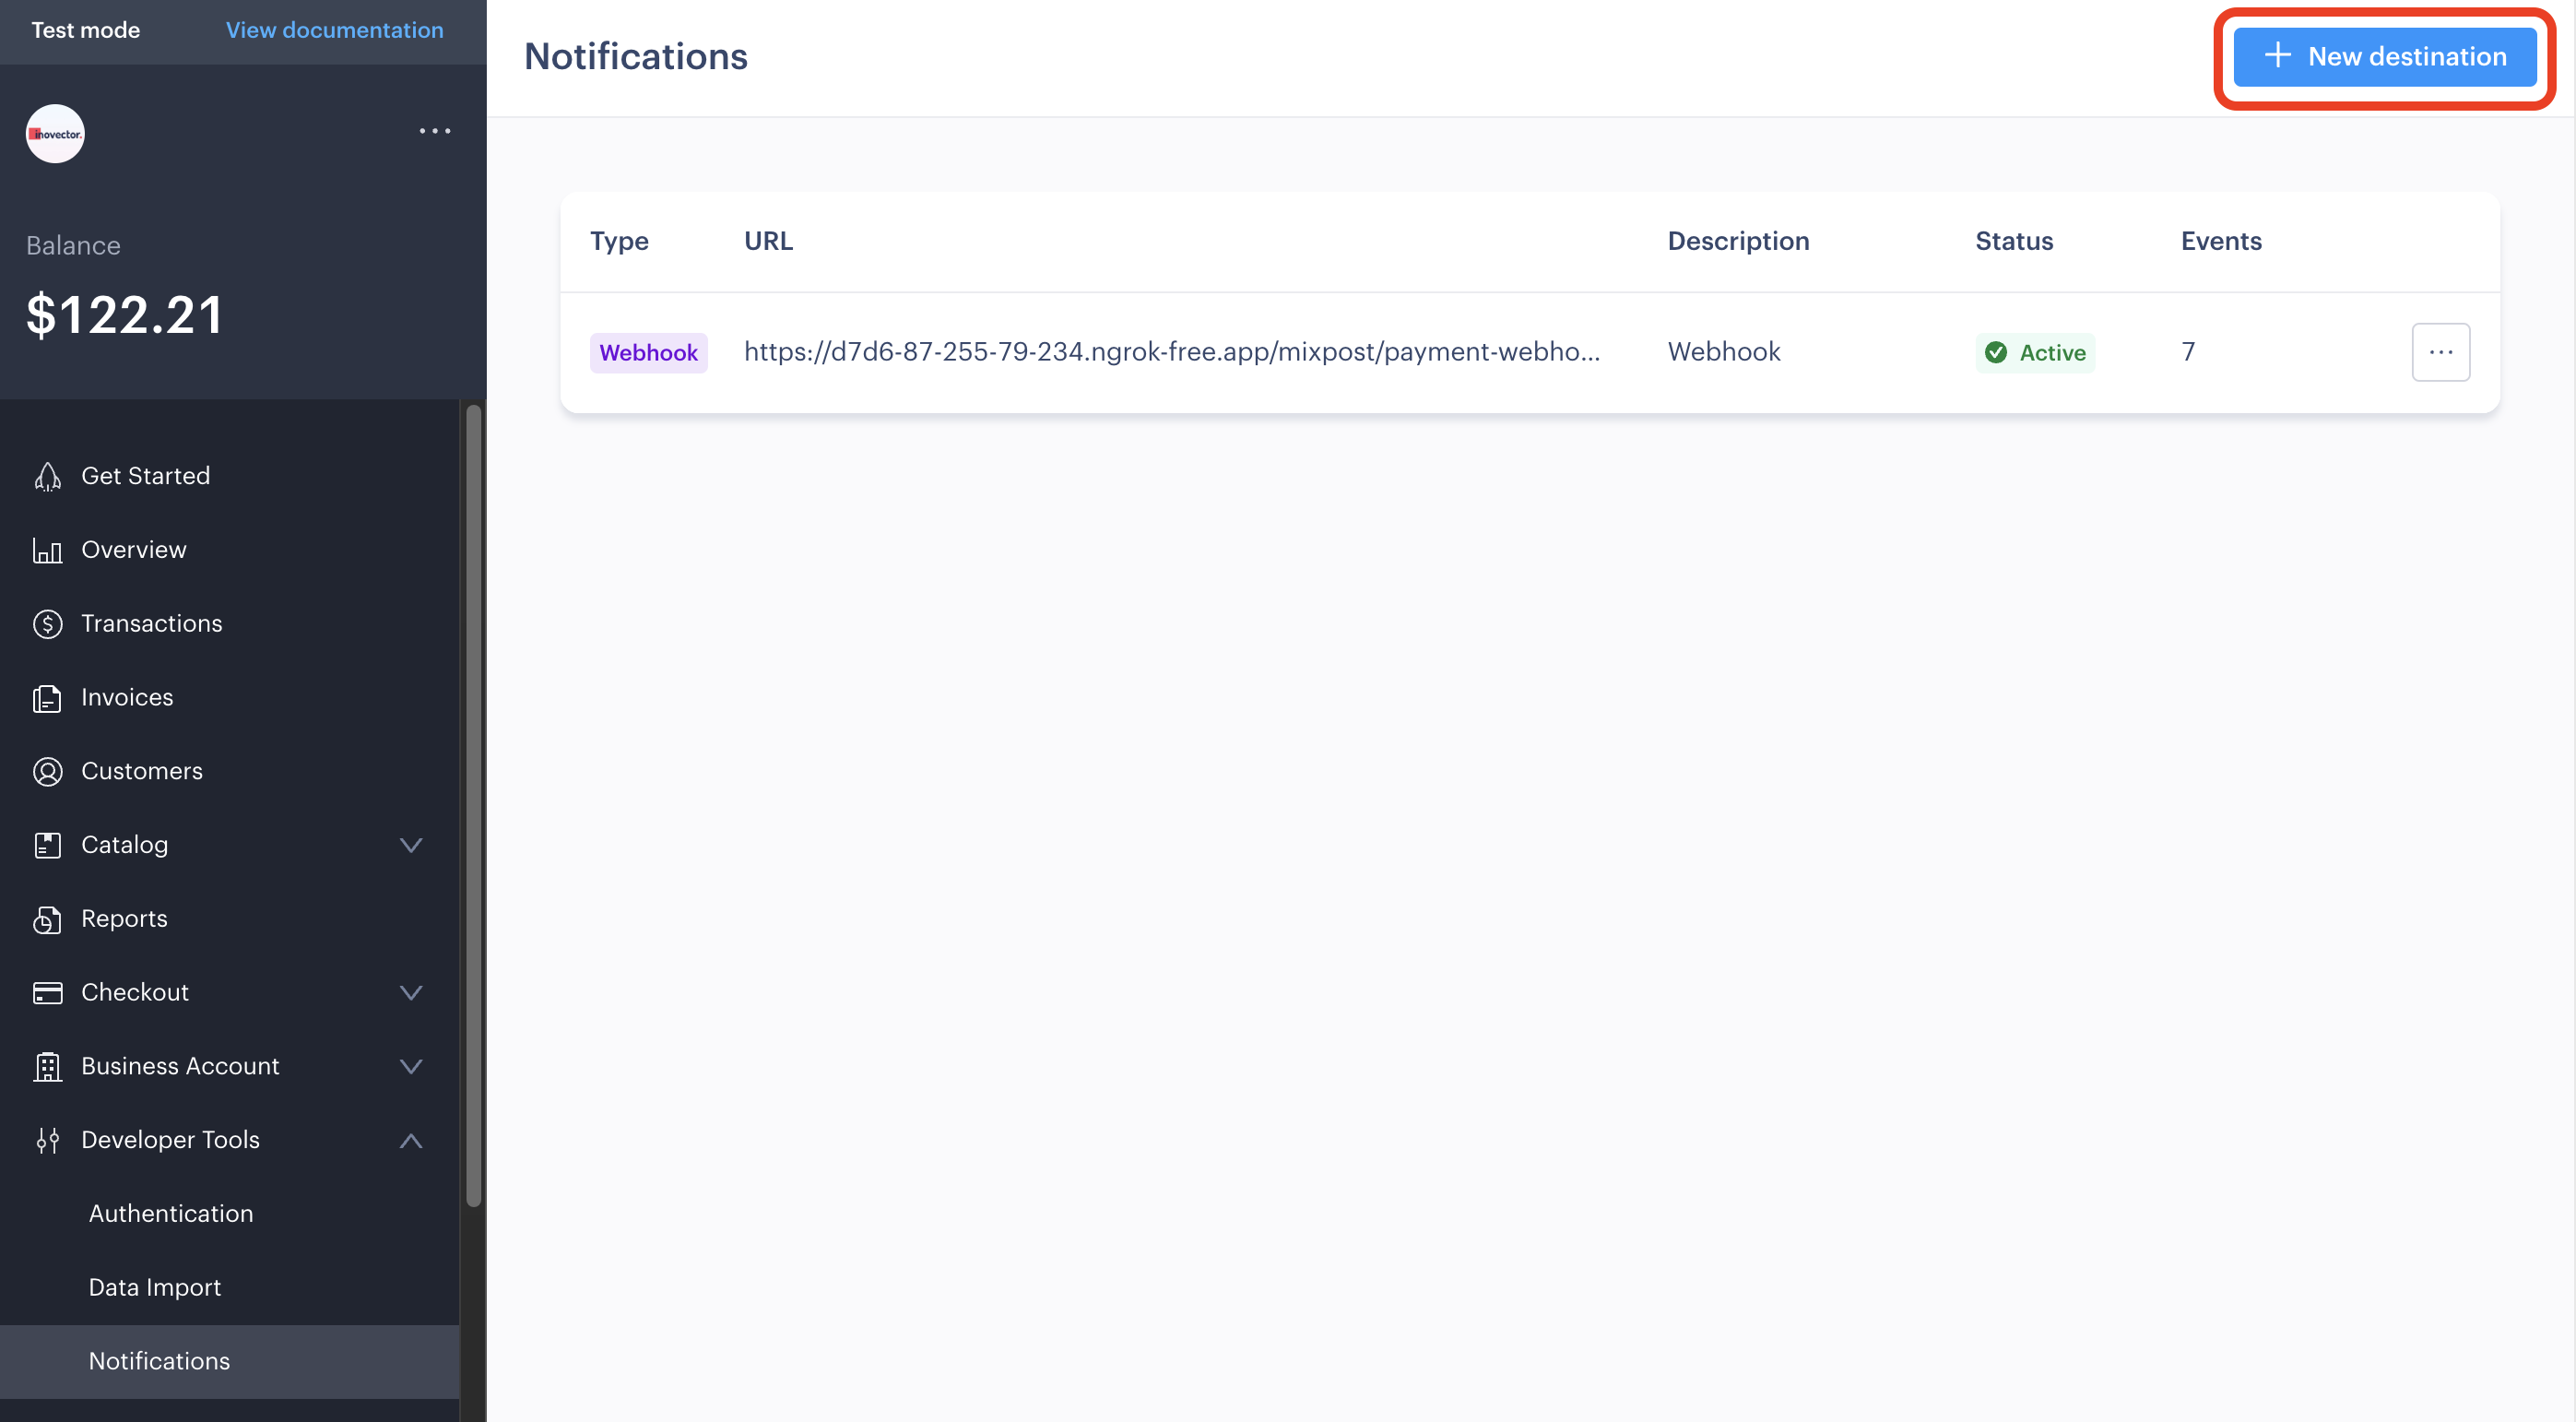
- From Paddle's dashboard, go to Developer Tools section;
- Enter Description;
- Choose Webhook from the Notification type selector;
- Enter th following URL:
https://example.com/<MIXPOST_CORE_PATH>/payment-webhook
Replace <MIXPOST_CORE_PATH> with your specified MIXPOST_CORE_PATH. If you have not altered the MIXPOST_CORE_PATH environment variable, use the default value: mixpost.
Note: For the Lite package, use the value mixpost, if this integration is supported in Lite.
- Select 1 for API version;
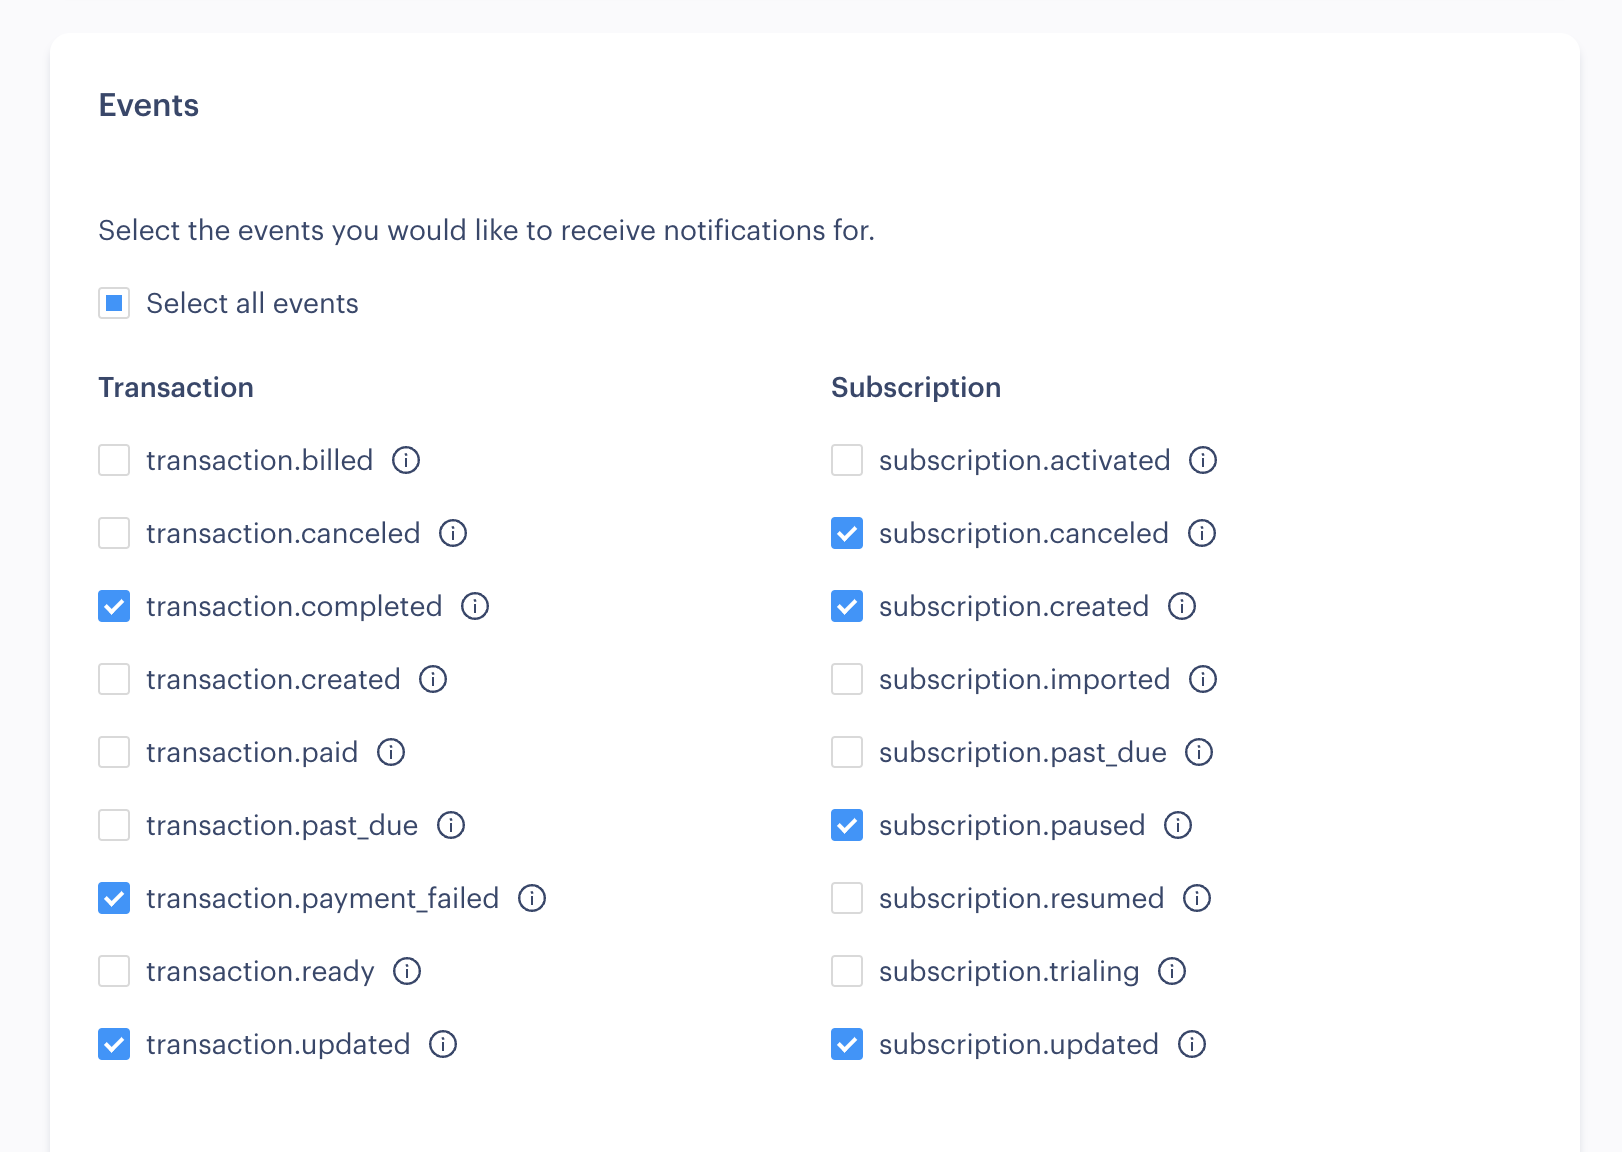
3.2 Events
Select the following events to listen for:
transaction.completedtransaction.payment_failedtransaction.updatesubscription.canceledsubscription.createdsubscription.pausedsubscription.updated
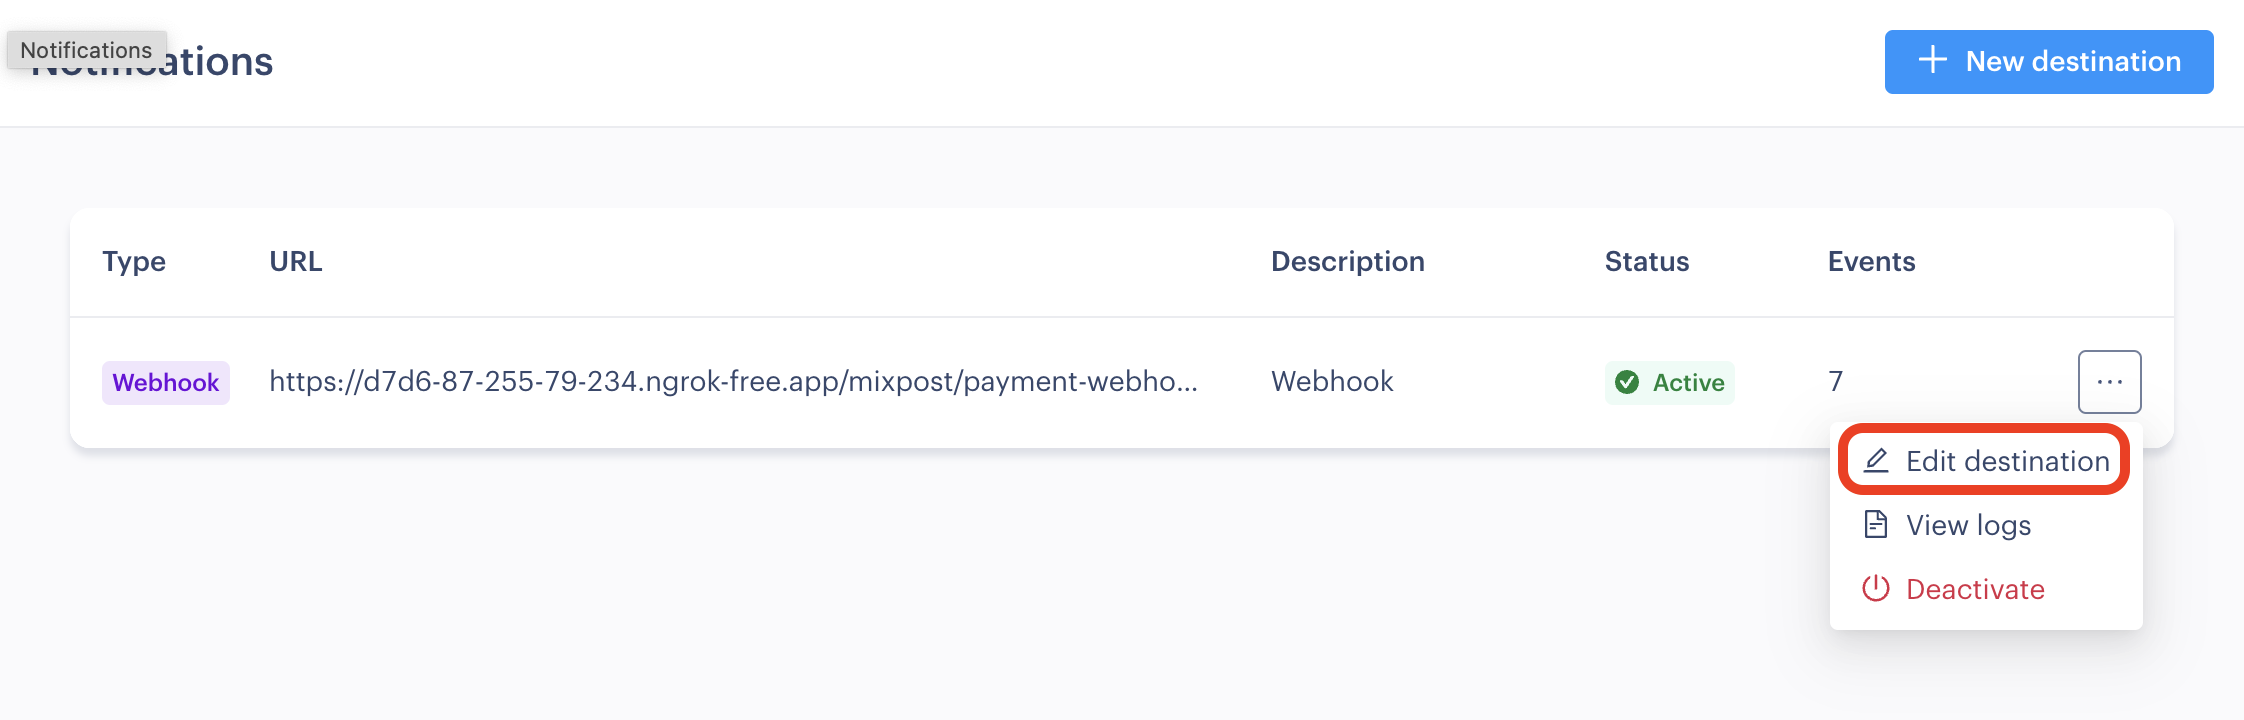
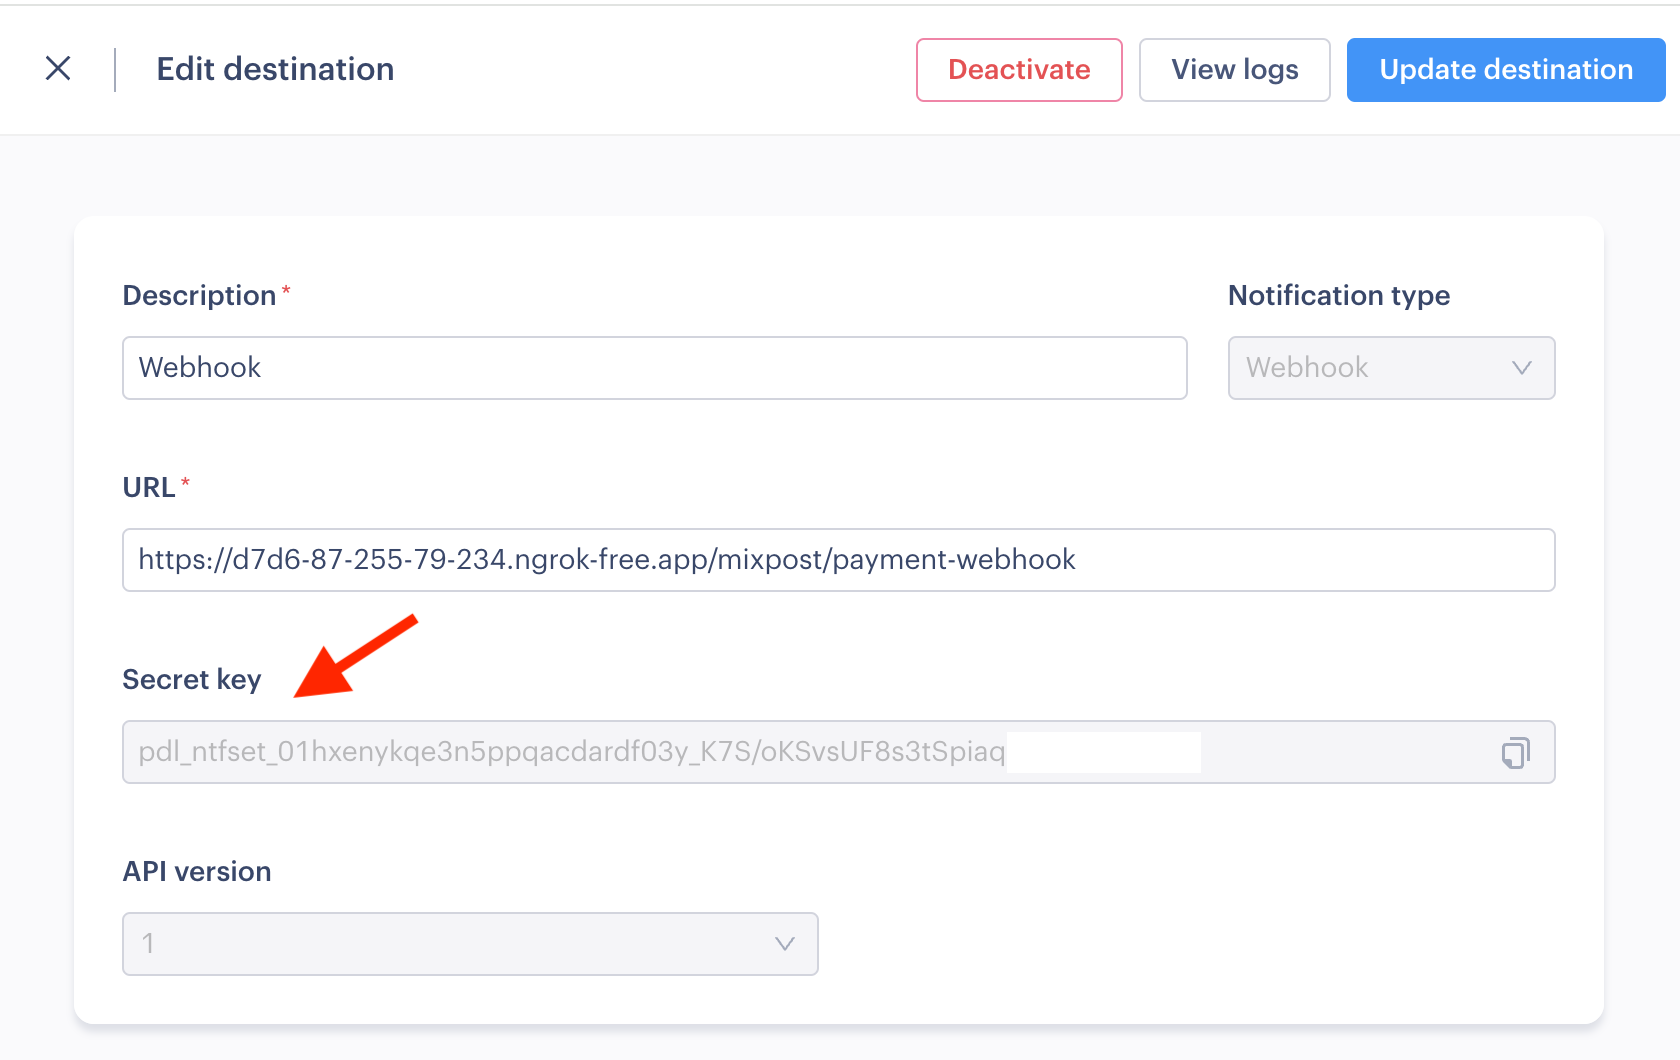
Save destination.
After saving the destination, click on Edit Destination to open it, then copy the Secret Key.
Screenshots:
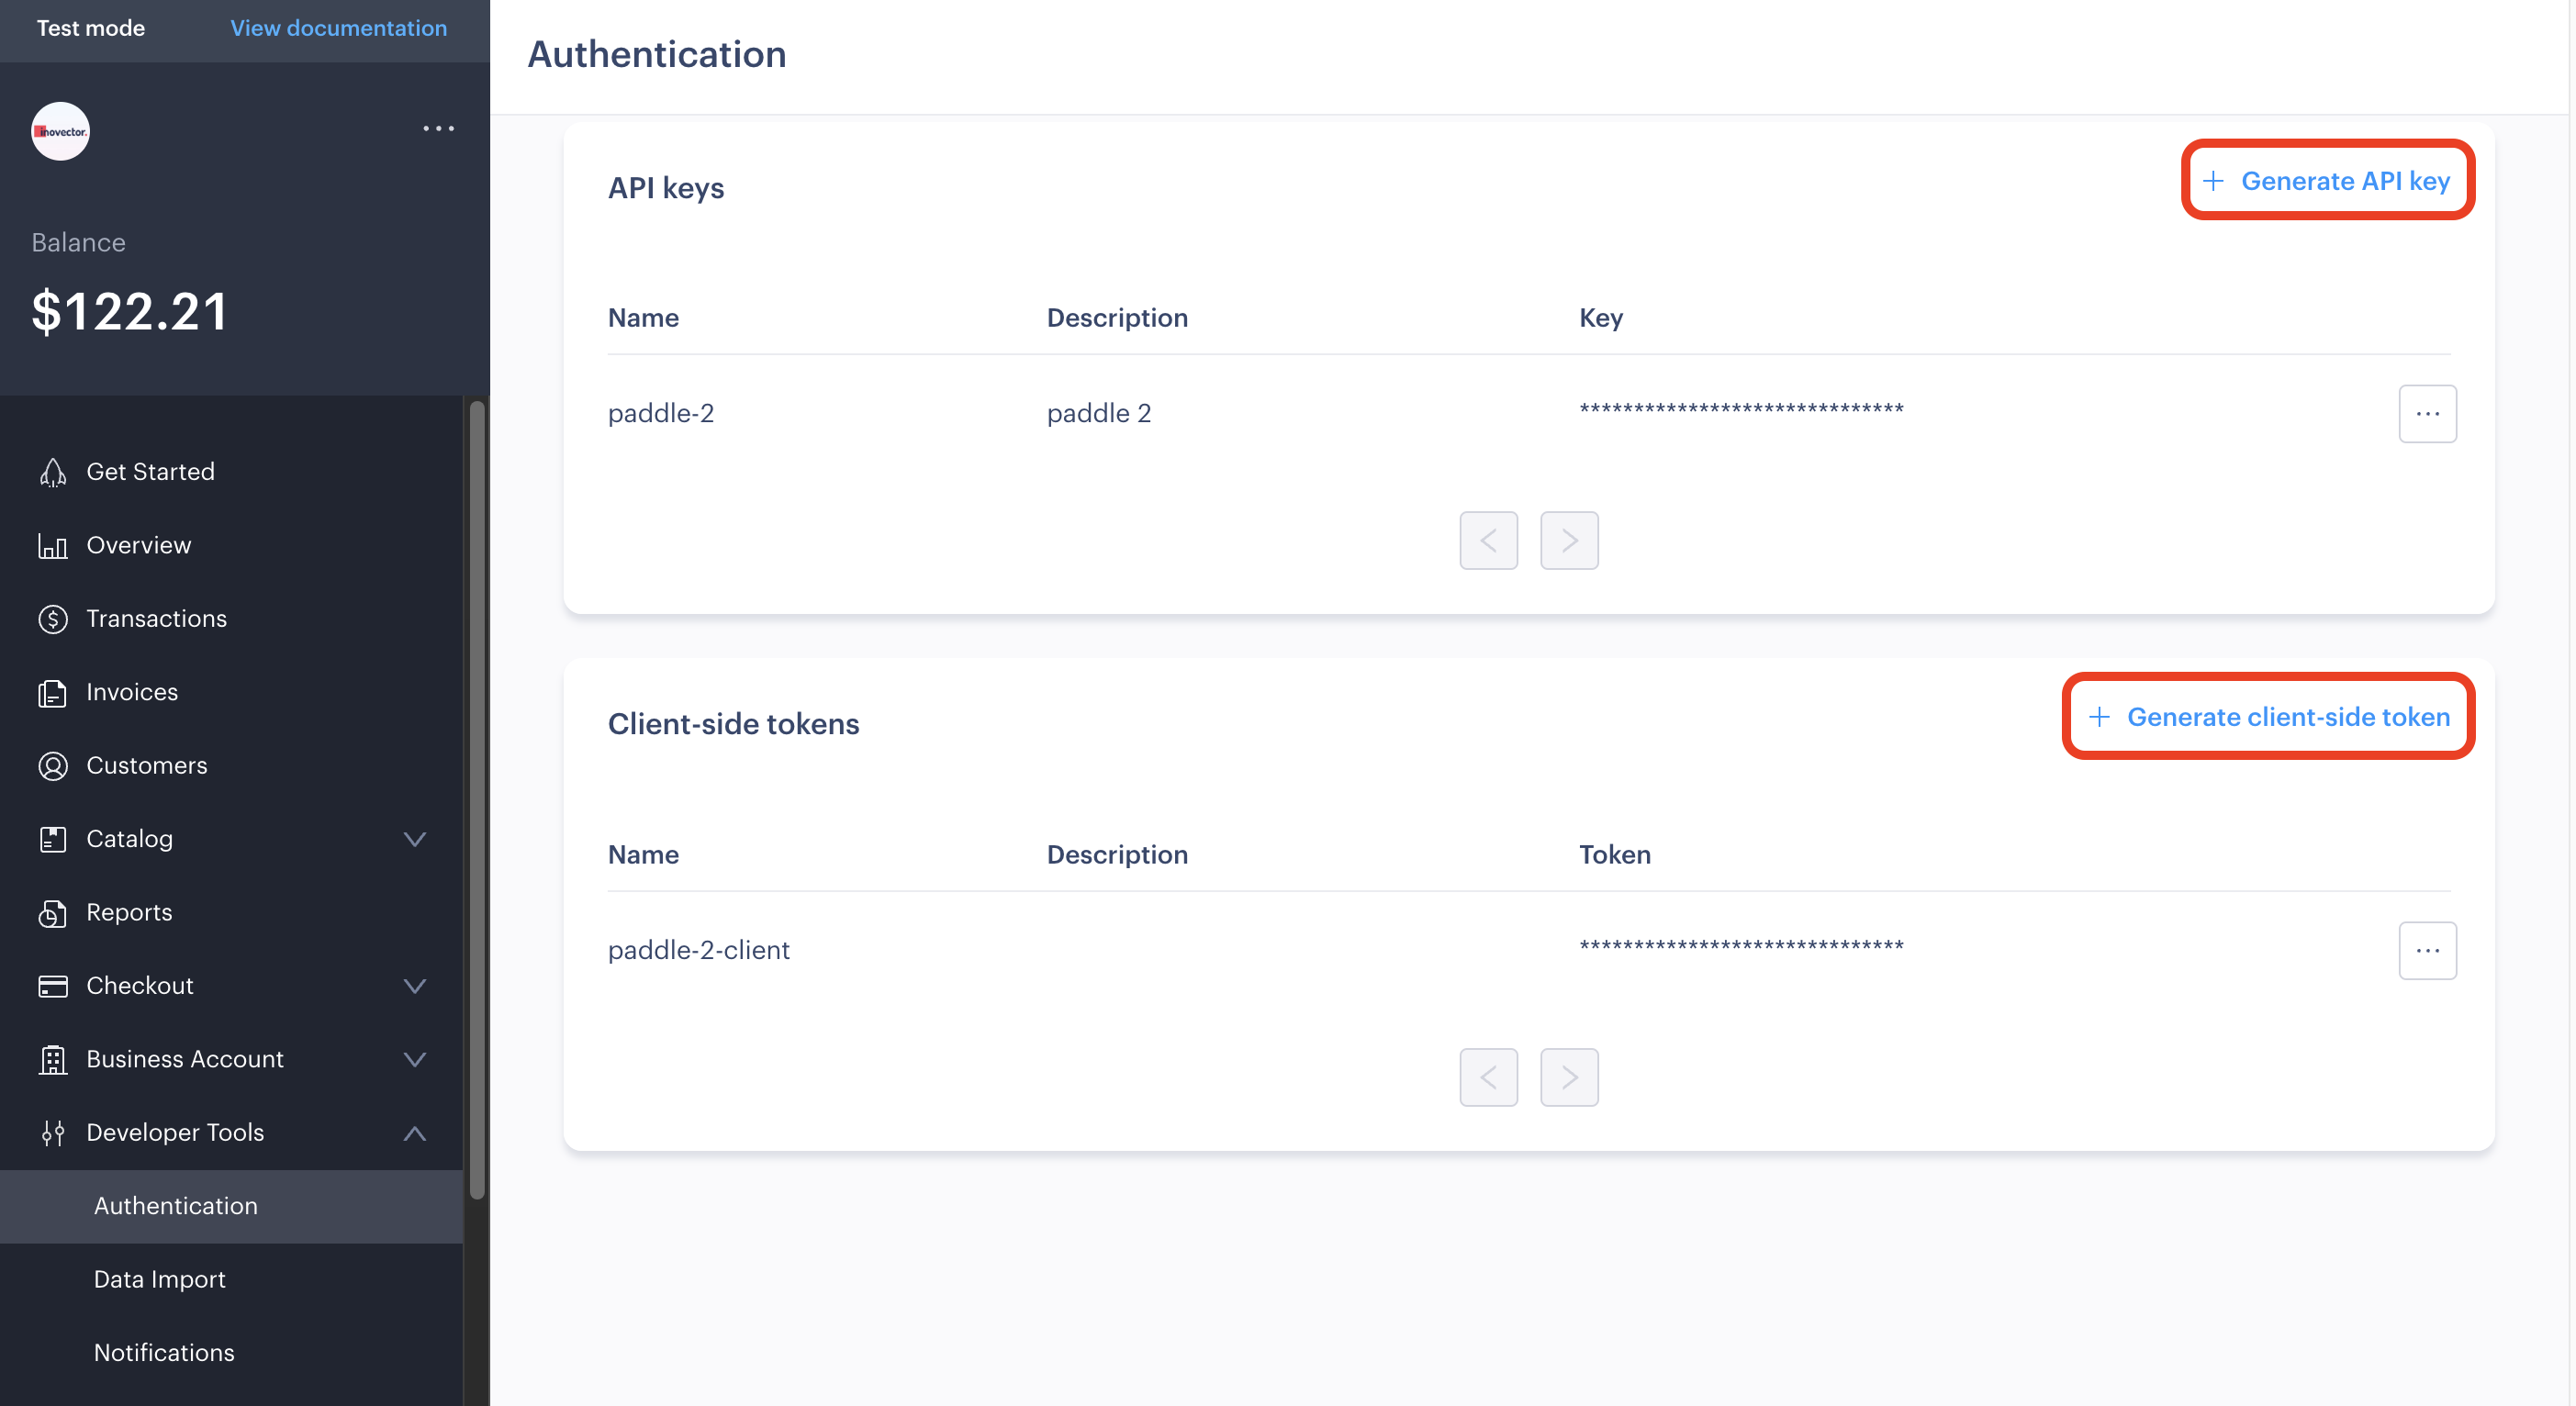
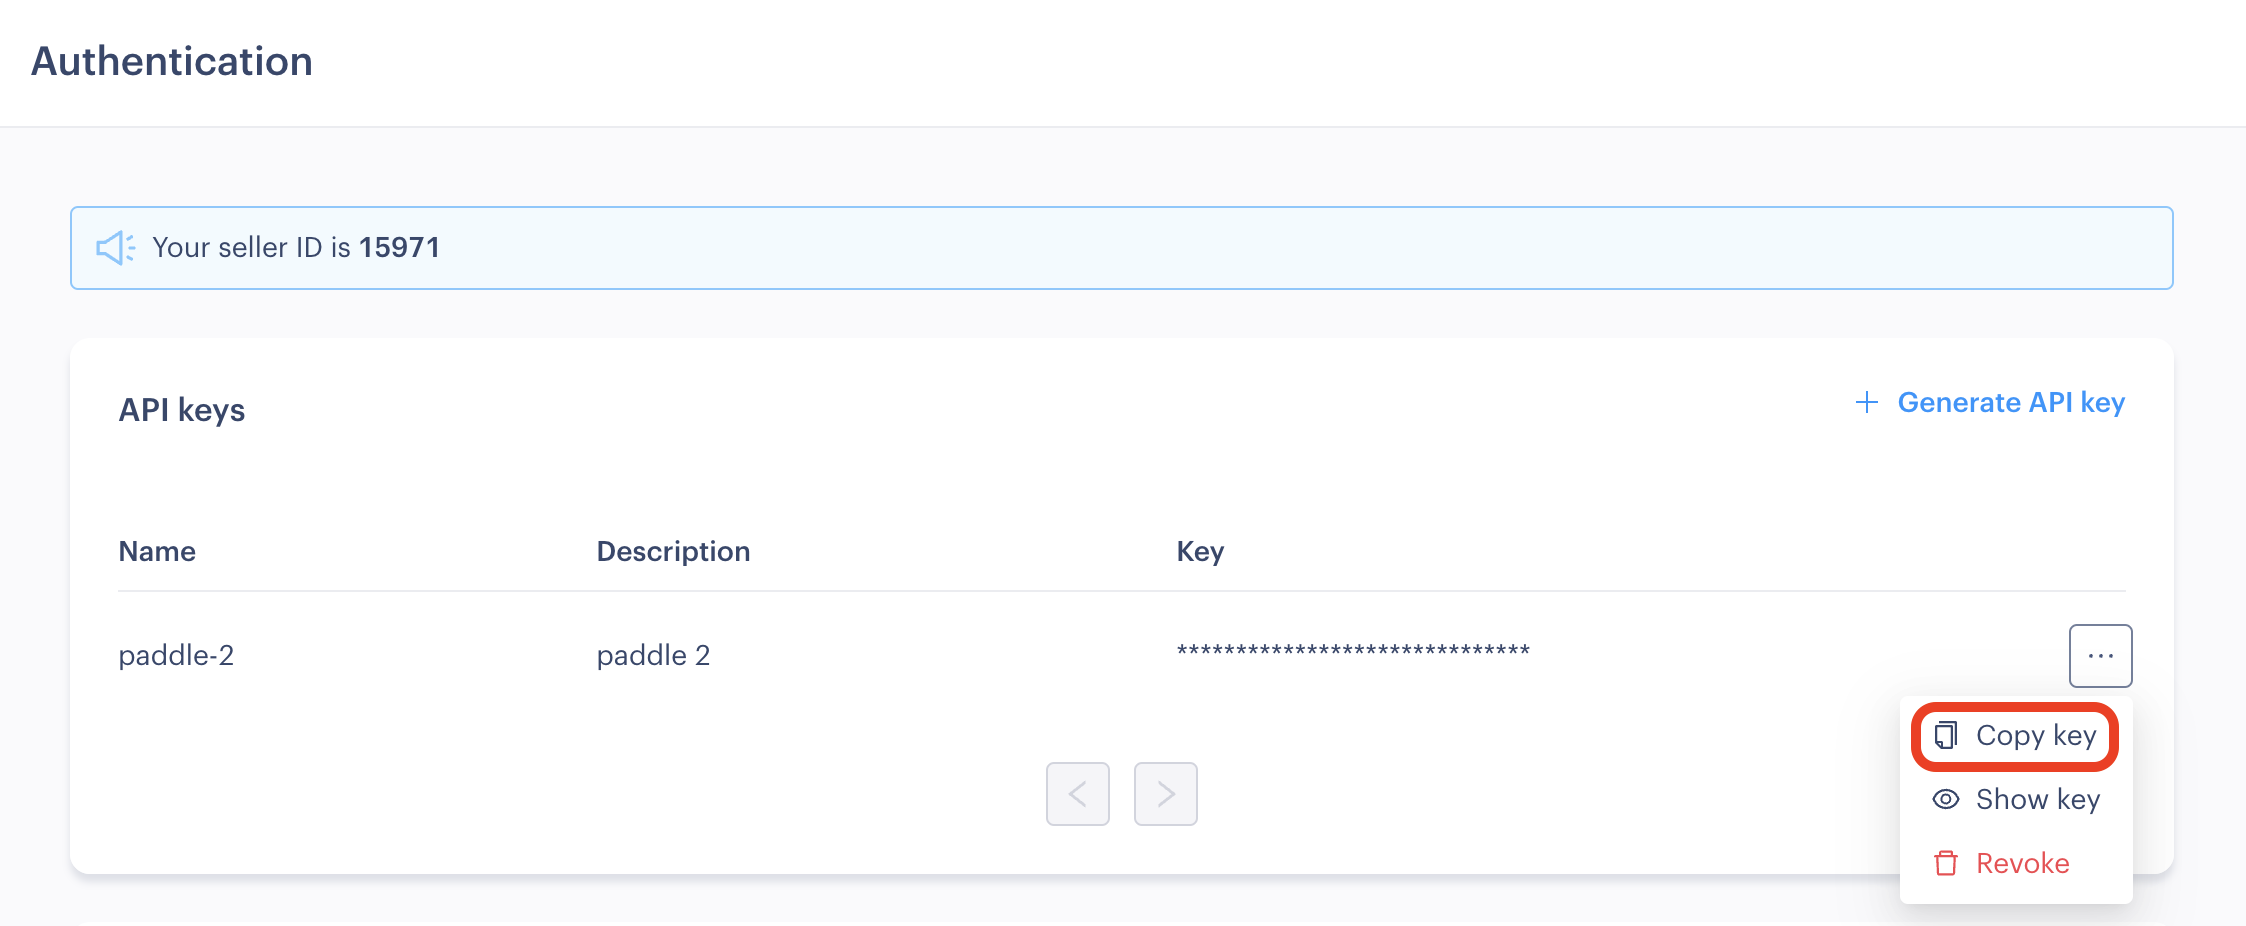
4. Get credentials
- From Paddle's dashboard, go to Developer Tools -> Authentication.
- Generate a new API key and and copy it.
- Generate a new Client-side token and and copy it.
Always keep your credentials confidential.
Screenshots:
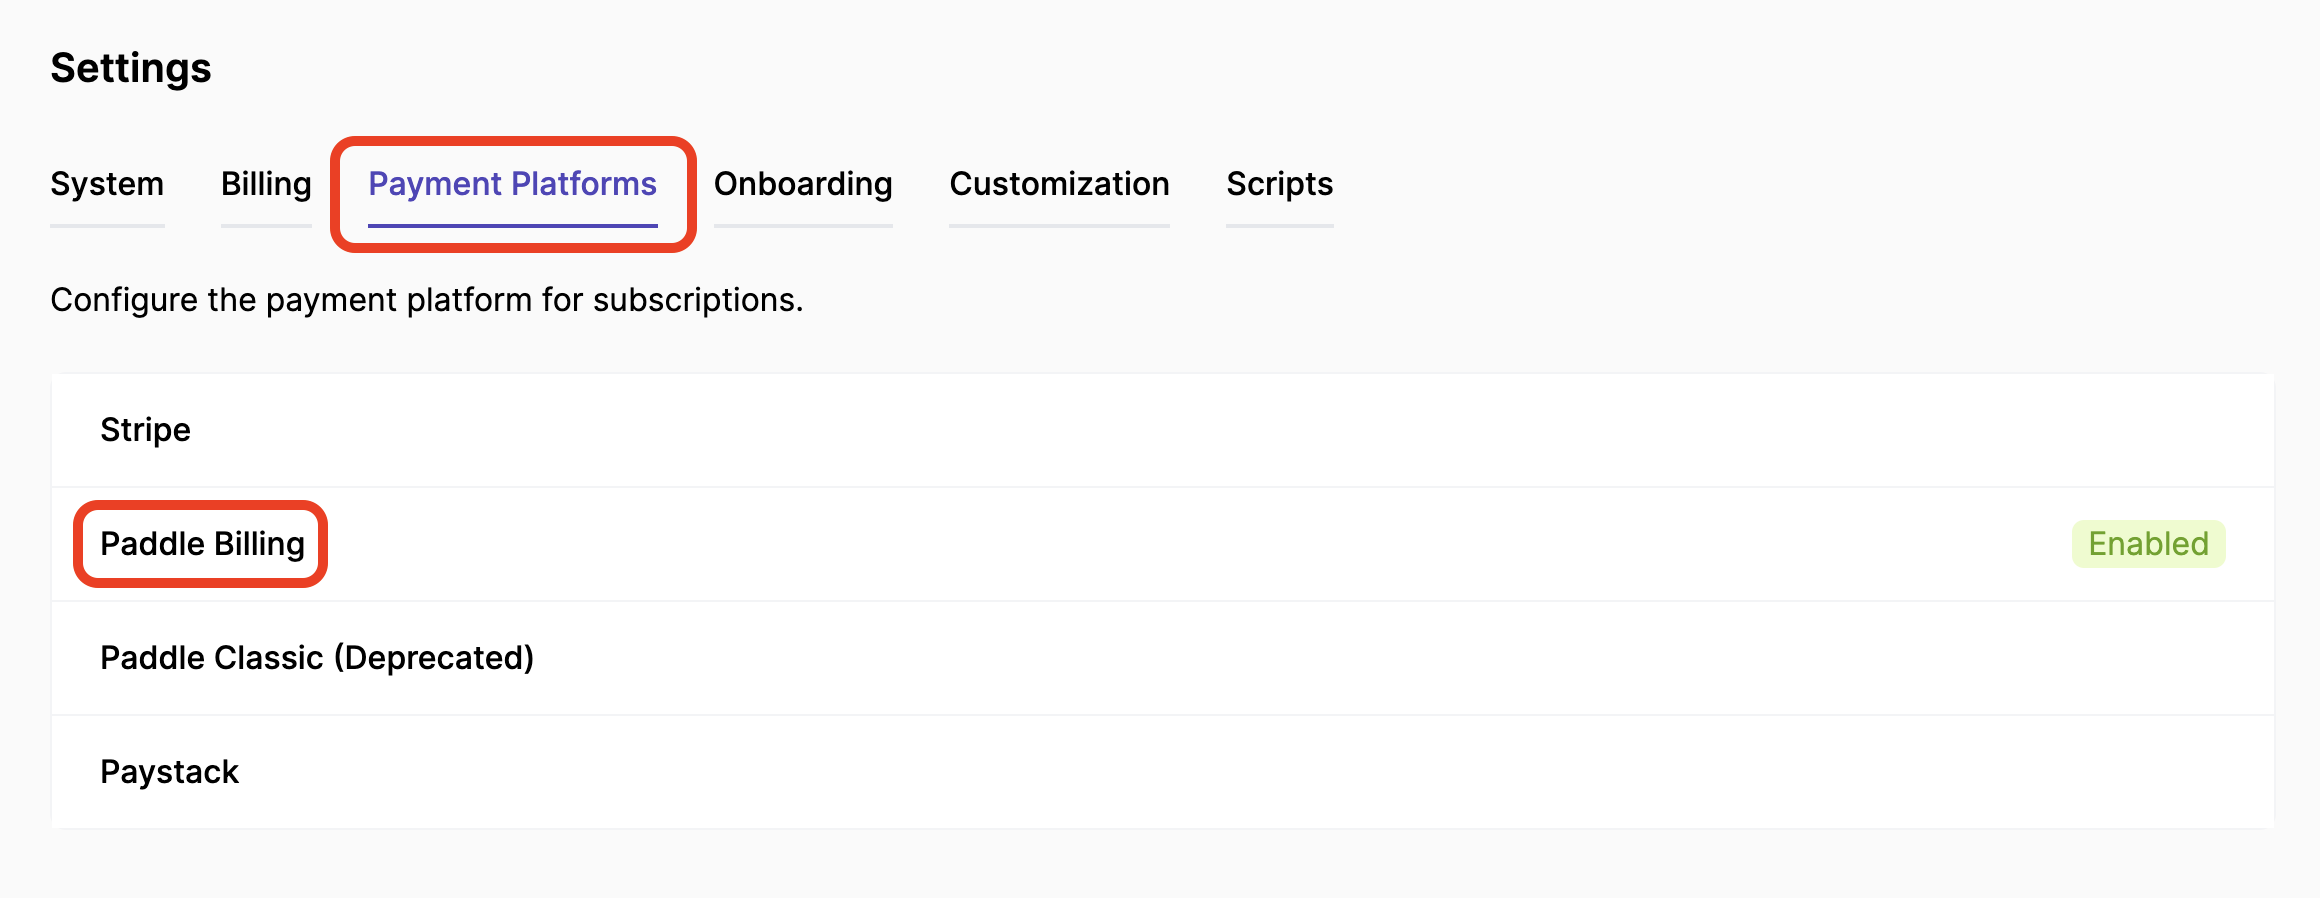
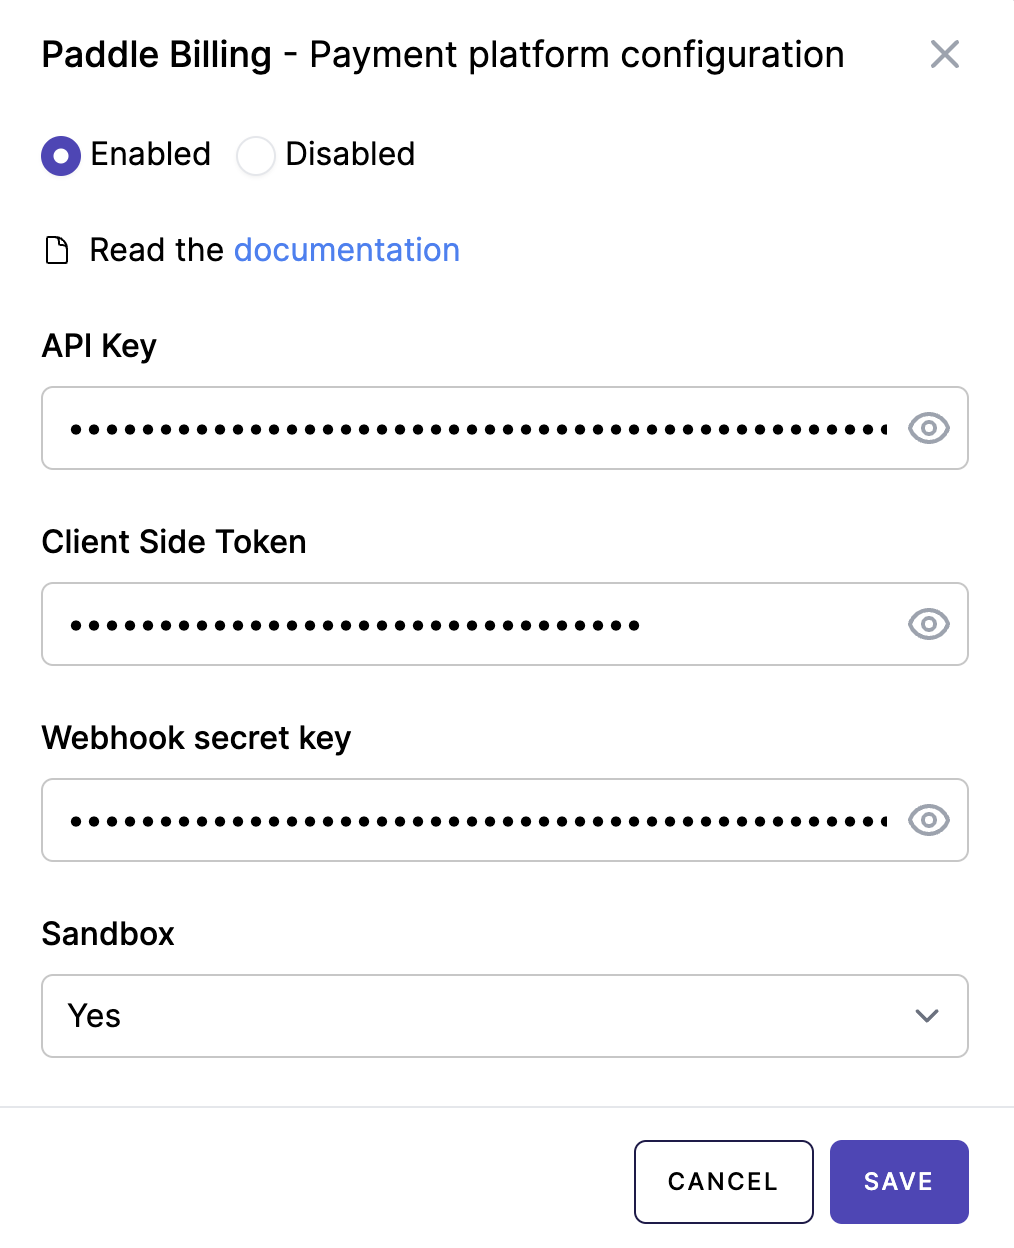
5. Copy the credentials to Mixpost
Once you have API key, Client-side token, and webhook Secret Key, navigate to your Mixpost dashboard and enter these credentials into the Paddle Billing payment platform section. Make sure to select the Enabled option. Additionally, for the Sandbox field, select Yes if you have a sandbox account, otherwise select No.
Navigate to the User Menu at the bottom left, click on Enterprise Console, then select Settings from the left sidebar, and finally click on Payment Platforms.
Screenshots:
6. Add pricing plans
We are adding all the necessary pricing plans in both Paddle and Mixpost dashboard.
6.1 Add subscription plans in Paddle
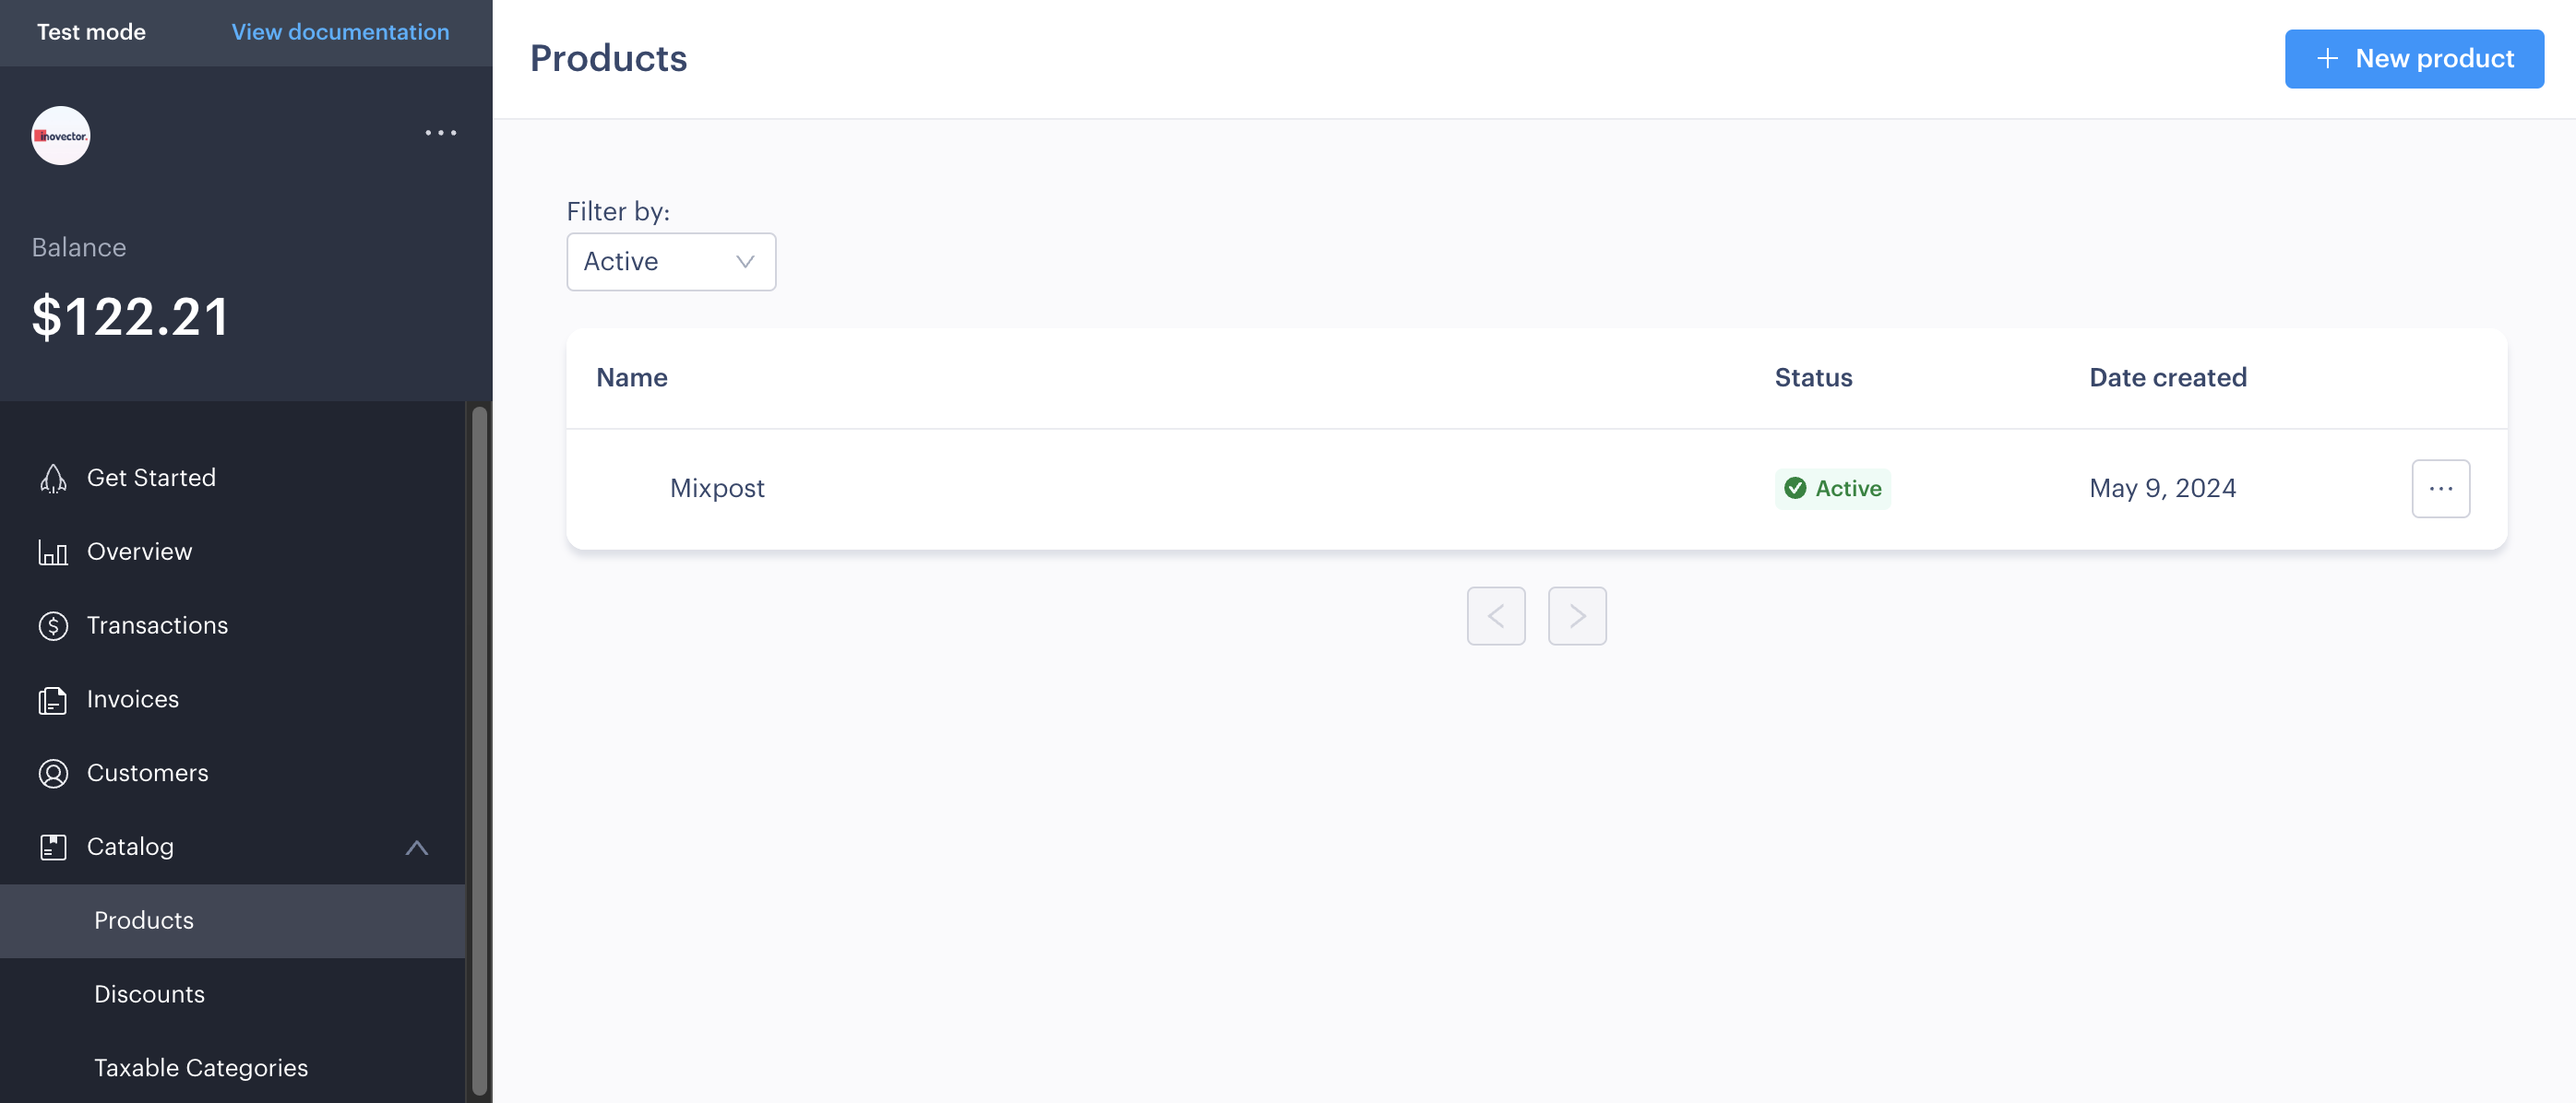
- Navigate to the Catalog section in your Paddle Dashboard.
- Click the Products button and then on New product.
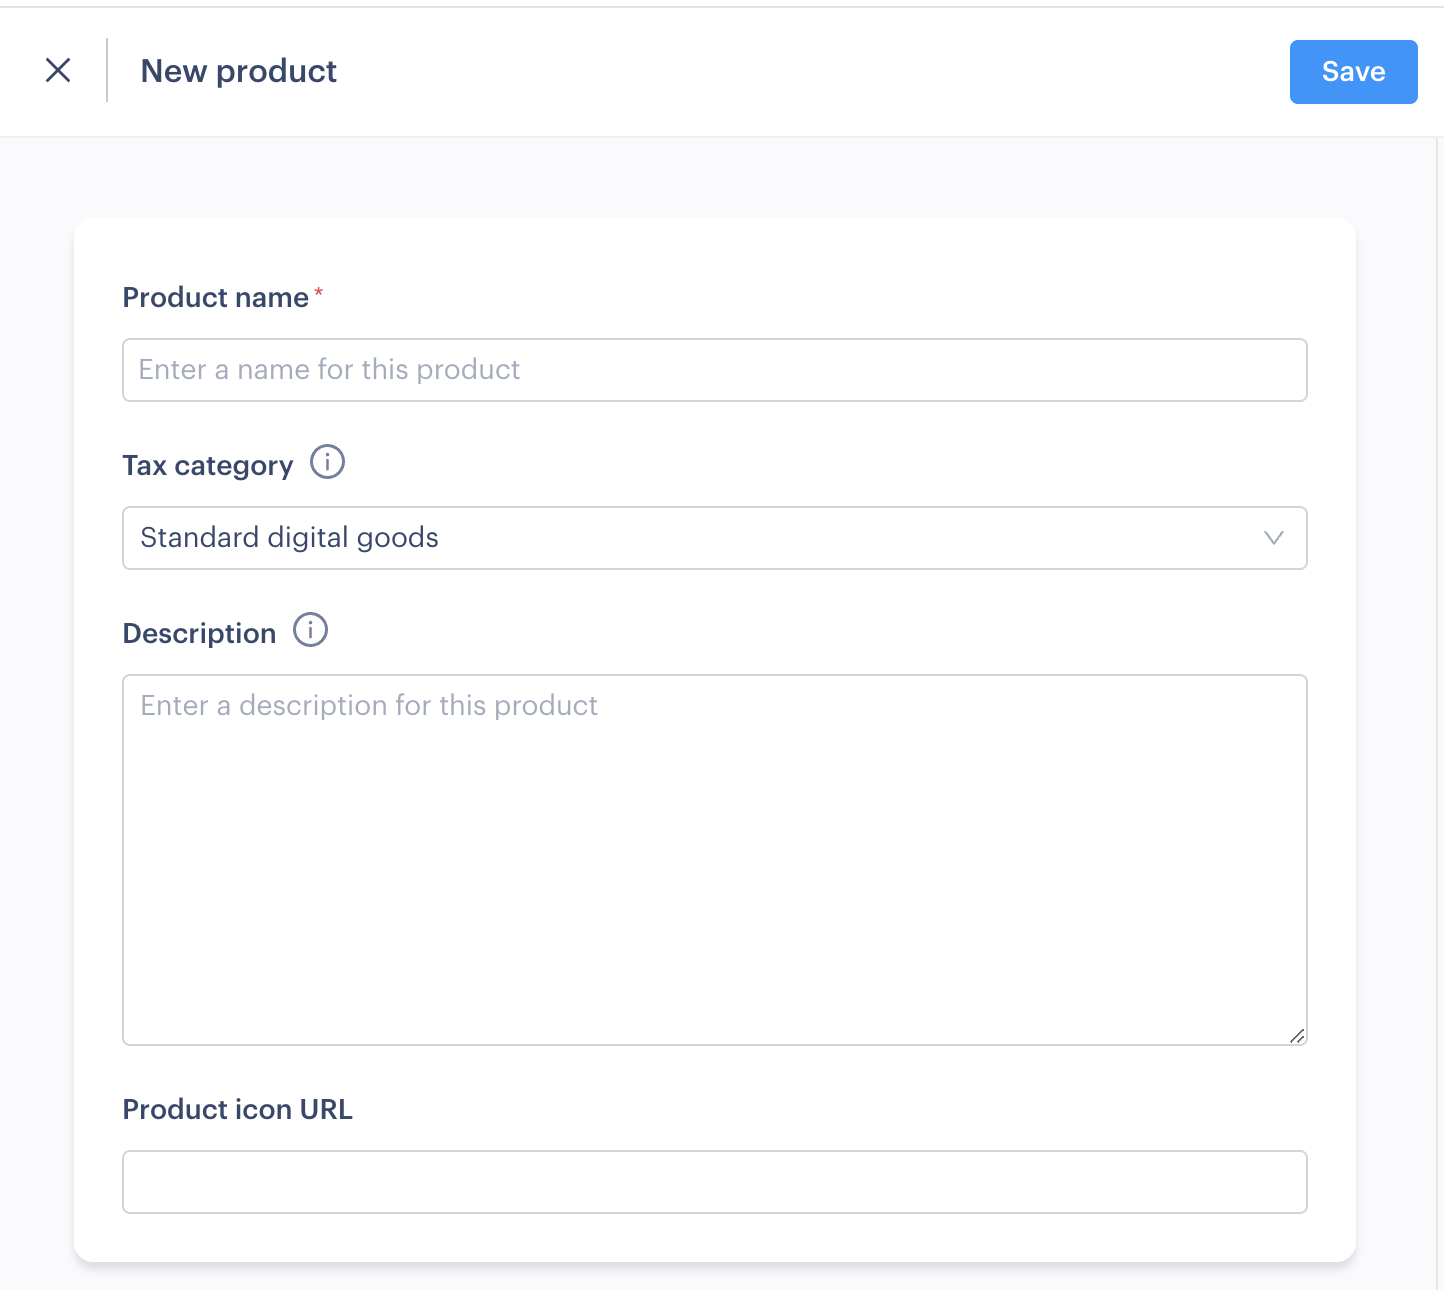
- Enter a plan name, e.g Mixpost.
- Taxable Category, select Standard Digital Goods.
- Click on Save.
- After saving, you will redirect to the product page.
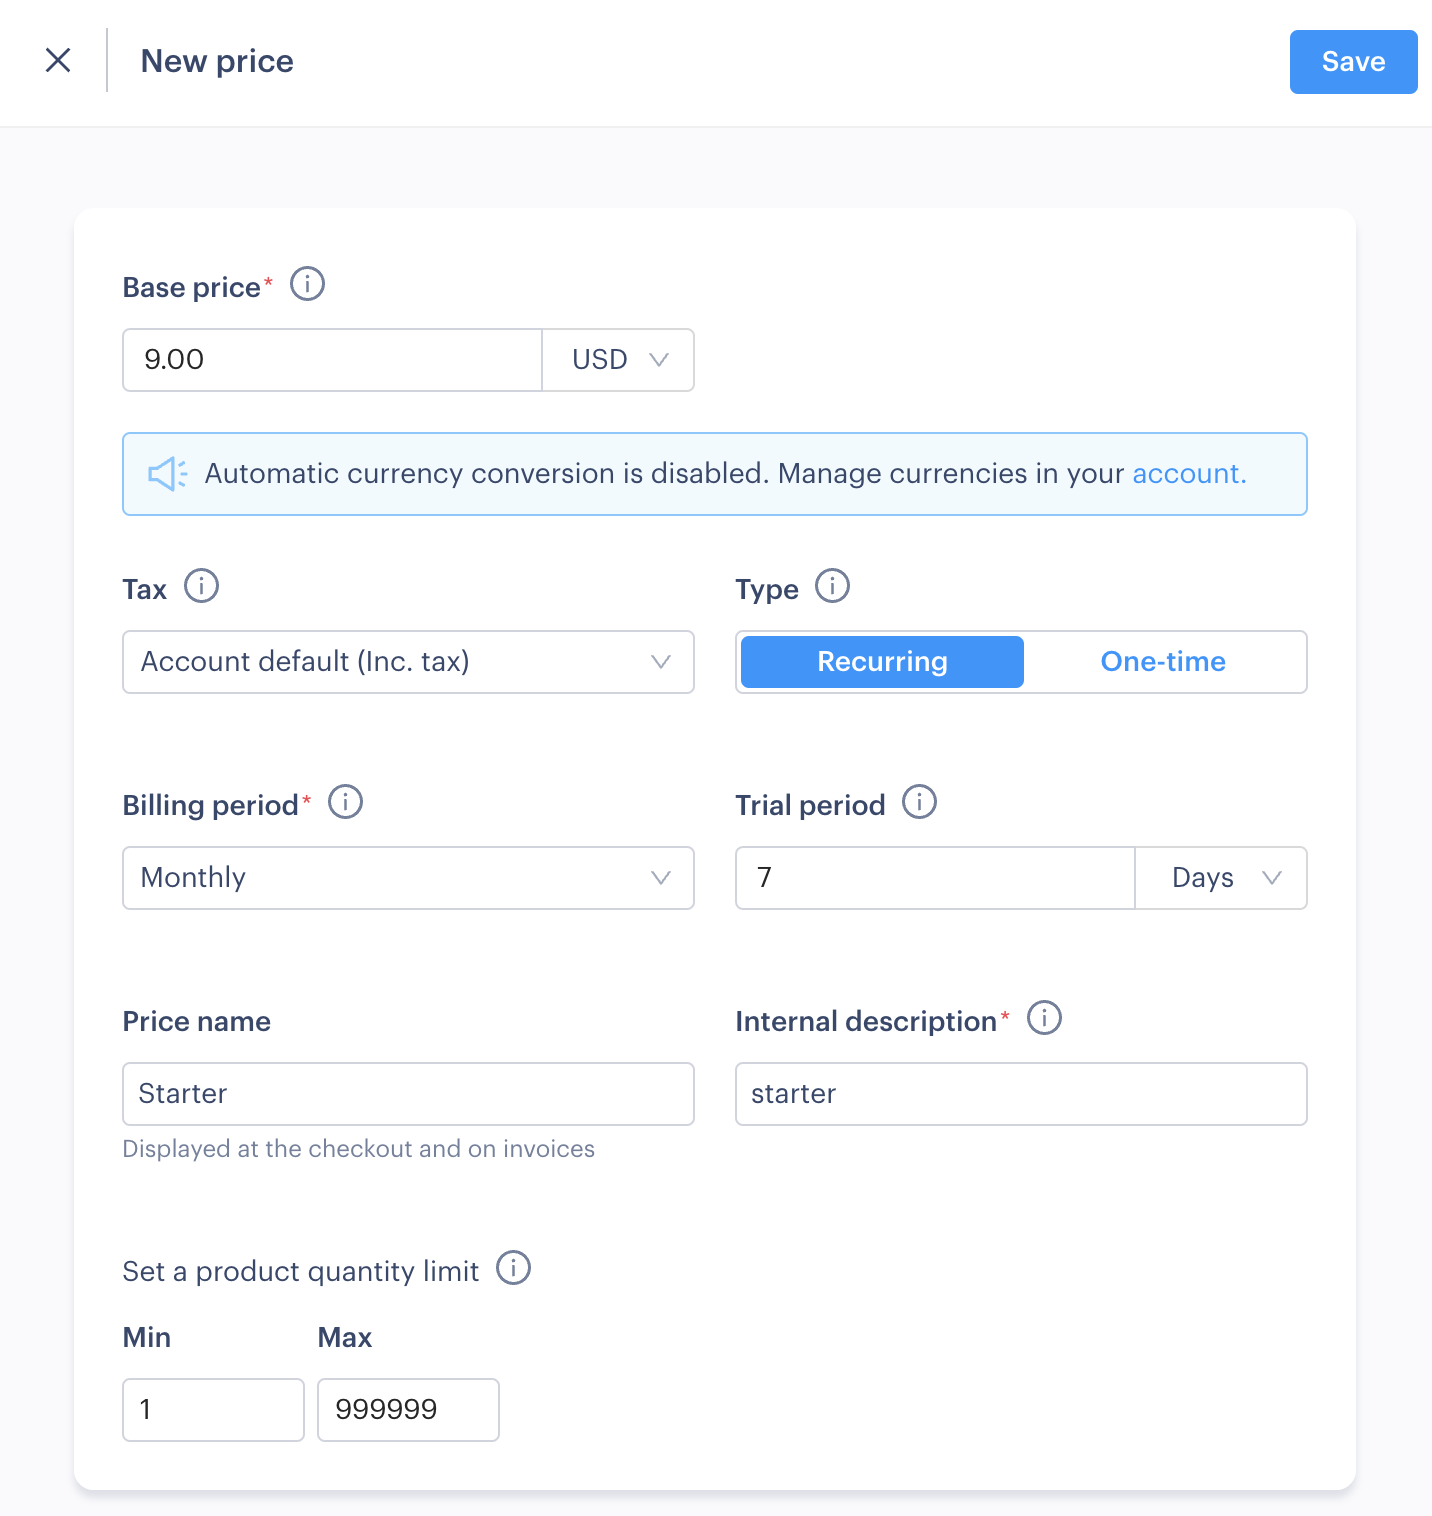
- Click on New price
- Set the plan price, for example, $9.00.
- Set the Type switch to Recurring.
- Select the Billing period. Mixpost supports only Monthly or Yearly billing periods.
- You may input the trial period (optional).
- Enter the Price name, e.g Starter.
- Enter the Internal description, e.g starter.
- Save the product.
If you want to support Monthly and Yearly billing periods for plans, you should add another price, first select Billing Interval under Monthly and then select Yearly.
Screenshots:
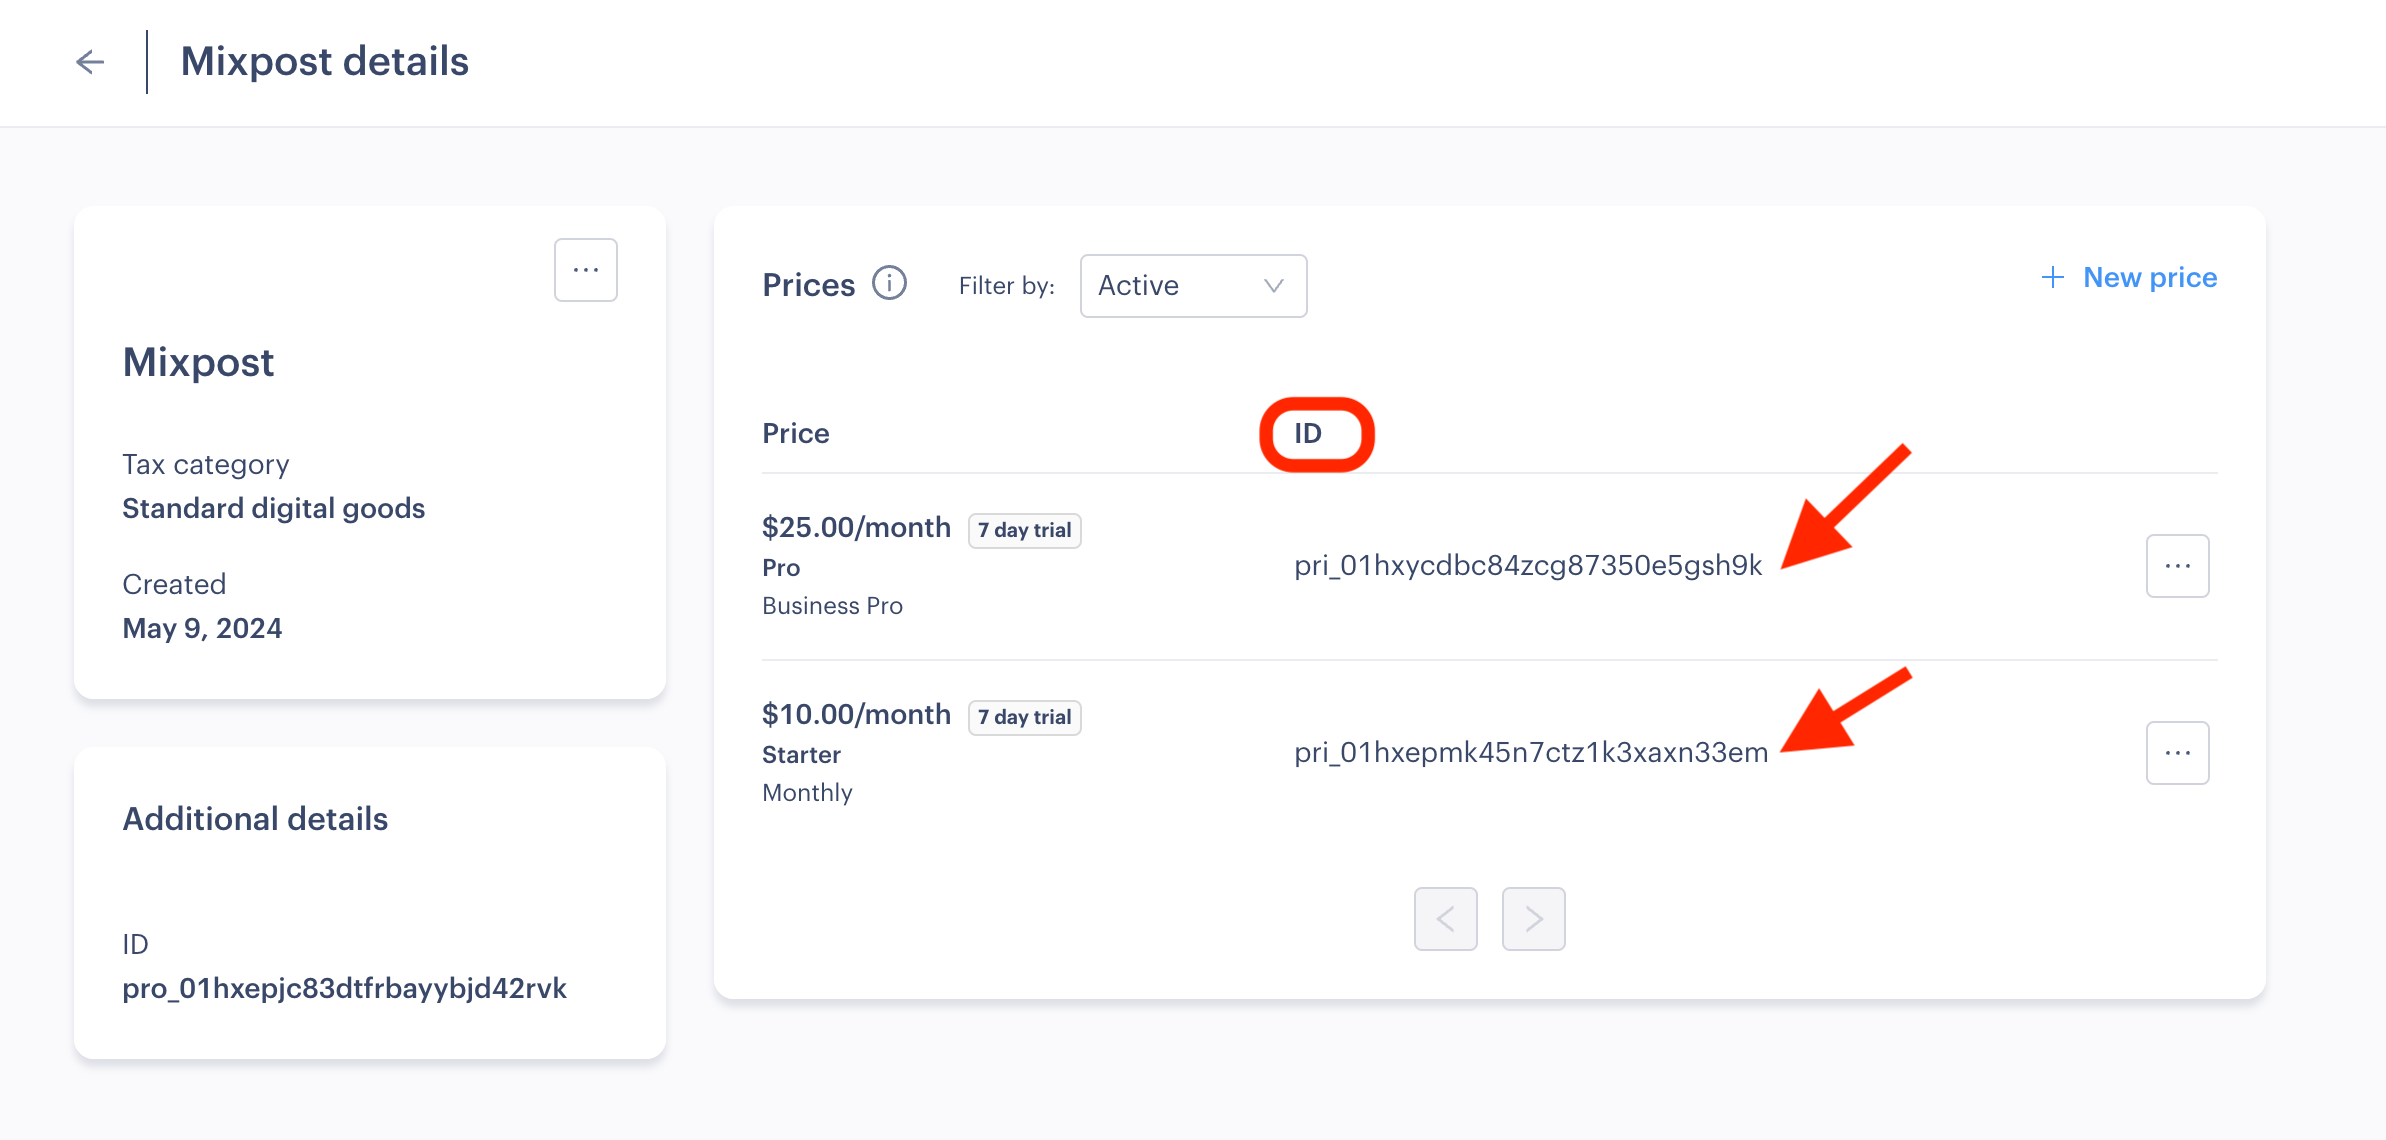
6.2 Sync Paddle products with Mixpost plans
After the plan has been created in your Paddle dashboard. You should copy the ID of each price item to your created plans in the Mixpost Dashboard. See the instructions.
Screenshots:
7. Testing
- Try to register a user and subscribe to a plan.
- Use Paddle's test card numbers to make sure the subscription is done correctly.
8. Go live
If you have integrated with your Paddle's sandbox account, and you're confident in the integration:
- Repeat the integration process for your Production Paddle account.
- Ensure you've added any necessary pricing plans in both Paddle and your Mixpost Enterprise console.
- Start onboarding users and generating revenue!