TikTok Direct Post Audit
By default, TikTok allows you to upload content as drafts, enabling creators to edit further before posting. If you prefer that scheduled posts be published automatically, enable the Direct Post option in the Content Posting API section of your application.
1. Apply
After your application has been accepted by the TikTok team. You can apply for access to Direct Post.
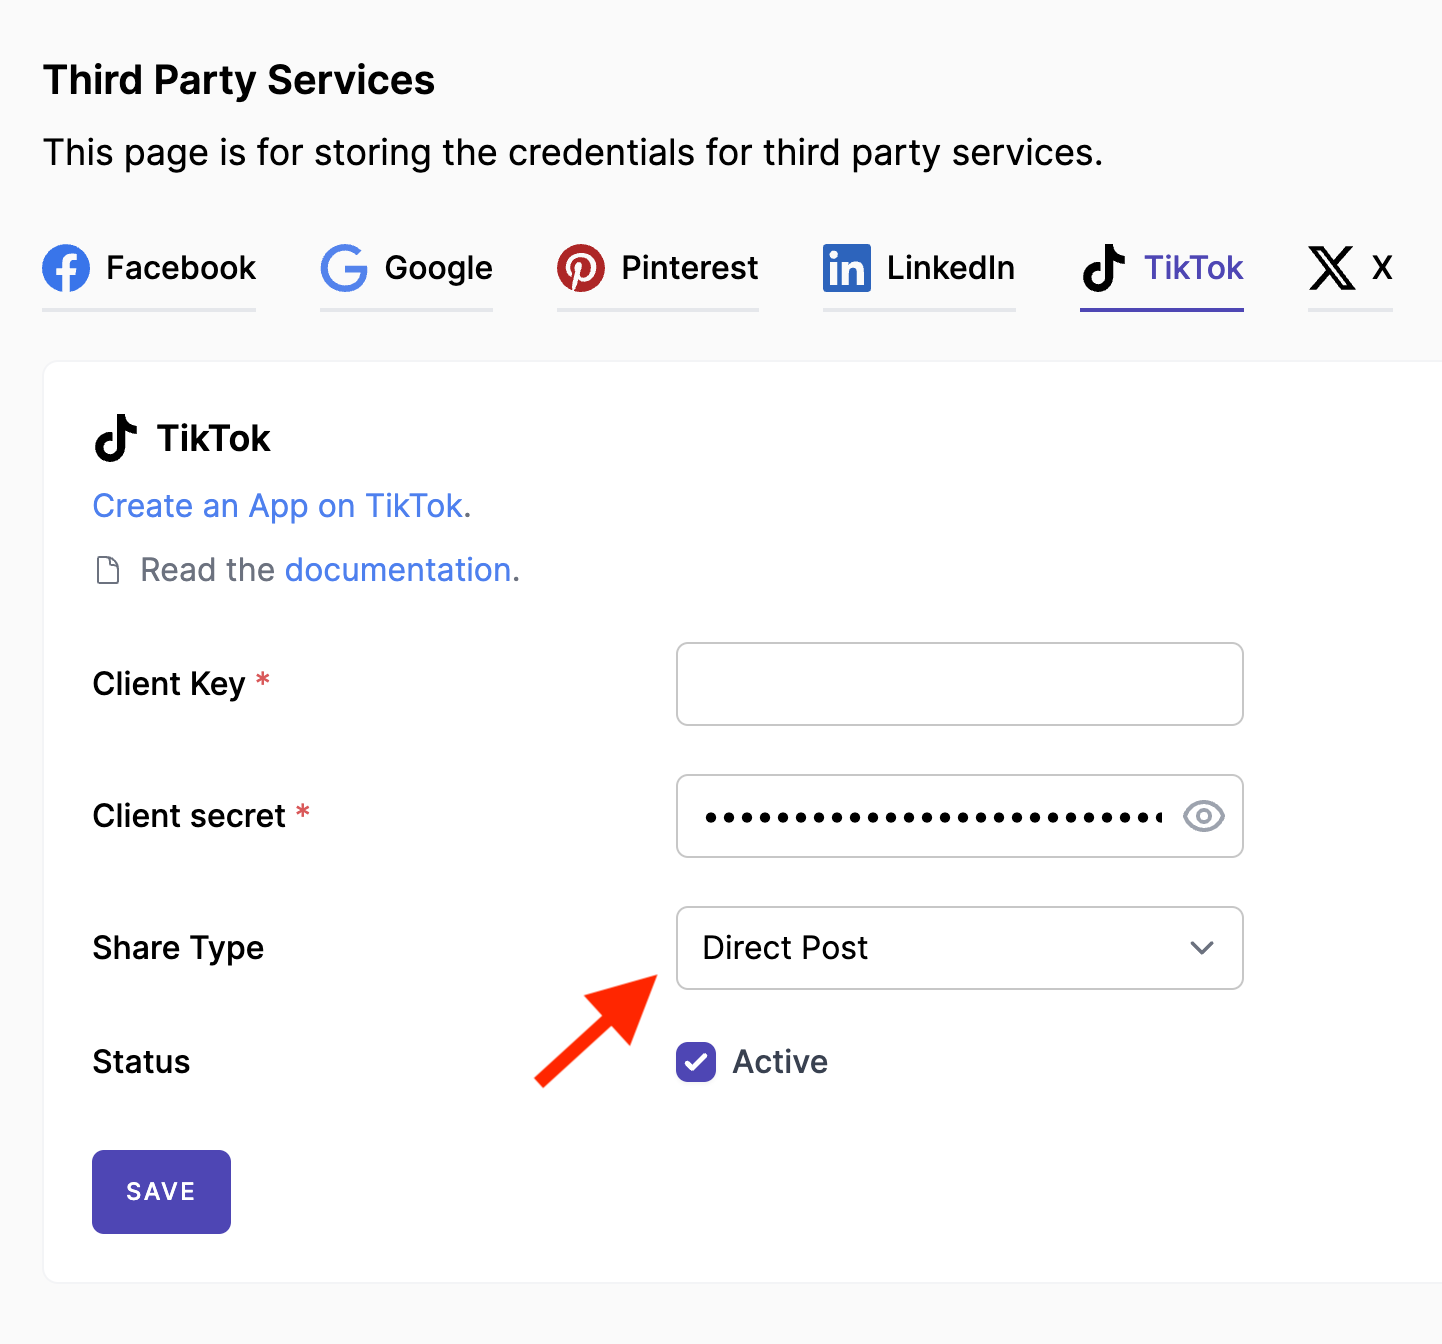
Before submitting, select the Direct Post option from the Share Type selector on the TikTok service's page within the Mixpost dashboard.
- Pro and Enterprise
- Lite
Navigate to the User Menu at the bottom left, click Admin Console, and then click on Services from the left sidebar.
Click on Services from the left sidebar.
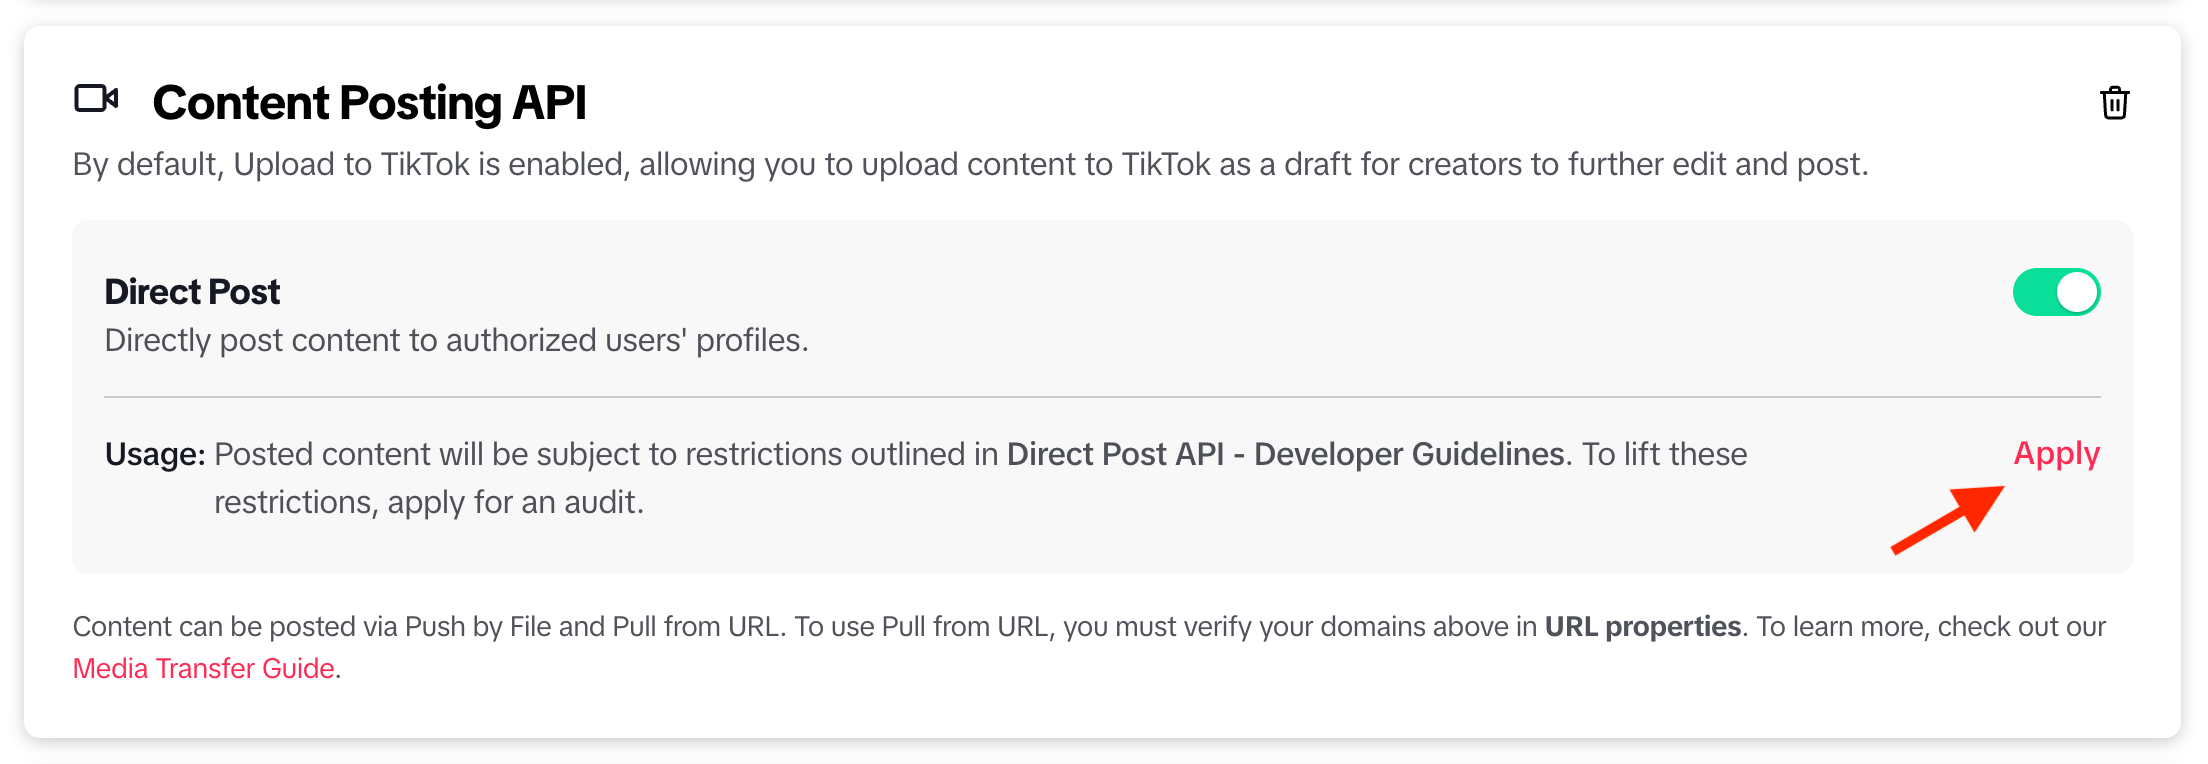
Then, open the application from your app list and scroll to the Content Posting API section. Then click on Apply.
Screenshots:
2. Application request
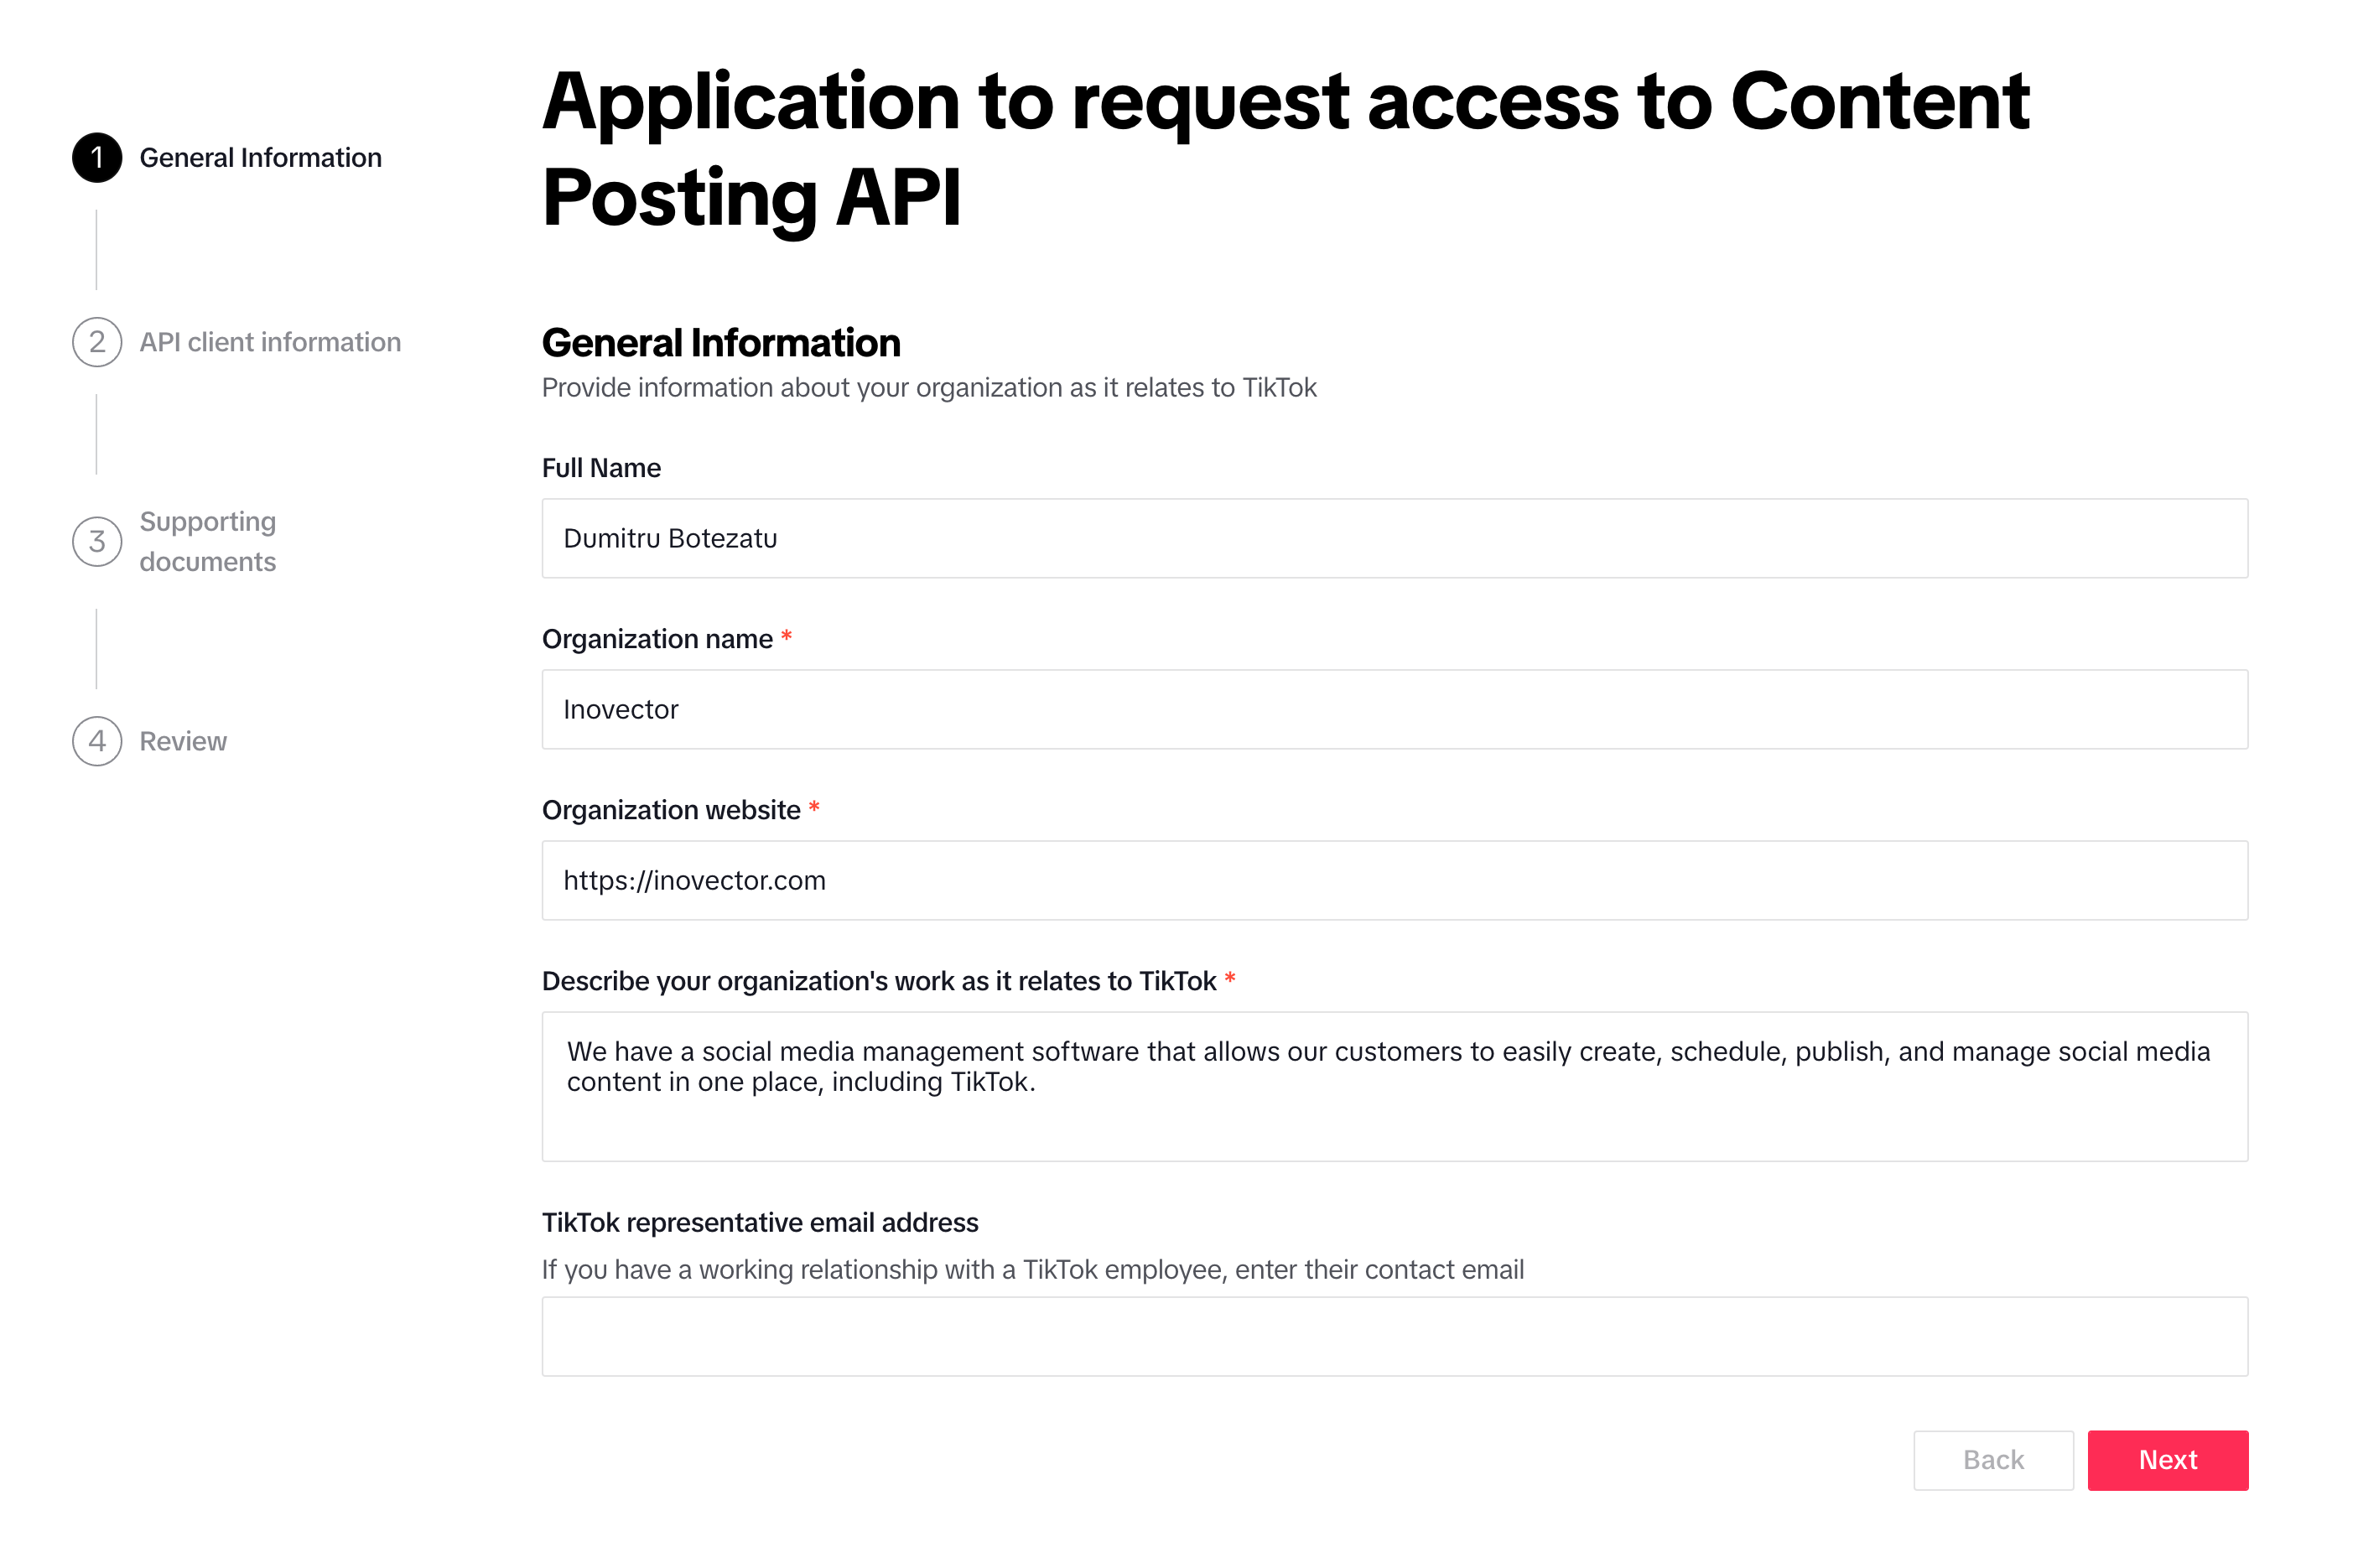
2.1 General Information
Provide informaion about your organization as it relates to TikTok.
Fill out the basic information such as Full Name, Organization Name, and Organization Website, etc.
Below, we have listed all some important answers you need to provide:
Describe your organization's work as it relates to TikTok
We have a social media management software that allows our customers to easily create, schedule, publish, and manage social media content in one place, including TikTok.
Screenshots:
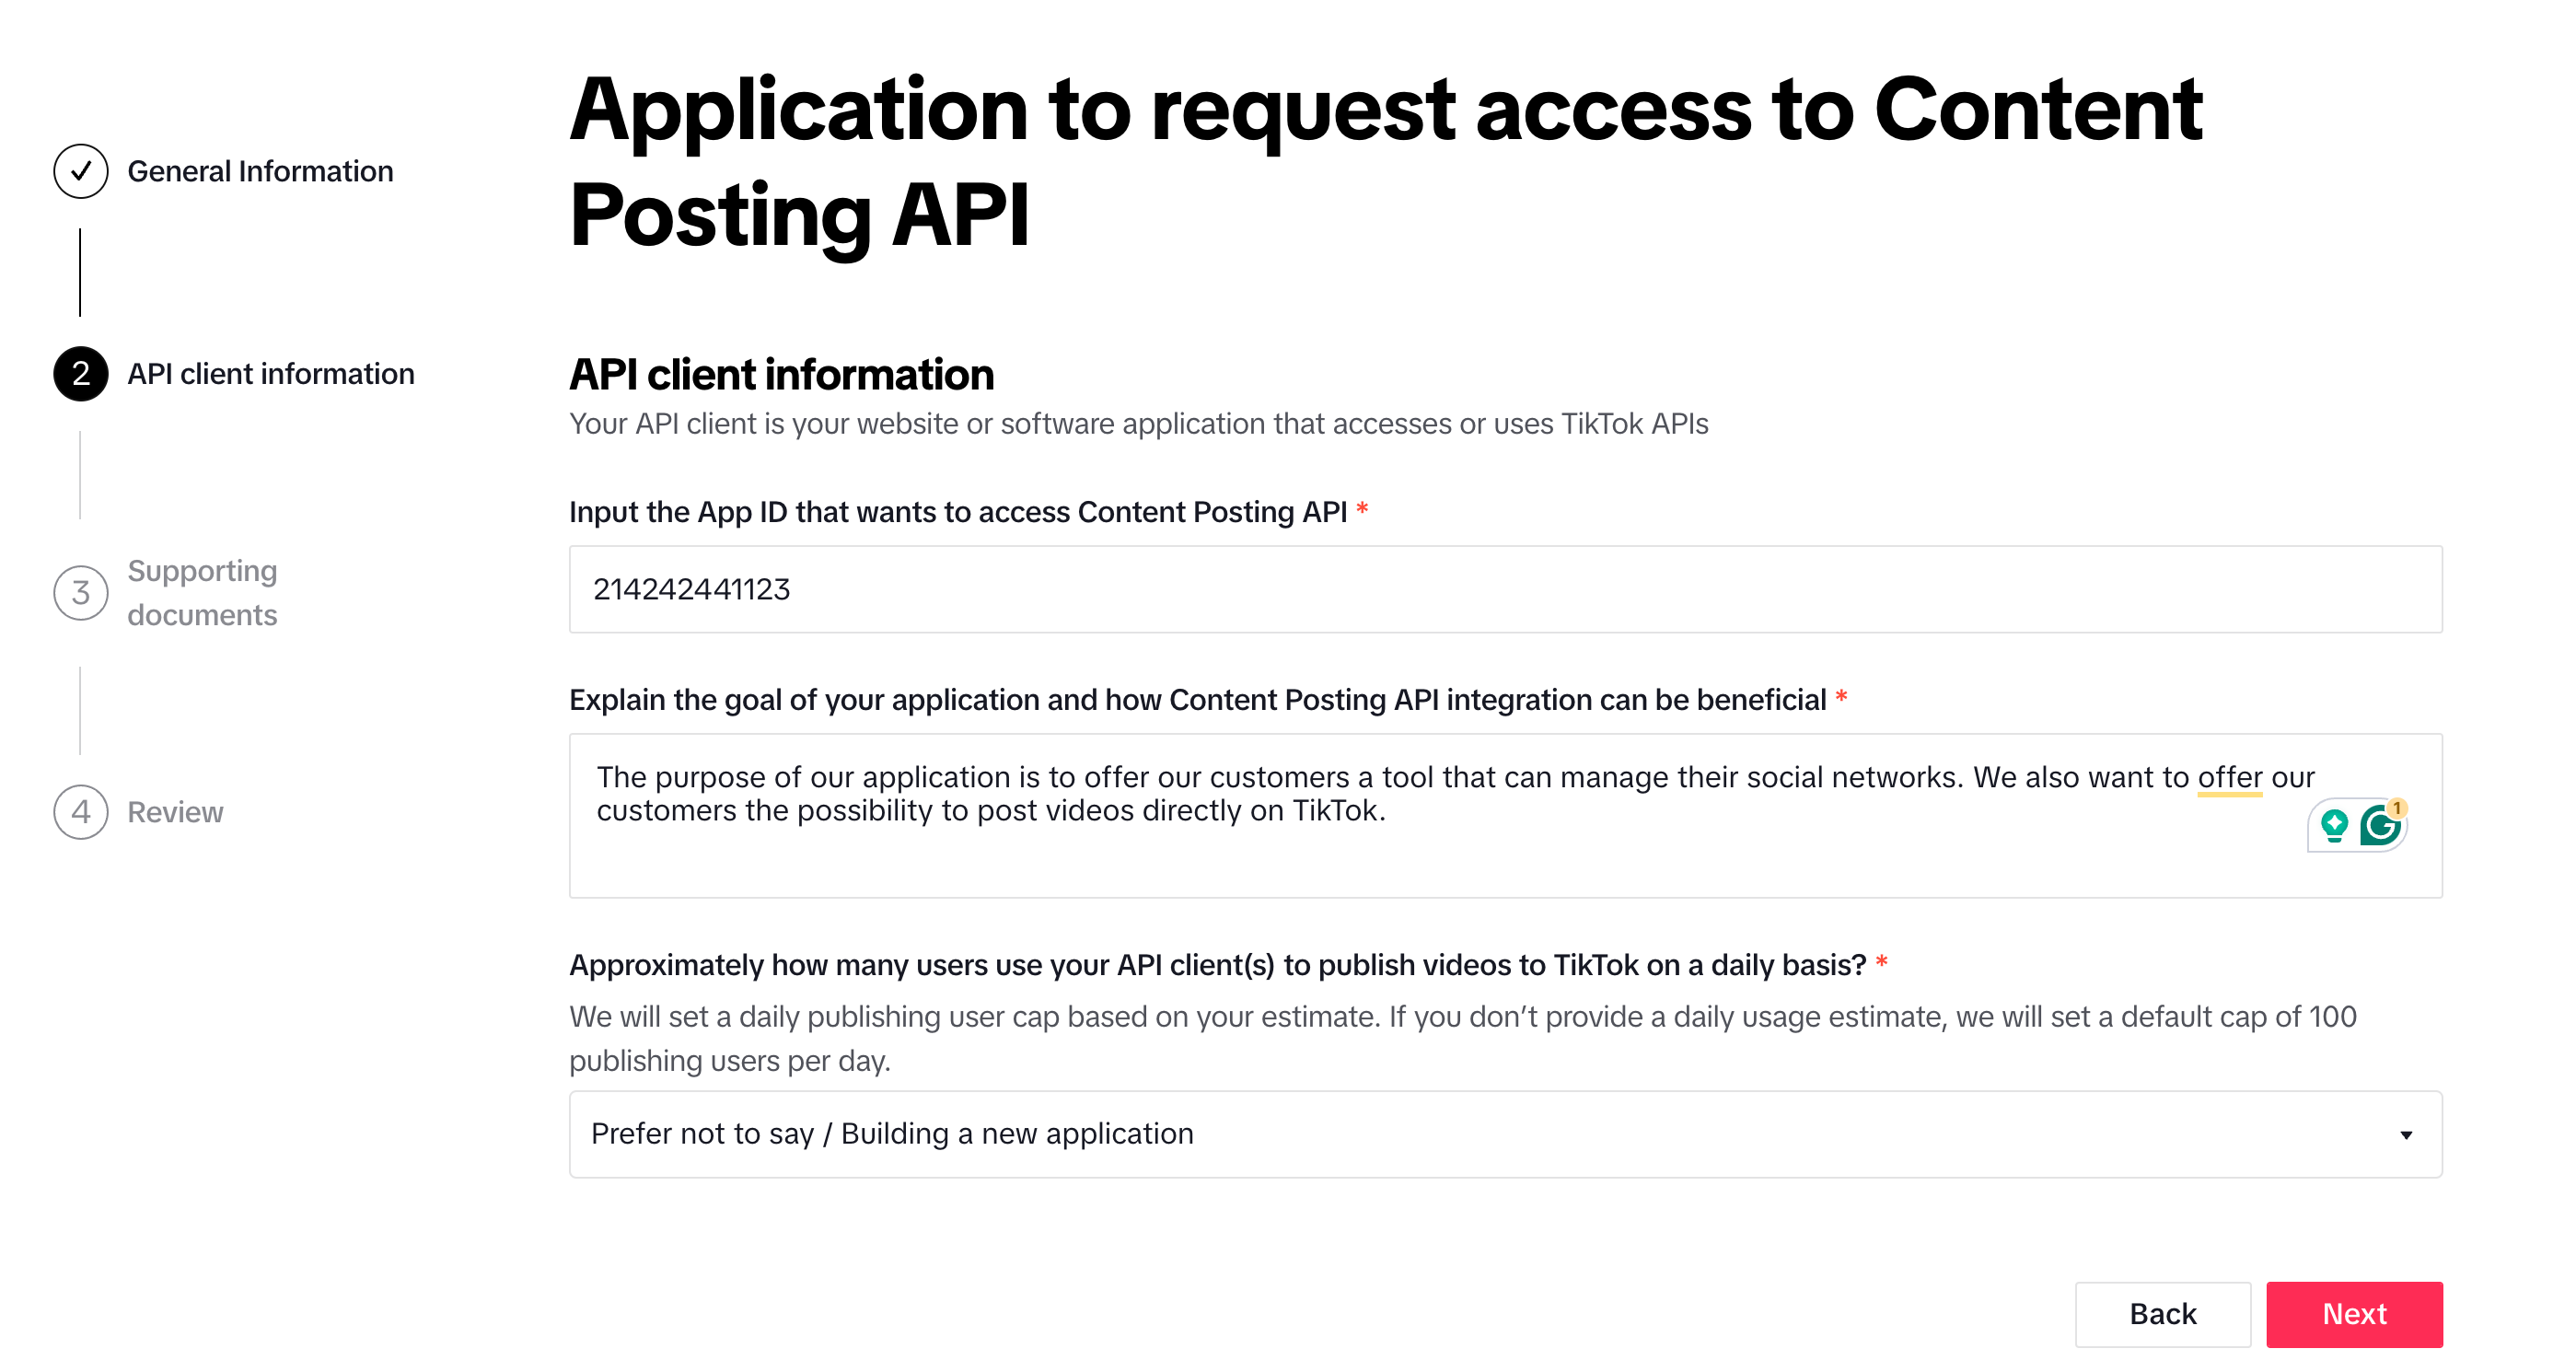
2.2 API client information
There you need to input the APP ID, which you can obtain from the App details section of your TikTok application.
Below, we have listed all some important answers you need to provide:
Explain the goal of your application and how Content Posting API integration can be beneficial
The purpose of our application is to offer our customers a tool that can manage their social networks. We also want to offer our customers the possibility to post videos directly on TikTok.
Approximately how many users use your API client(s) to publish videos to TikTok on a daily basis?
If your application is new or you're unsure what to select, choose Prefer not to say / Building a new application. If you are aware of the number of users you have or expect to have, select from the available options provided.
For example, if you select Less than 100, you will also need to provide an estimate in the daily usage estimate field. Here is an example of what to include for Explain how you determined the daily usage estimate:
At the moment we have 4 customers, the customer base can grow, and each customer can have a maximum of 3 TikTok accounts connected. We would assume a maximum upload of 10 videos per day for each TikTok account.
Screenshots:
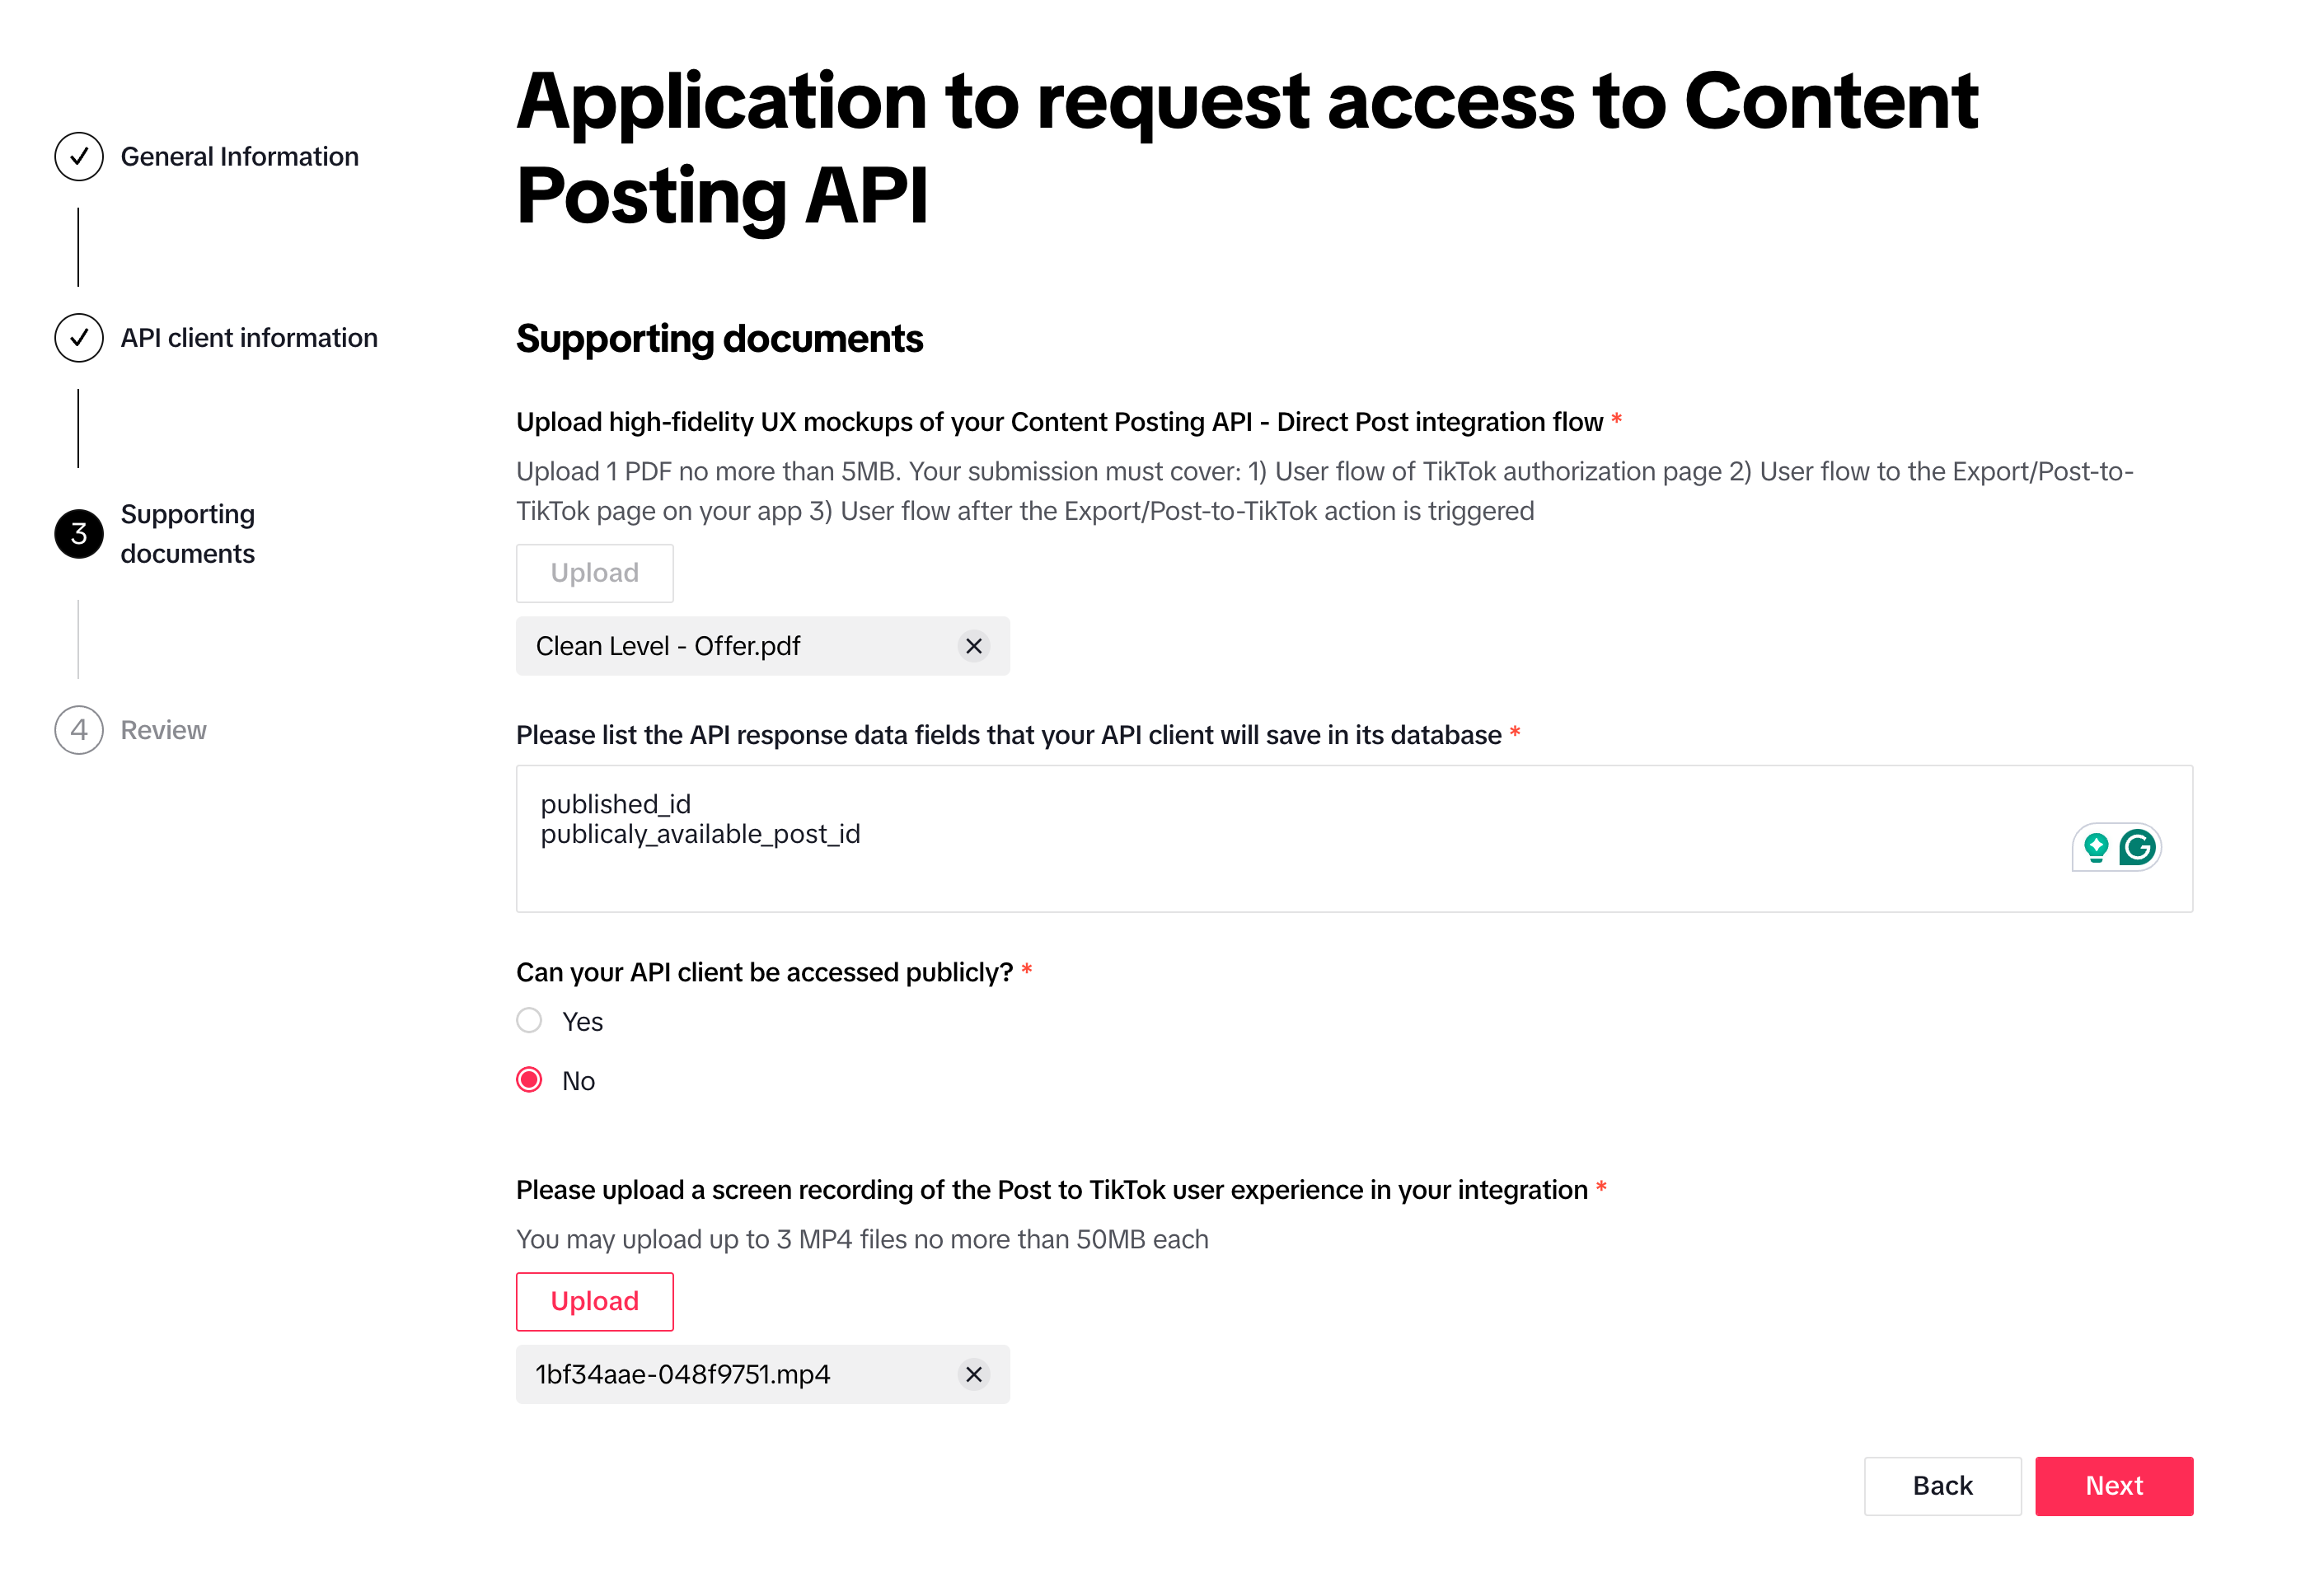
2.3 Supporting documents
TikTok requires you to submit UX mockups in PDF format illustrating the TikTok usage flow in Mixpost. You should also provide a screen recording that demonstrates the TikTok usage flow in Mixpost. This helps ensure that your application meets TikTok's integration standards.
Tips for showcases:
- Create a new, private TikTok account.
- Make a post with private visibility by selecting Only You for the Who can watch this video option.
- Consider creating your showcase in Google Docs, and then export it to PDF format.
Screen recording walkthrough:
Record one continuous screen capture of the real Mixpost app publishing to a real (private) TikTok test account, narrating or captioning each step so the reviewer can match it against TikTok's UX requirements.
Before recording:
- On the TikTok service page in Mixpost, set the Share Type to Direct Post — the TikTok post options only appear in this mode. Enable photo uploads too if you want to demo a photo carousel.
- Optional: in the test account's TikTok app settings, turn off one interaction (e.g. Duet) so you can demonstrate the disabled/greyed-out control.
In the recording, demonstrate the following in order:
- Connect the account — add a TikTok account and accept all permissions on the TikTok authorization screen, then show it connected on the Accounts page.
- Open the composer and select the TikTok account. Show the options panel header with the account avatar and nickname, so it is clear which account will receive the post.
- Who can view this post — show the selector has no default value (it reads "Select who can view this post"), open it to reveal the privacy options returned by TikTok, and select one manually.
- Allow users to — show Comment / Duet / Stitch are unchecked by default; show that the interaction you disabled appears greyed out with the tooltip "Turned off in your TikTok account settings."; then tick one to show it is a deliberate choice.
- Content Disclosure Setting — show it is off by default, then turn it on to reveal Your brand and Branded content:
- Tick Your brand → the prompt reads "Your video will be labeled as 'Promotional content'."
- Tick Branded content → the prompt changes to "Your video will be labeled as 'Paid partnership'."
- Branded content vs. private visibility — with Branded content checked, show that Only you is disabled in the privacy selector; conversely, set privacy to Only you and show the Branded content checkbox becomes disabled with the warning "Branded content visibility cannot be set to private."
- Consent declaration — show the declaration above the publish button and that its wording changes: Music Usage Confirmation on its own, or Branded Content Policy and Music Usage Confirmation when branded content is selected.
- Preview & editing — show the post preview, and edit the caption to show that preset text is editable and no watermark is added.
- Publish — for the post you actually publish, select Only You visibility, show the "it may take a few minutes…" processing notice. then click Post now.
- Go live — open the TikTok account and show the published post on the profile.
If photo uploads are enabled, record a short second pass with a photo carousel showing that Duet and Stitch are hidden (only Allow Comment remains) and the Auto-add music option appears.
While your app is pending approval, TikTok only allows posts with Only You (private) visibility. Keep Content Disclosure off (or use Your brand only) for the post you actually publish, since Branded content cannot be set to private.
Examples:
- Example of PDF
To avoid rejection, do not submit our PDF example. We recommend preparing your own PDF showcase for submission.
Below, we have listed all some important answers you need to provide:
Please list the API response data fields that your API client will save in its database
published_id
publicaly_available_post_id
Can your API client be accessed publicly?
If you want them to test your application live, select Yes. In this case, you will need to provide access to the demo version, including the URL for opening your application, the email and password they should use, and a brief guide on how to schedule a post on TikTok. Here is an example:
URL: https://example.com
Email: example@example.com
Password: password!

1. Inside my app, click "Accounts" from the left menu.
2. Click on the "Add Account" button.
3. A login dialog will open, click on "TikTok".
4. TikTok authorization will open in a new tab.
5. Login with your TikTok account and accept all the permissions.
6. Now the TikTok should be connected to my app.
7. Click on the top "CREATE POST" button from the left menu.
8. Select your TikTok account you want to post on.
9. Write whatever you want to share with your audience.
10. On the right bottom, click on the "Post now" button or you can pick a time to schedule. If you click "Post now" the post should be published in a minute.
If you select No, you will need to attach a screen recording demonstrating how to use the application. Video example.
Screenshots:
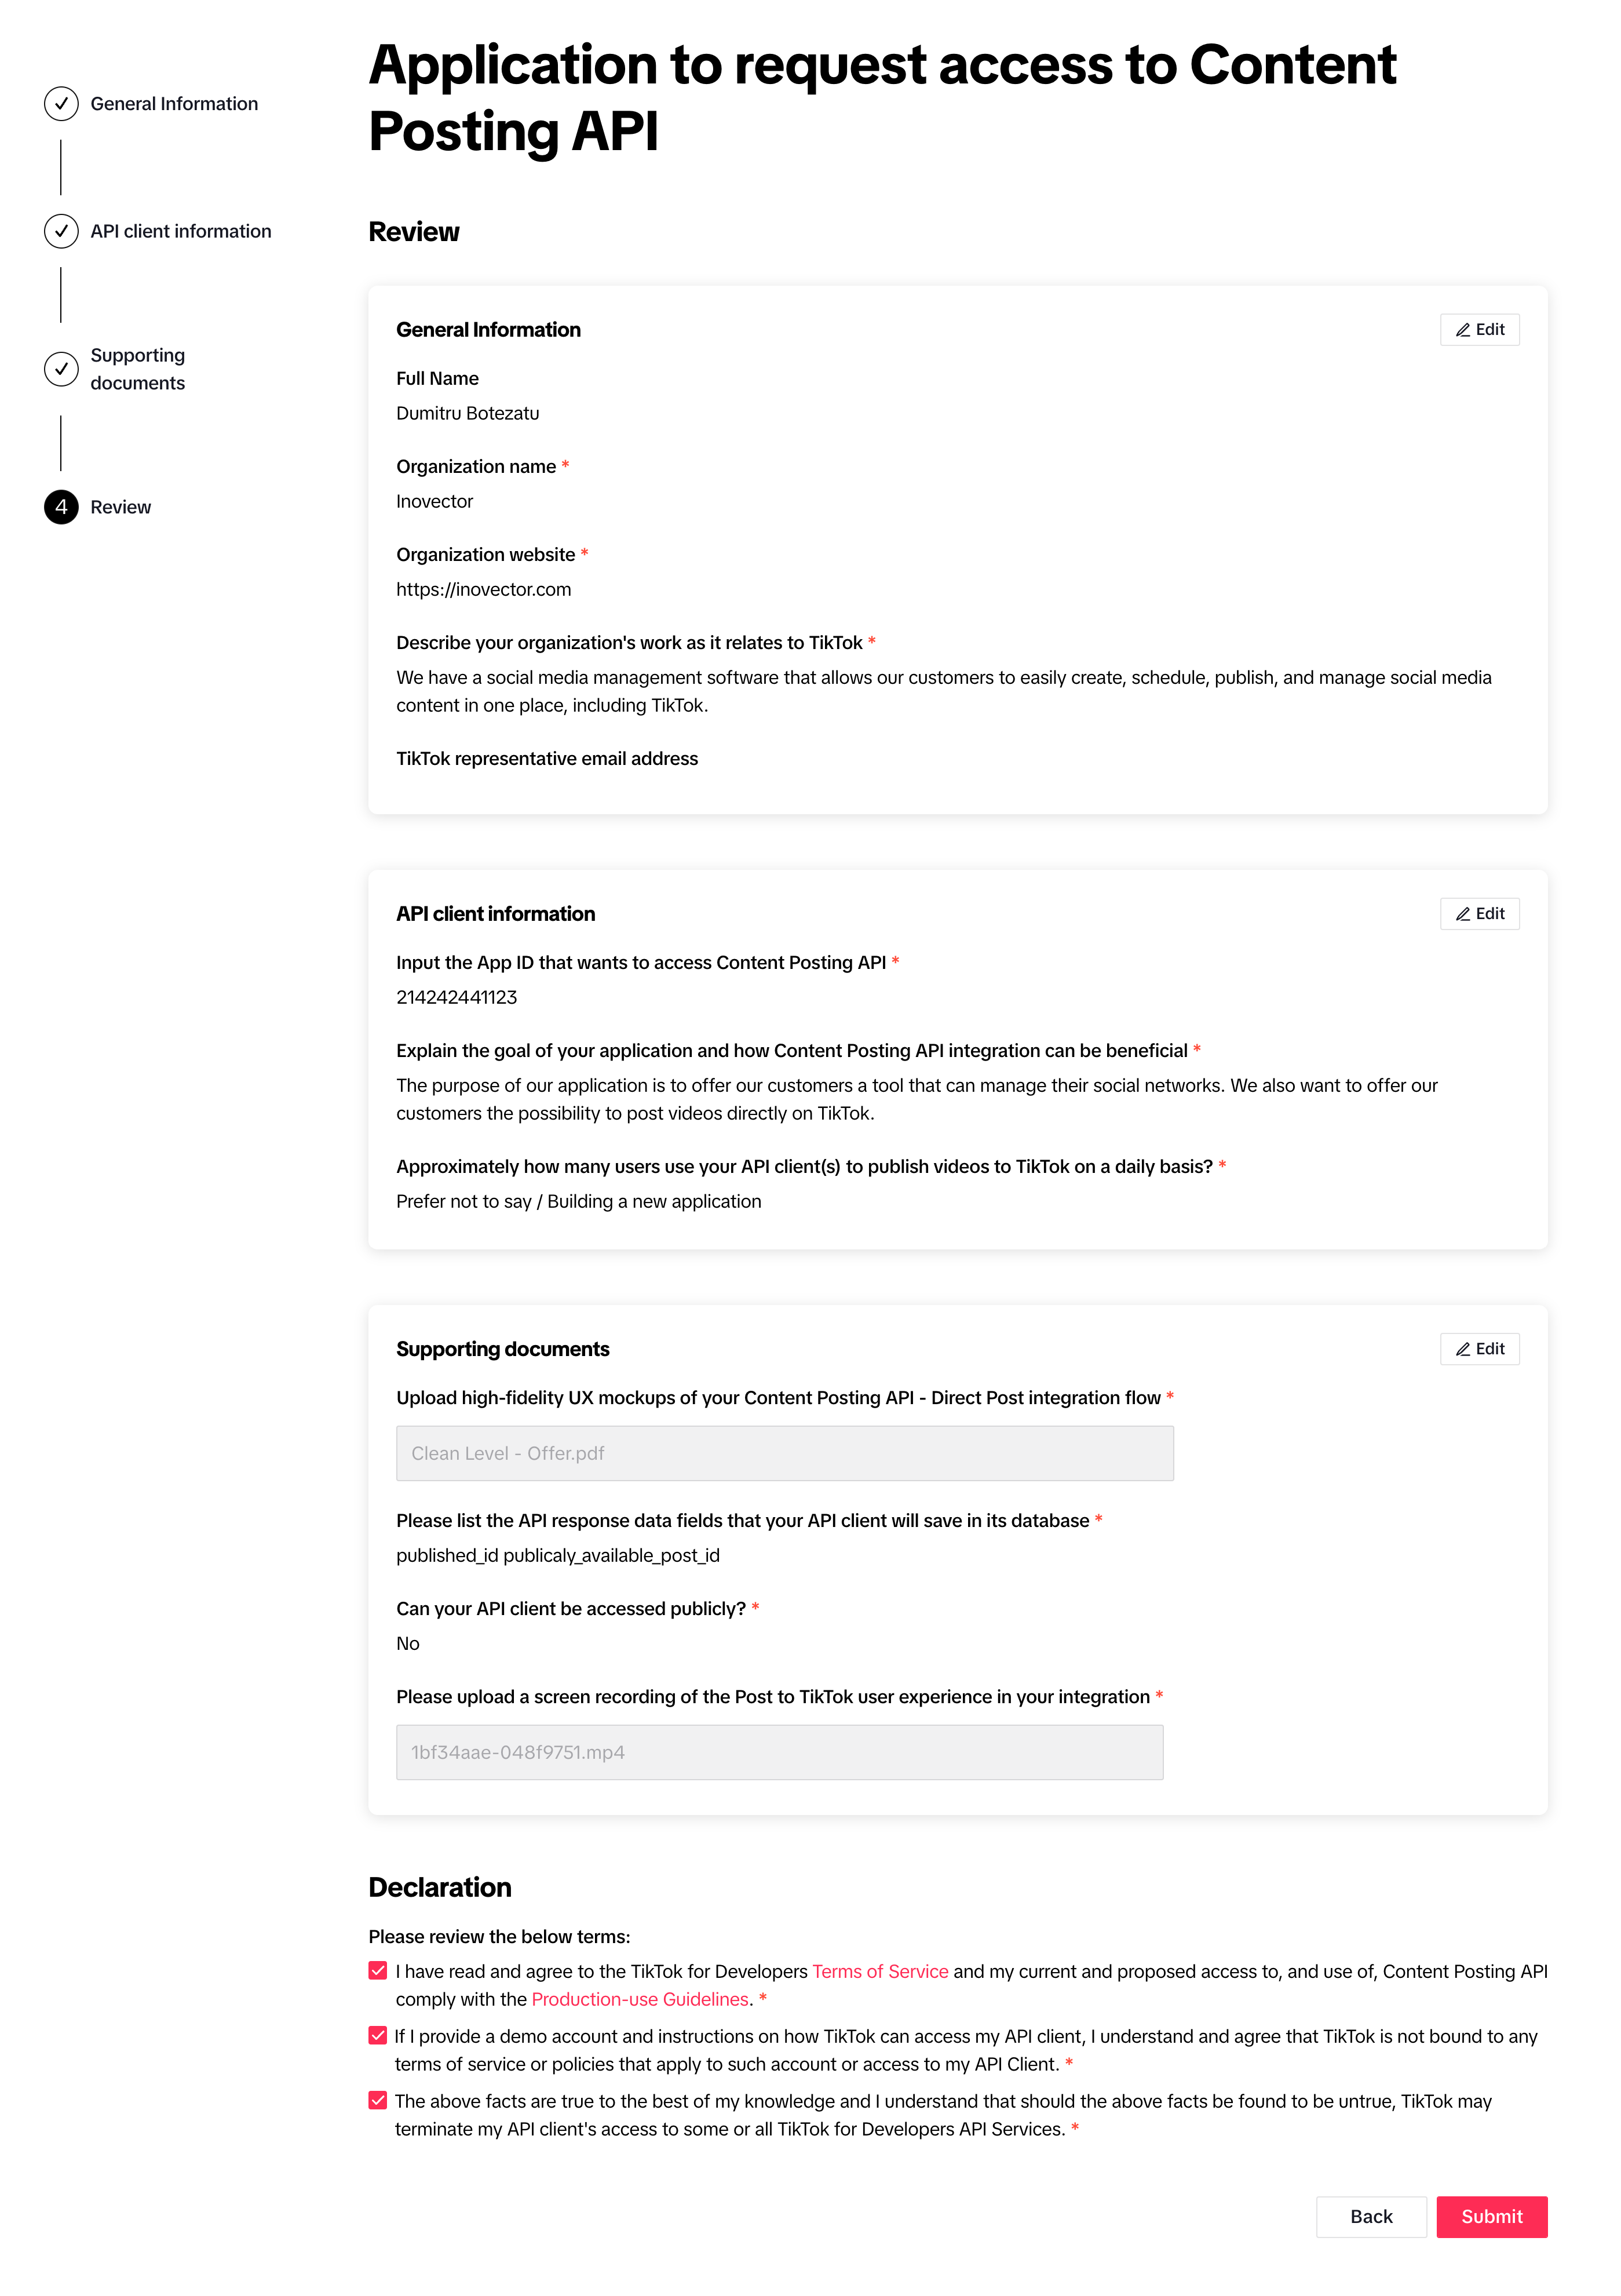
2.4 Review
Double-check that all data has been entered correctly, then Submit for review.
Screenshots:
3. Done
It may take 2-4 weeks to receive a response from TikTok team. You will receive an email from them, or you can check the status of the TikTok application in your developer account.