TikTok Integration
If you want to schedule posts on TikTok, you'll need to create and configure an app for this platform. This guide will walk you through the setup process.
1. Create a Developer account
The first step in creating a TikTok app is to create a developer account on the TikTok developer platform. To do this, go to the TikTok developer platform website and sign up for an account.
2. Create a new app
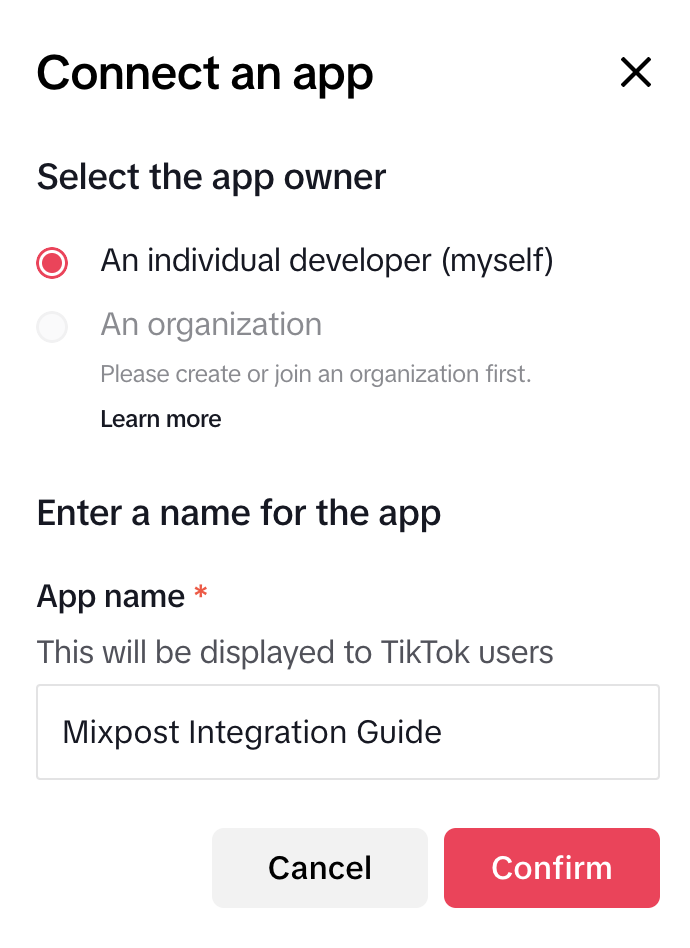
Once you have a developer account, go to the TikTok Developer Dashboard and click Connect an App in the top right corner.
Screenshots:

App details
Basic information
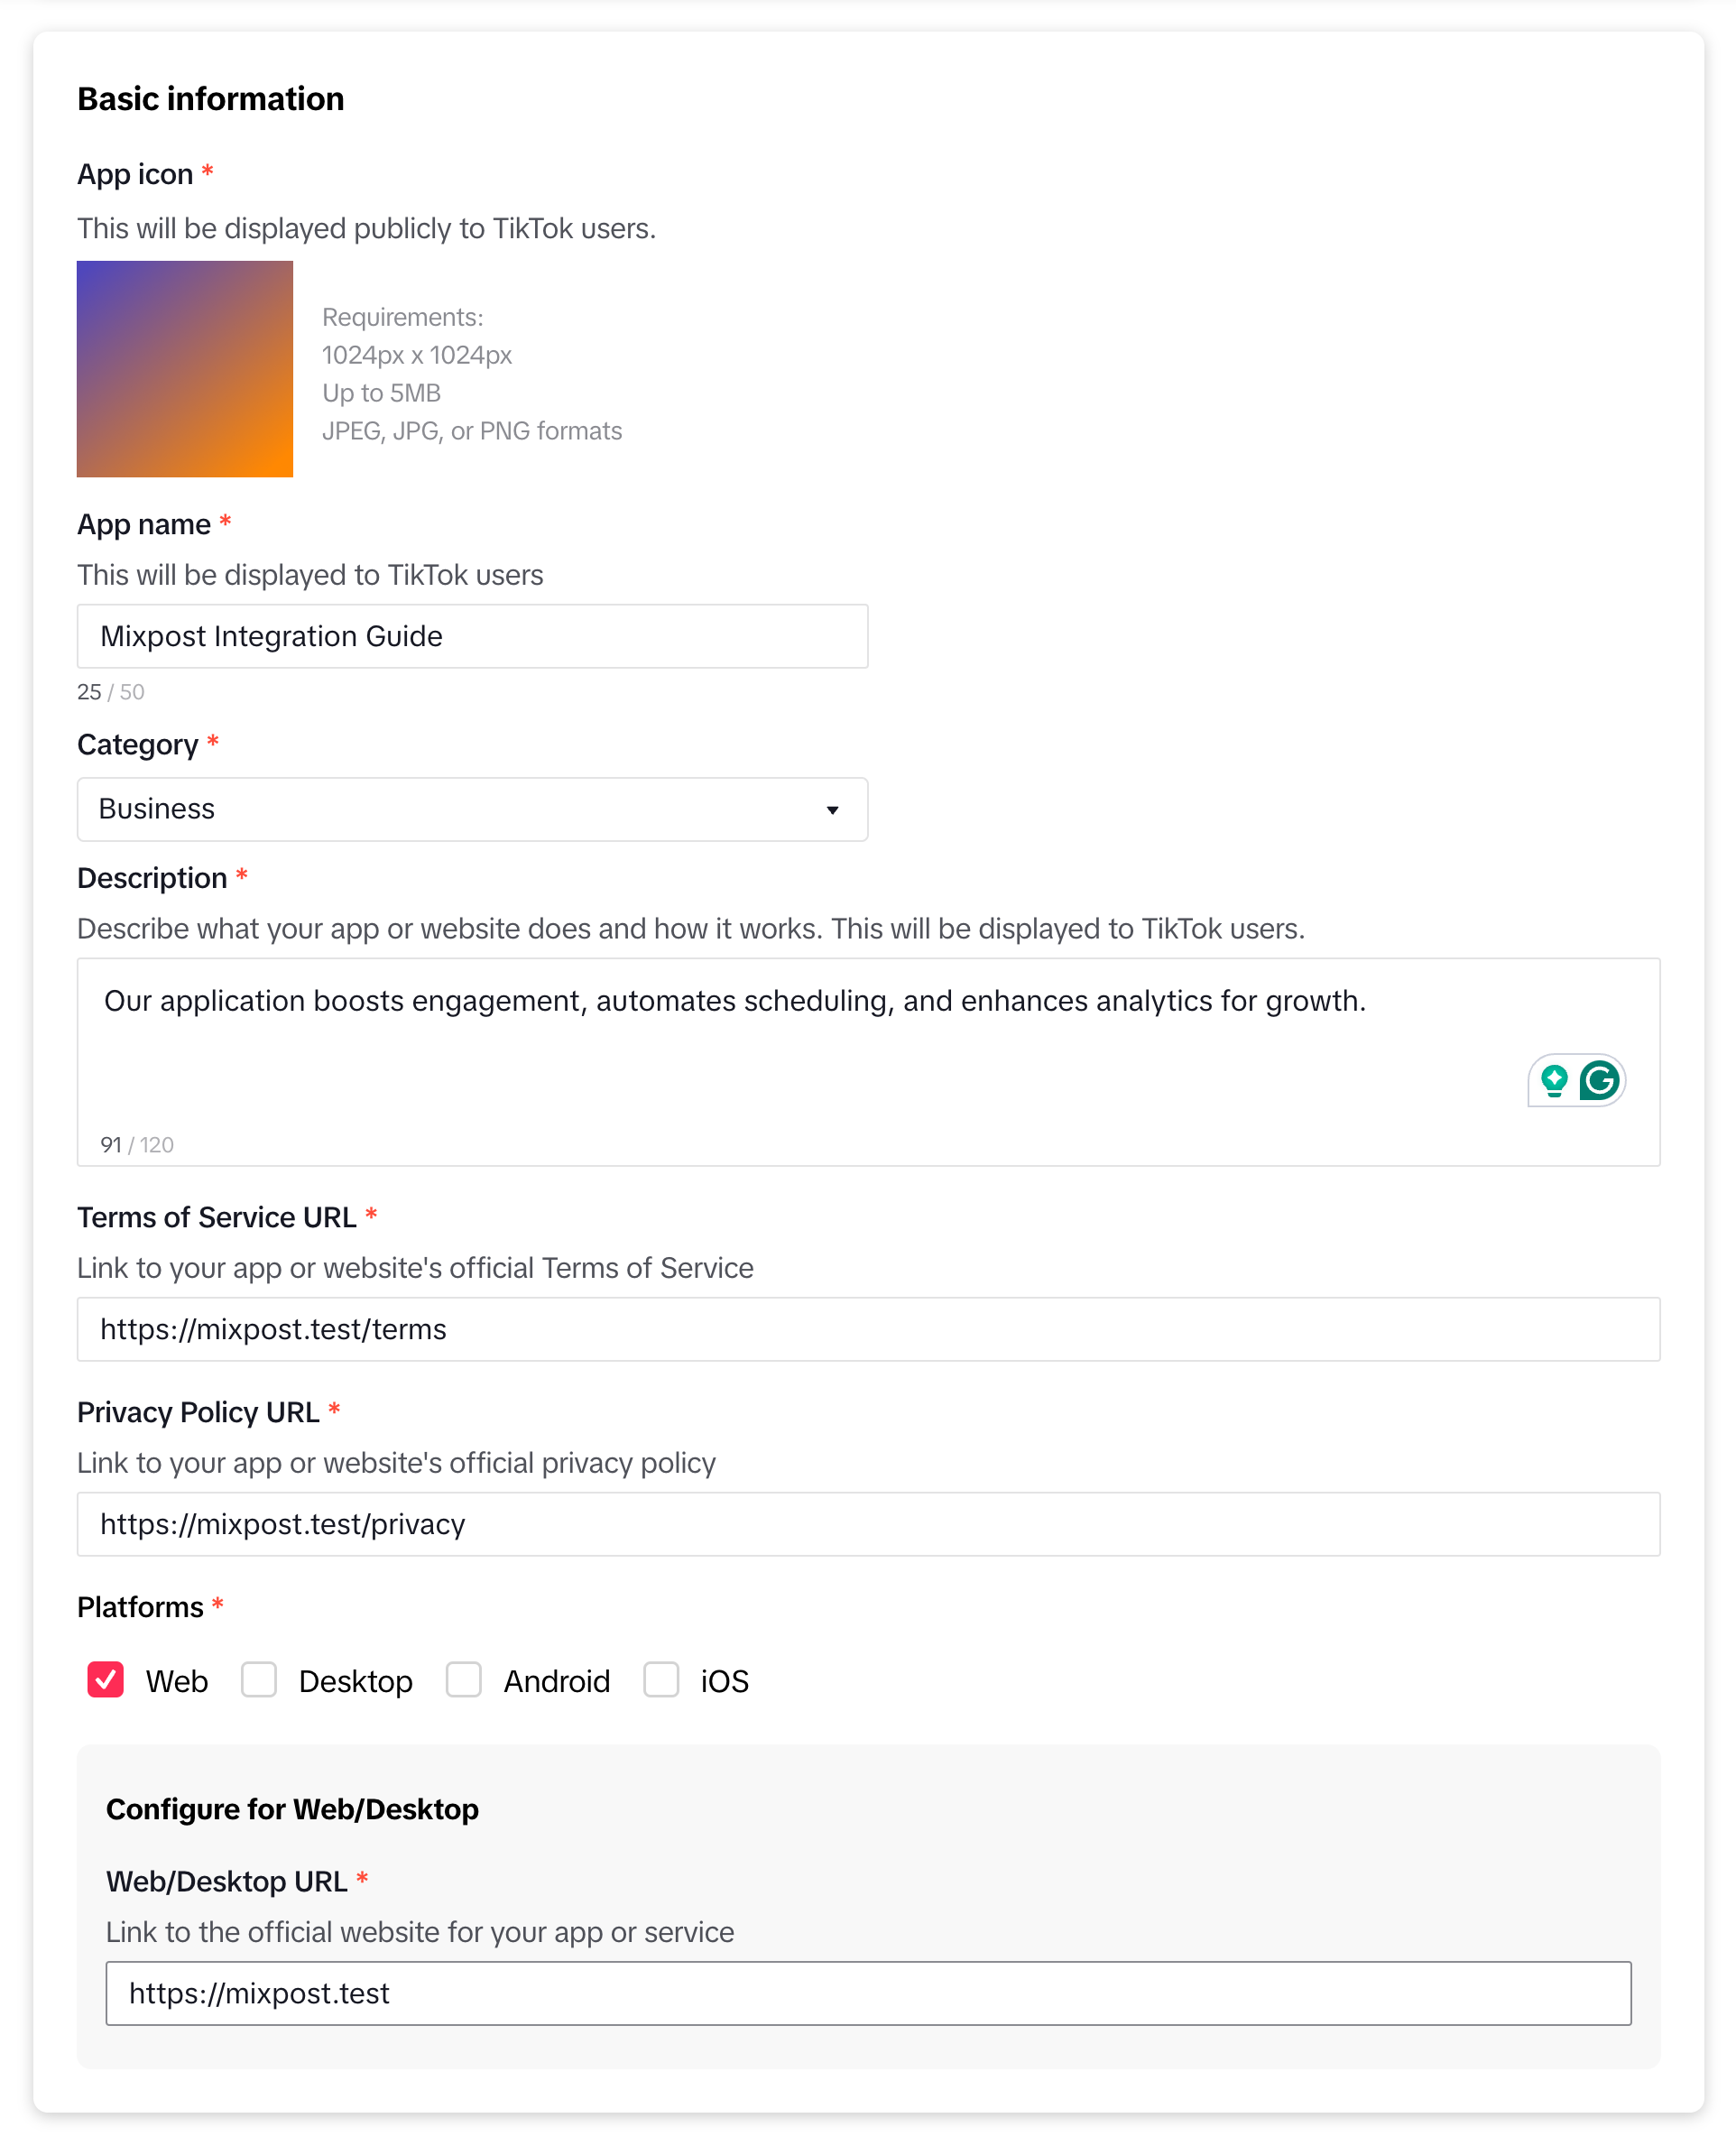
Fill out the required information, such as your app name, app icon, category.
For the Description field, consider using the following text:
Our application boosts engagement, automates scheduling, and enhances analytics for growth.
TOS
TikTok requires you to provide Terms of Service URL and Privacy Policy URL. It may require you to verify the domain through one of the available options (DNS record or signature file).
With Mixpost you can generate Terms of use and Privacy policy pages in seconds. More details. Generation TOS pages is only available for Pro and Enterprise packages.
Website URL
Choose Web option for the Platform and enter your website URL. It may require you to verify the domain through one of the available options (DNS record or signature file).
This note is relevant only if you plan to proceed with the App Review process.
TikTok requires a fully developed website to approve your application; they do not approve it for private use or similar purposes. You might find platforms like Unicorn Platform helpful for creating a website with at least 2-3 pages in minutes, but you’re free to choose any tool that suits your needs. Ideally, your Mixpost application should be hosted on a subdomain, while the marketing page is located on the main domain.
Screenshots:
App products
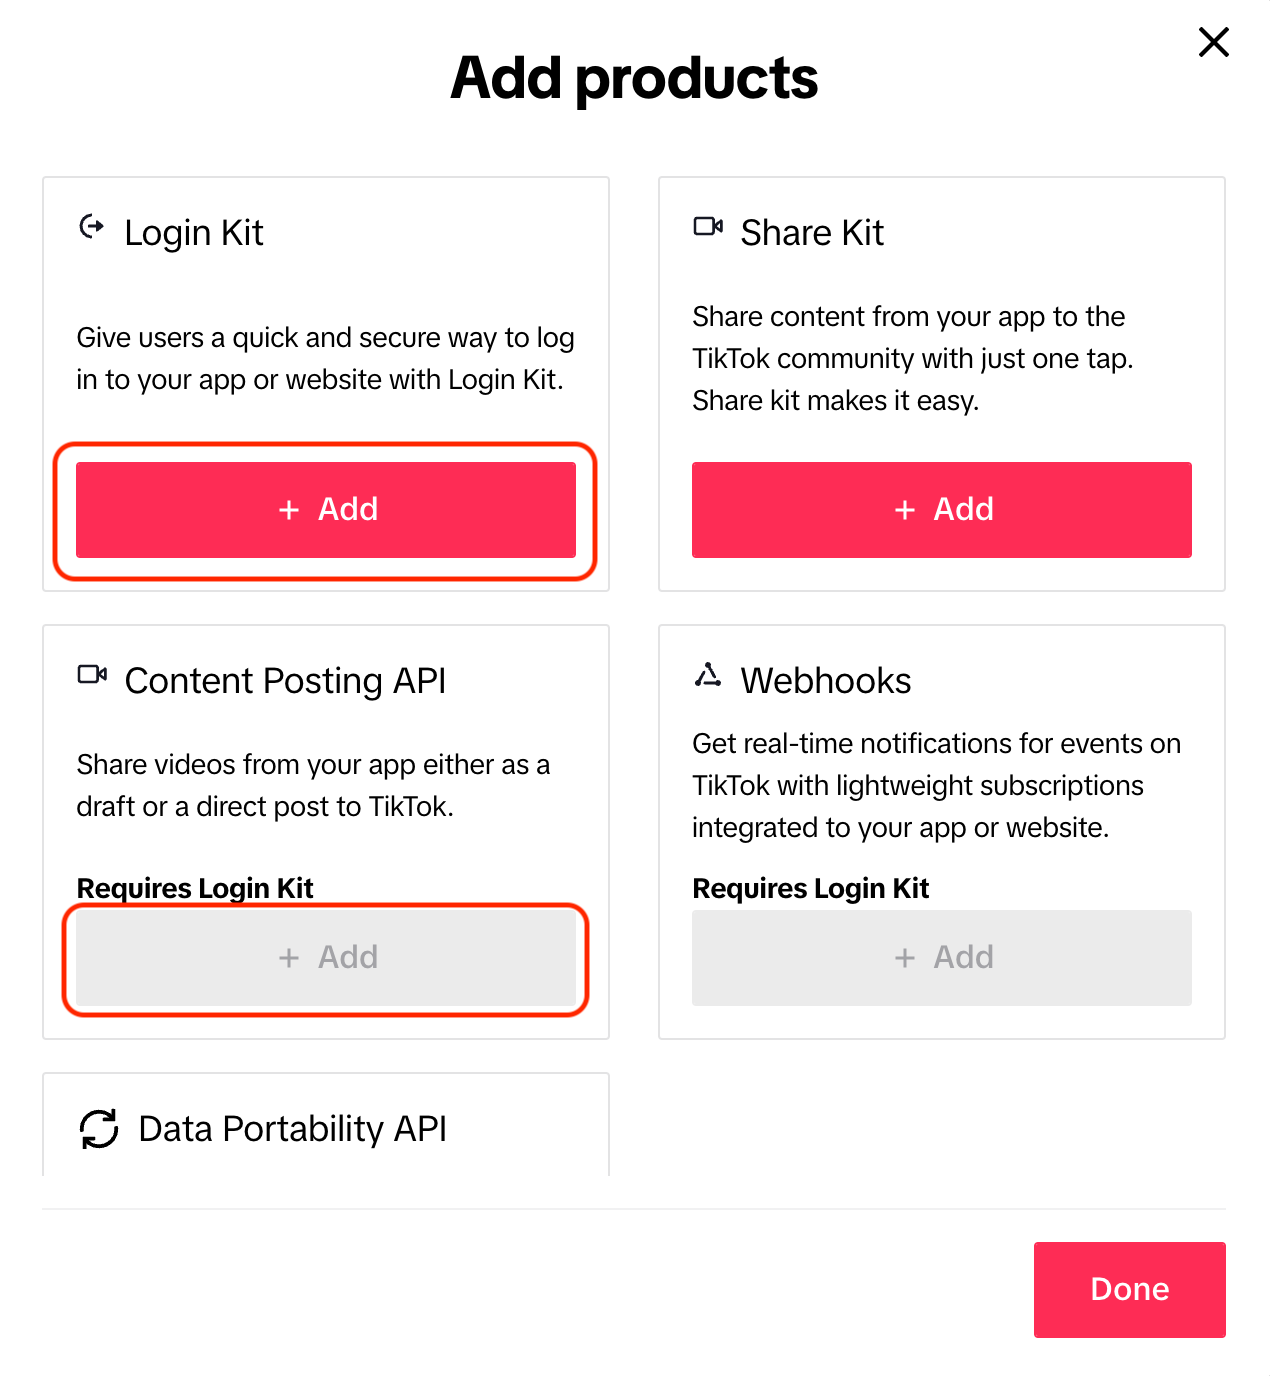
Next, in the left sidebar, click on Add products button and add the following products:
- Login Kit
- Content Posting API
Screenshots:
Configure redirect URI
Scroll to the Login Kit -> Redirect URI section and add the following redirect URI:
https://example.com/<MIXPOST_CORE_PATH>/callback/tiktok
Replace <MIXPOST_CORE_PATH> with your specified MIXPOST_CORE_PATH. If you have not altered the MIXPOST_CORE_PATH environment variable, use the default value: mixpost.
Note: For the Lite package, use the value mixpost, if this integration is supported in Lite.
Screenshots:

Direct Post
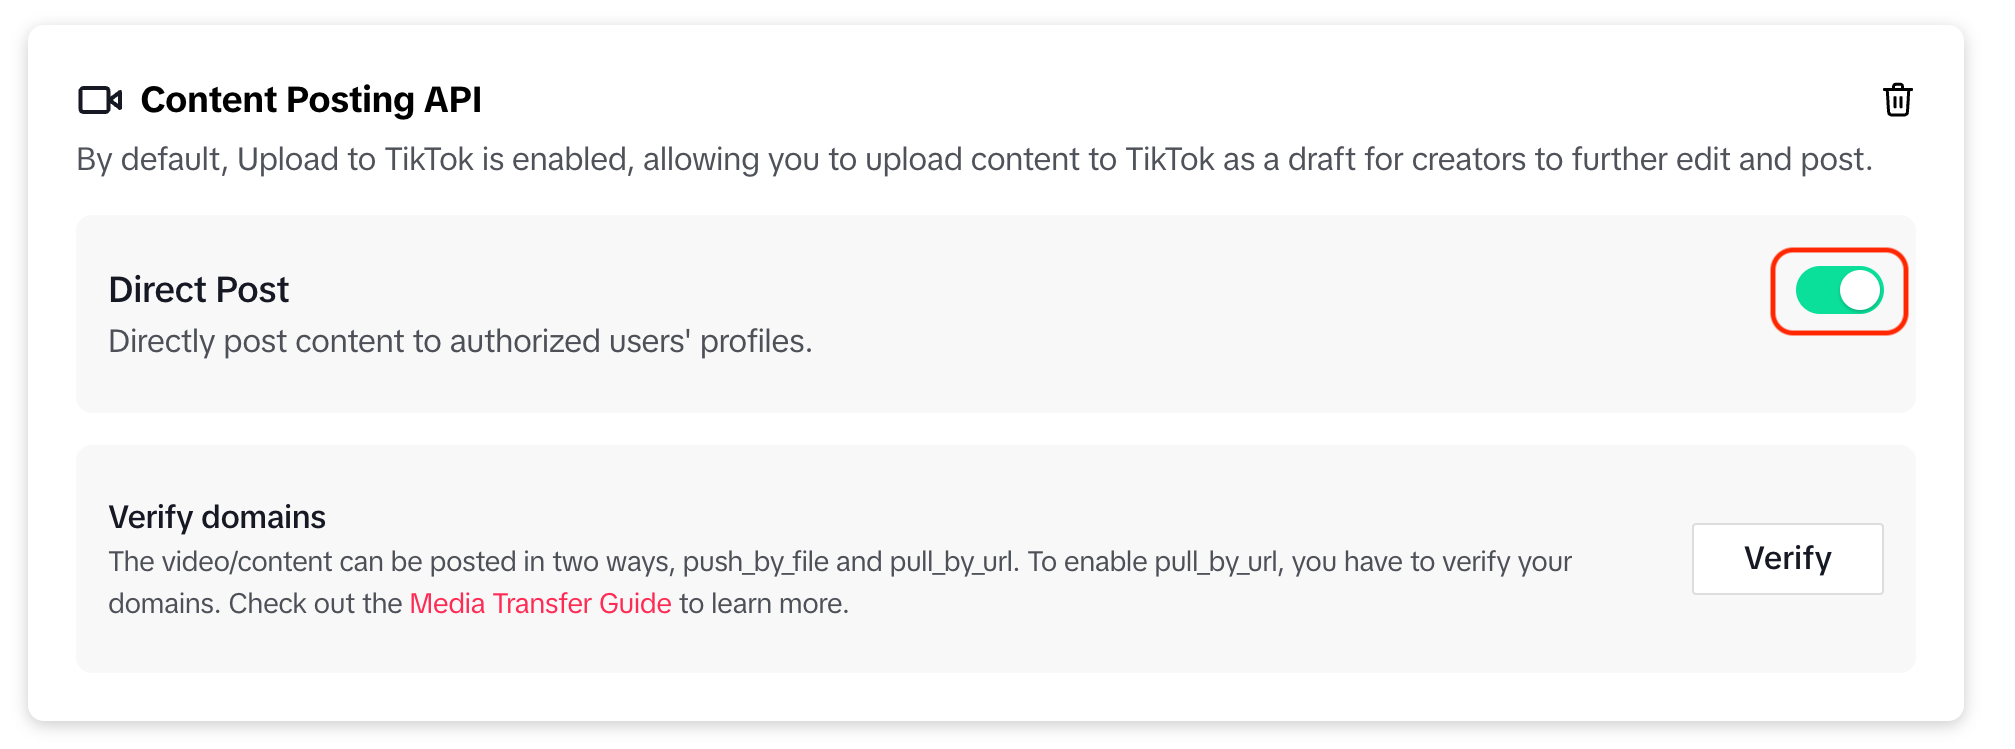
By default, TikTok allows you to upload content as drafts, enabling creators to edit further before posting. If you prefer that scheduled posts be published automatically, enable the Direct Post option in the Content Posting API section.
By enabling Direct Post TikTok may require an additional audit of your application.
Screenshots:
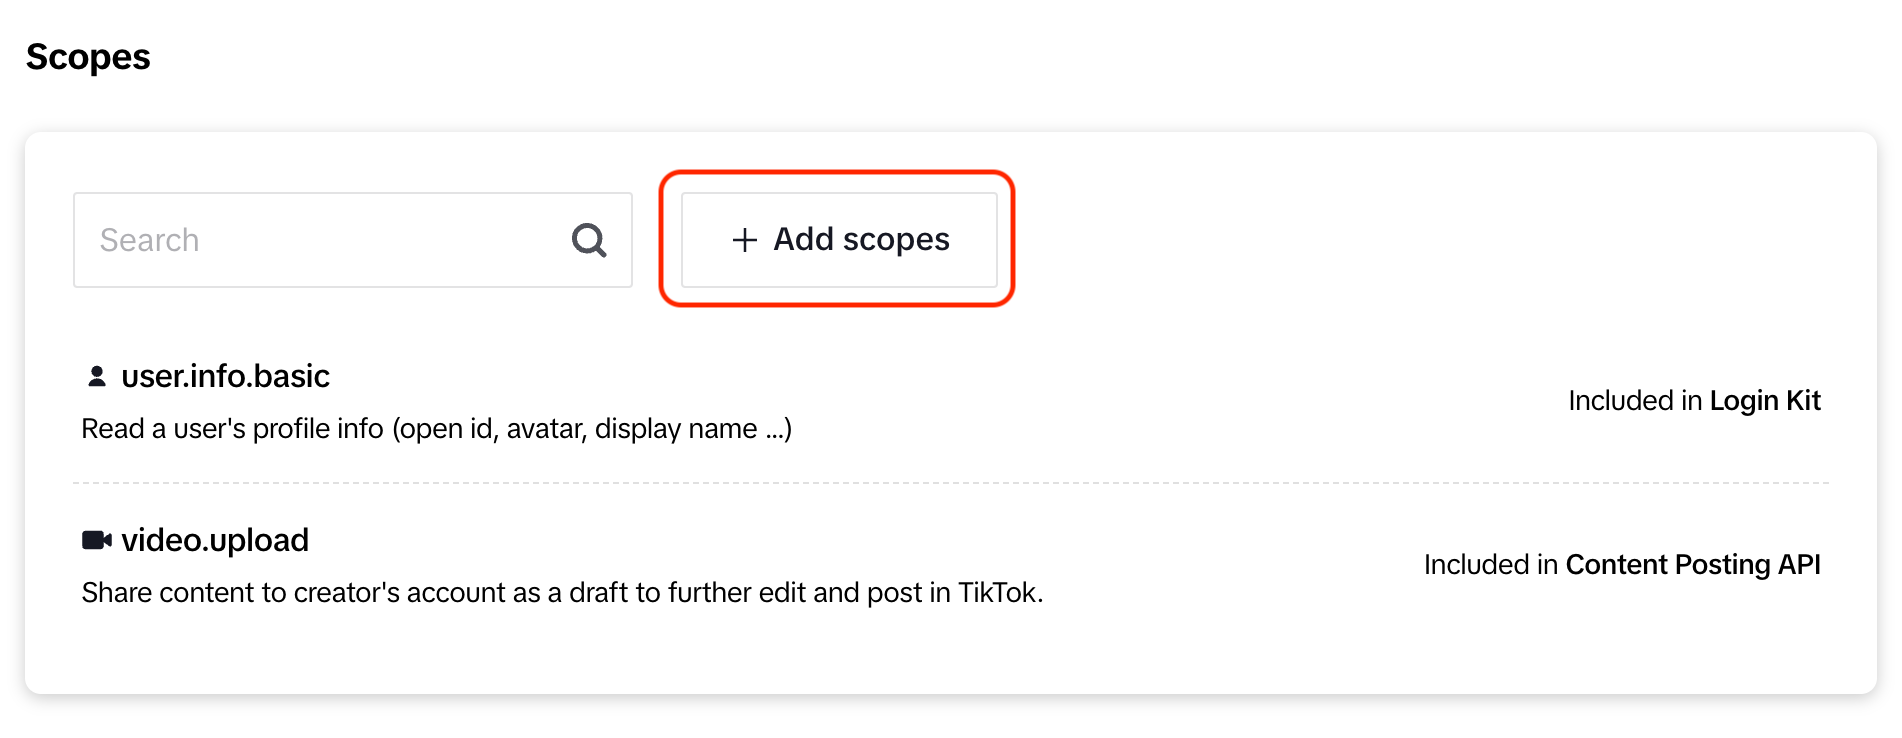
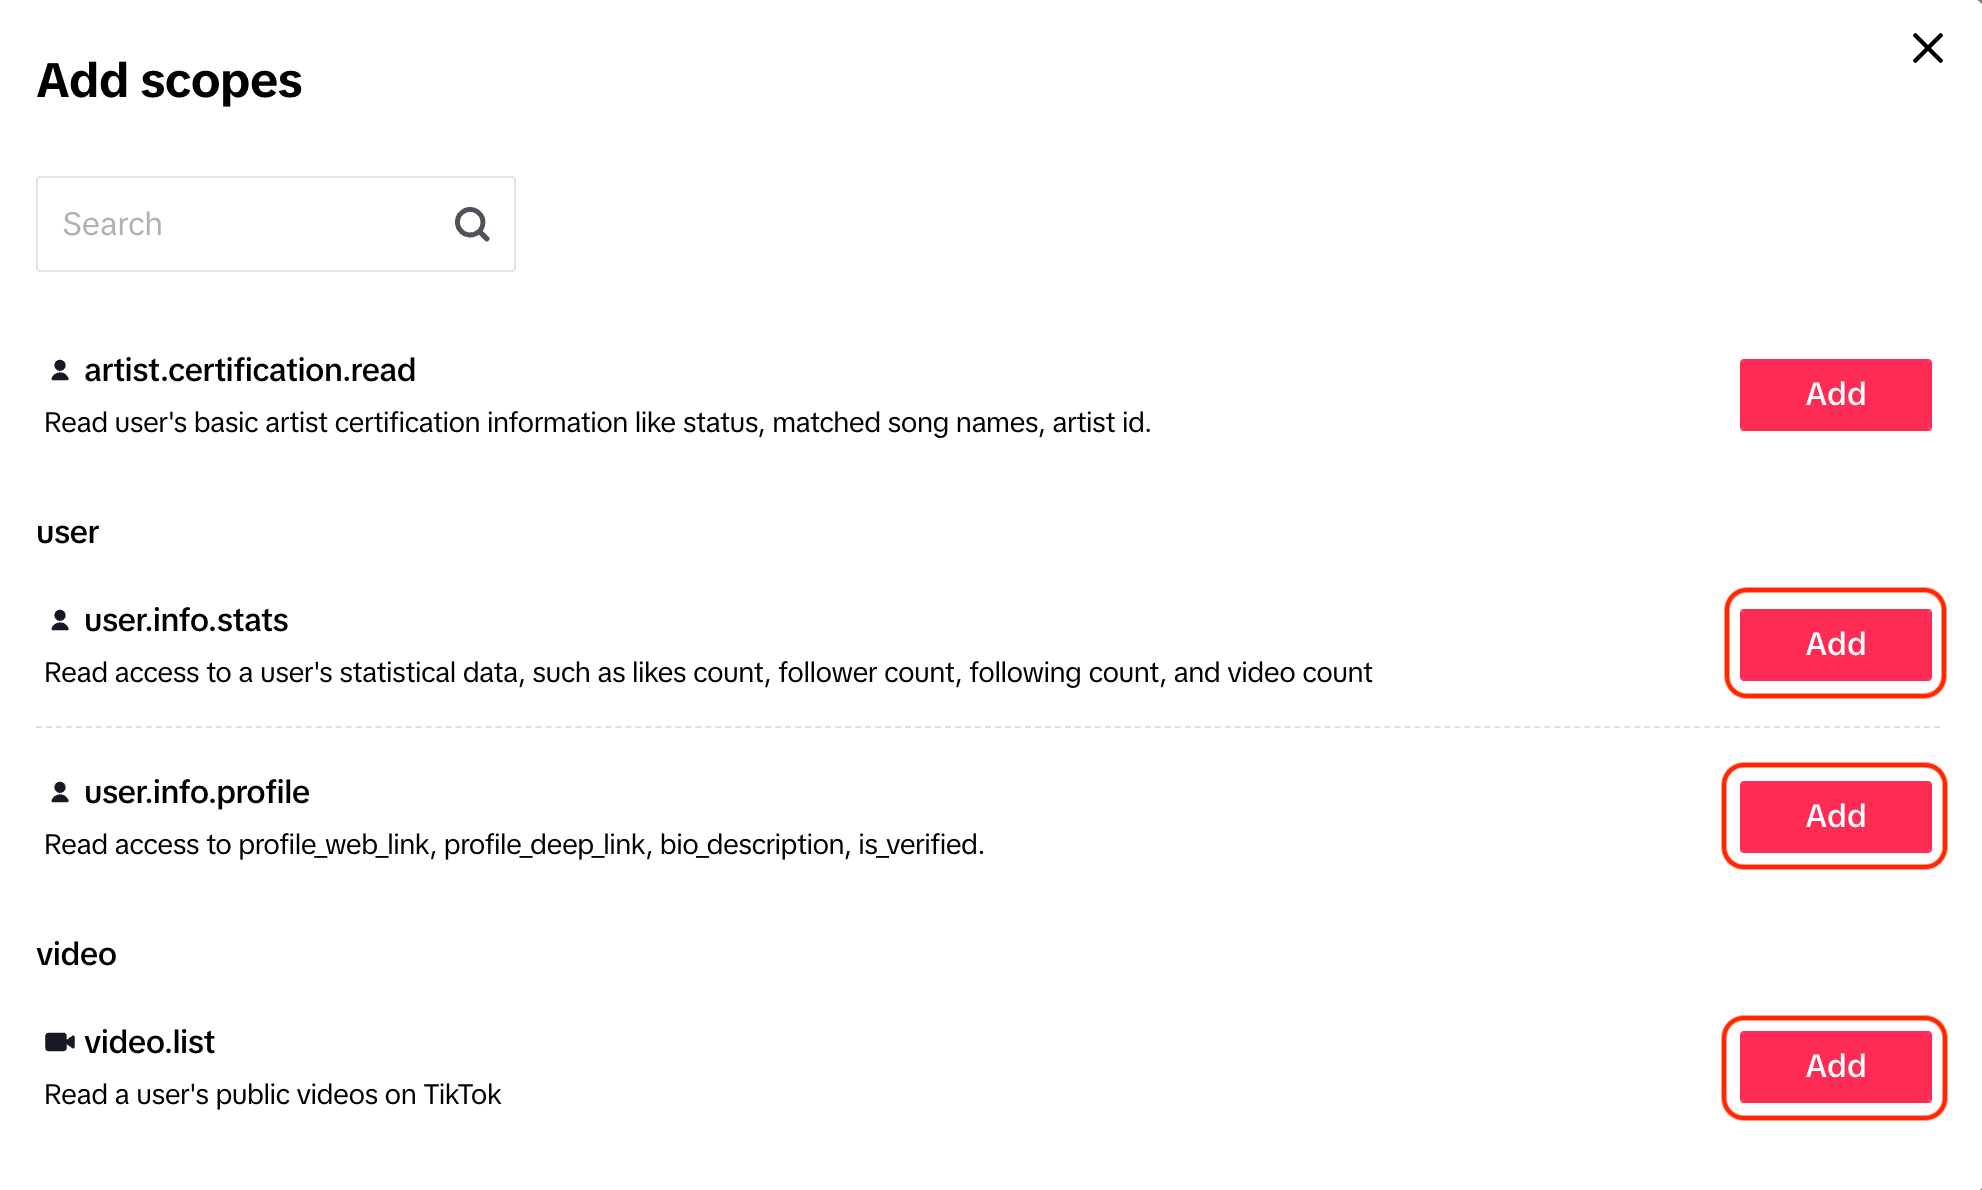
Add scopes
Click on Edit scopes from the section Scopes and make sure the following scopes are enabled:
user.info.basicuser.info.statsuser.info.profilevideo.listvideo.uploadvideo.publish(active only if the Direct Post option is enabled)
Double-check all configurations for accuracy, then Save the changes.
Screenshots:
3. Add a Sandbox
Add Sandbox if:
- You need to test the integration before requesting an App Review.
- You hold a Mixpost Pro license and wish to use TikTok integration internally.
The limitations of Sandbox mode:
- You can add up to 10 TikTok test accounts.
- Direct Post functionality is not available.
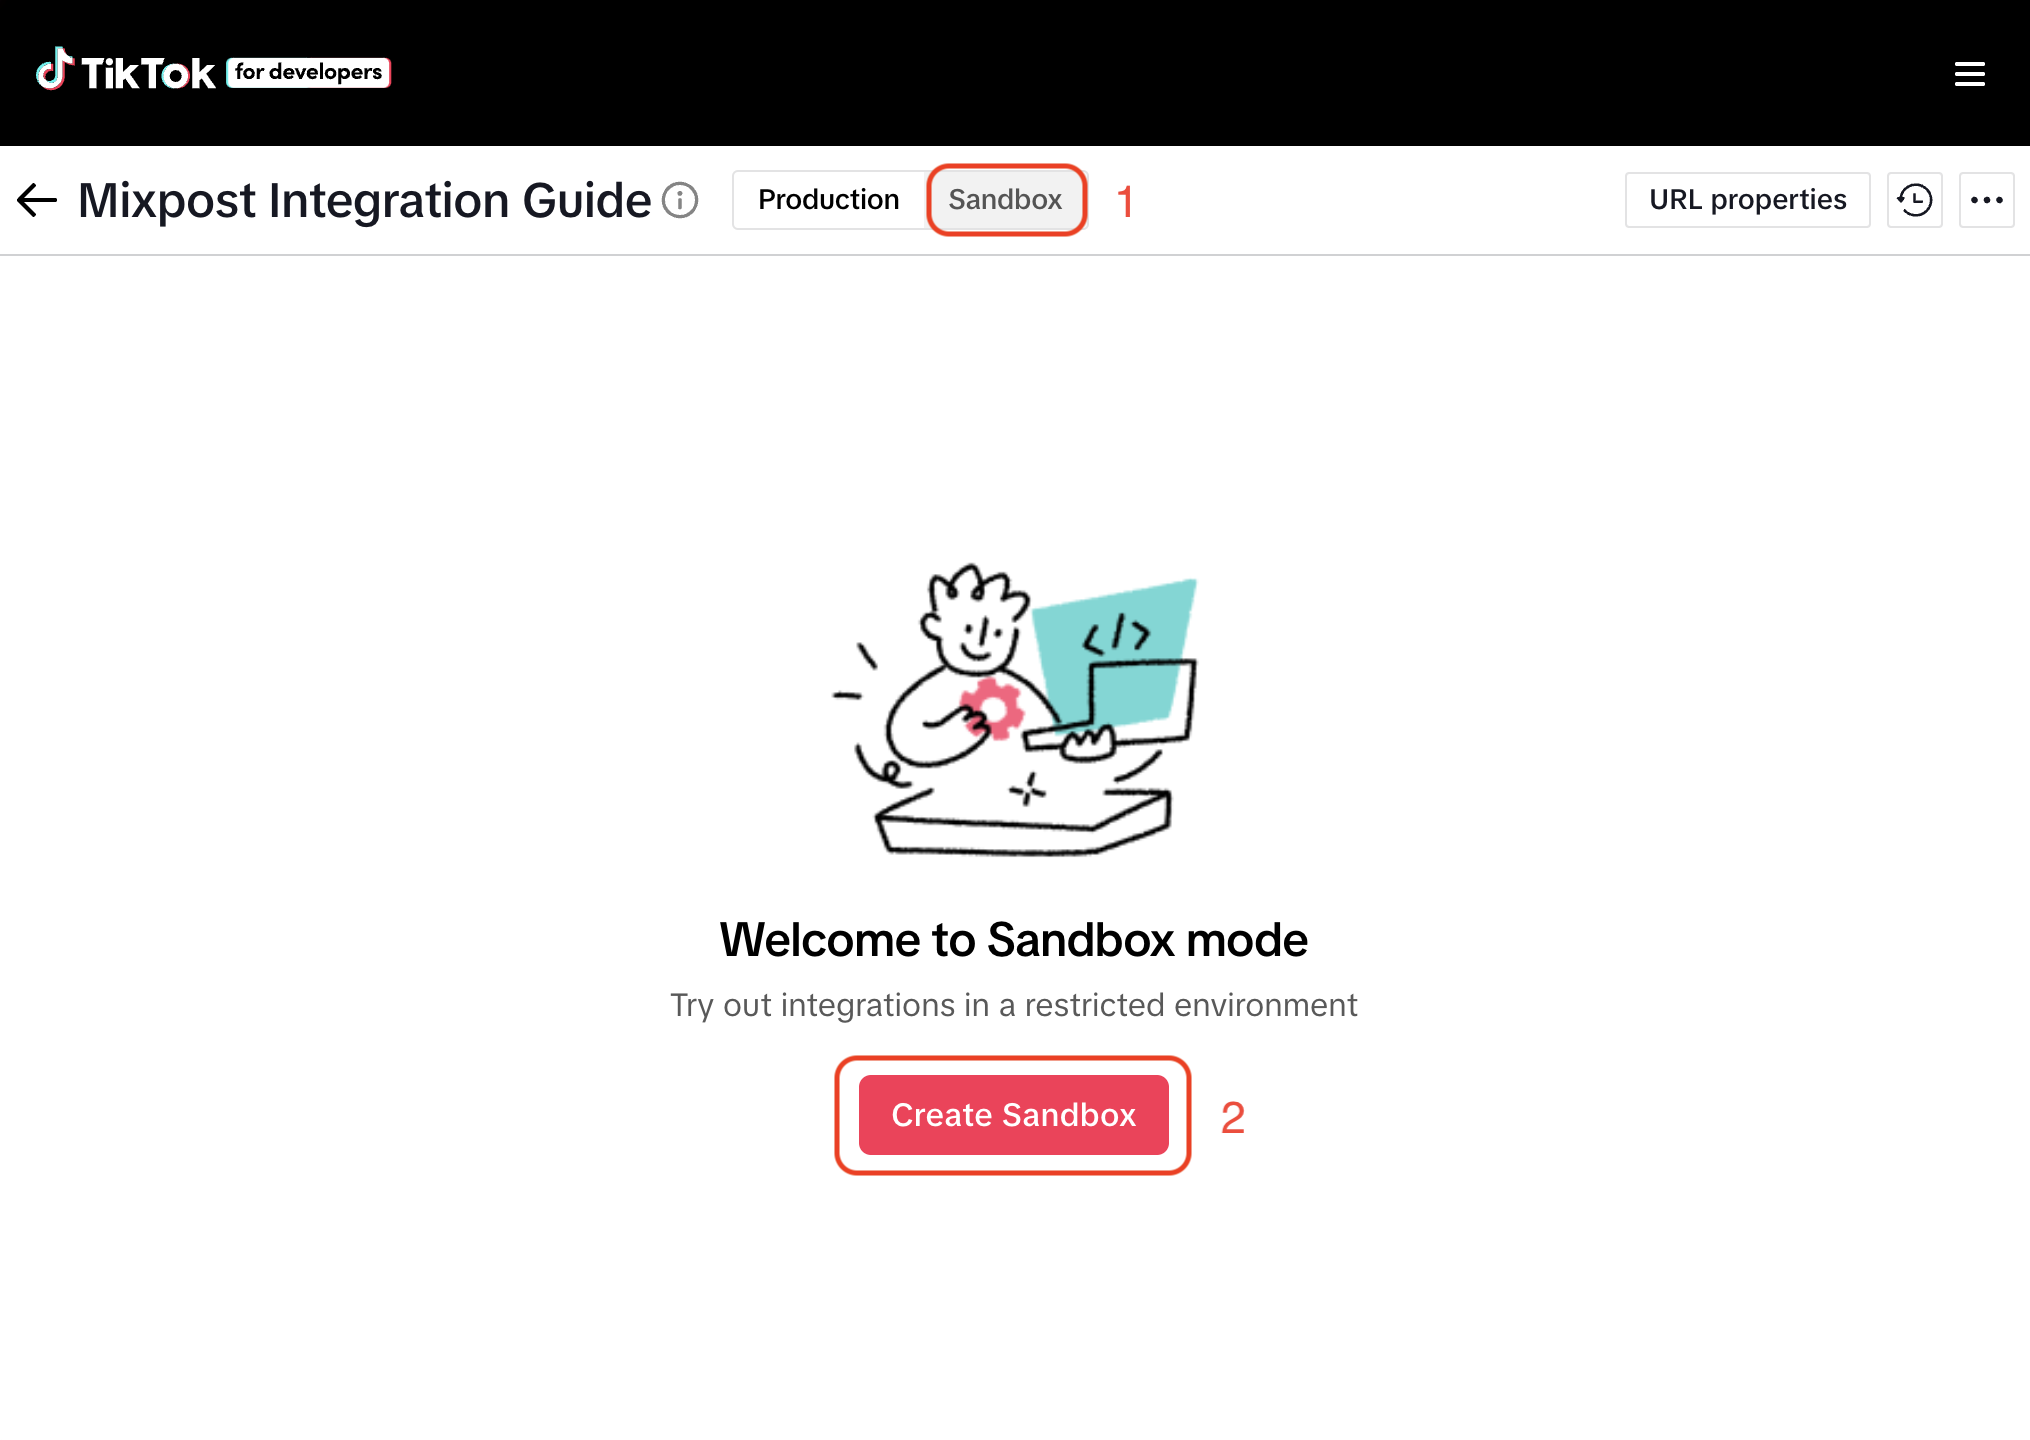
To add a Sandbox:
- Select Sandbox from the toolbar of your TikTok application.
- Click Create Sandbox.
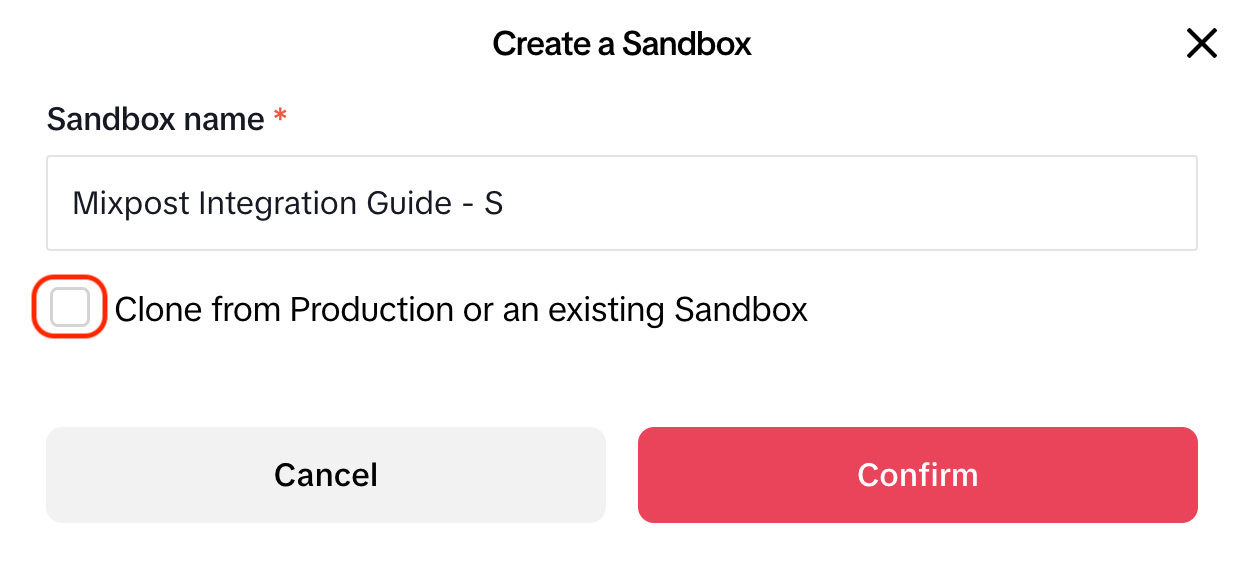
- Enter a name for your sandbox.
- Check Clone from Production or an existing Sandbox.
- Click Confirm.
Once you’ve added and configured a Sandbox, proceed to the 5. Copy the credentials to Mixpost step.
Screenshots:
4. App Review
TikTok requires that your application be intended for a wide audience and not restricted to internal or private use. As a result, only users with a Mixpost Enterprise license are eligible to request an App Review process.
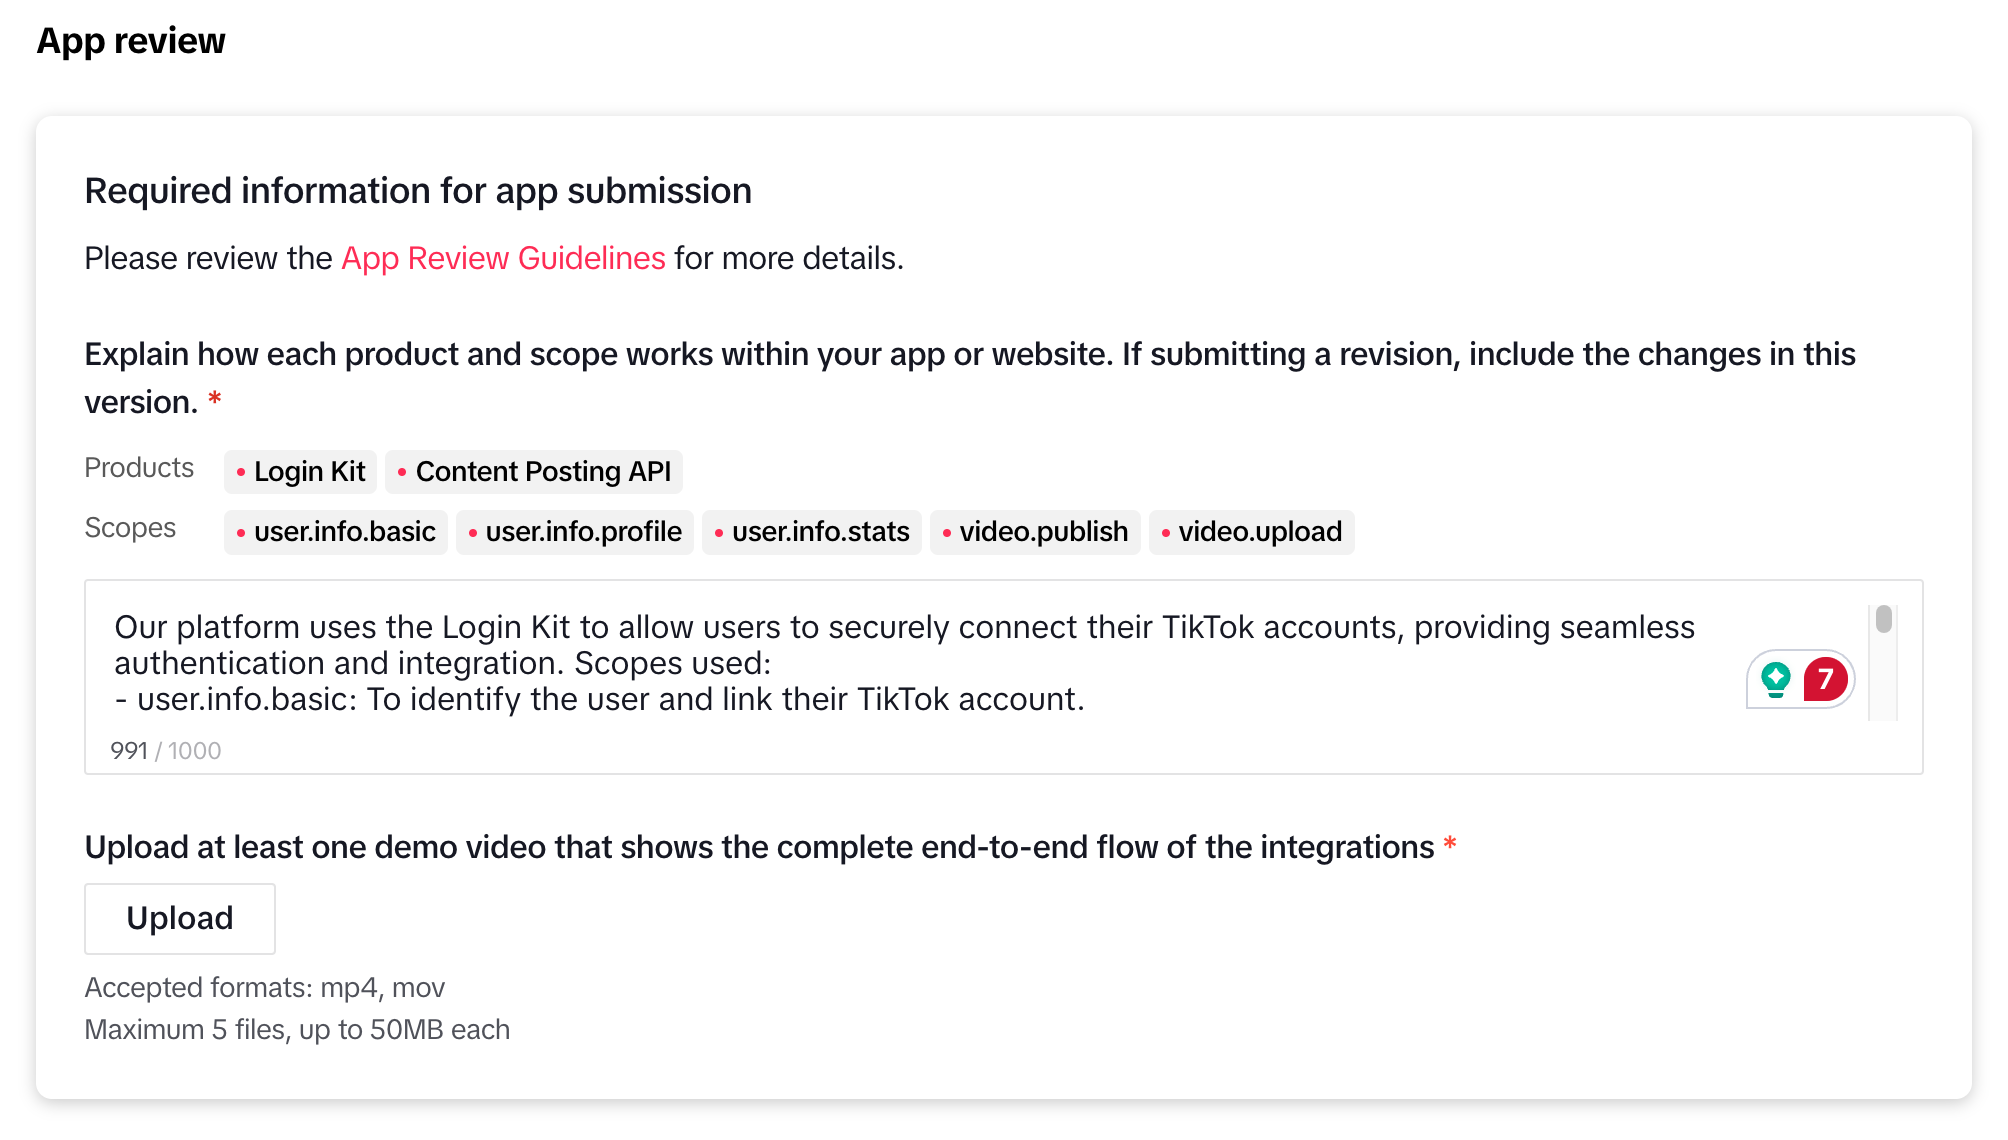
Scroll to the App review section and fill the Description field.
Text for the Description field:
Our platform uses the Login Kit to allow users to securely connect their TikTok accounts, providing seamless authentication and integration. Scopes used:
- user.info.basic: To identify the user and link their TikTok account.
- user.info.profile: To retrieve necessary profile information for account setup and personalization.

The Content Posting API powers our platform’s ability to let users create, upload, and publish TikTok content directly. It also enables them to performance insights to optimize their social media strategies. Scopes used:
- video.list: To fetch users’ TikTok video statistical data.
- video.upload: For uploading videos directly from our platform.
- video.publish: To publish pre-uploaded content to TikTok by using Direct Post feature.
- user.info.stats: To provide users statistical data, including likes, followers, following count, and video count.

Our application complies with TikTok’s App Review Guidelines, ensuring security and compliance at every stage.
Additionaly, upload at least one demo video that shows the complete end-to-end flow of the integrations.
Once completed, save the updated information and submit it for review.
App review may take several days to two weeks after submission. If your app is not approved, reach out to the TikTok team via their Support page for further guidance.
Screenshots:
5. Copy the credentials to Mixpost
Make sure you have selected the correct mode, either Production or Sandbox, before proceeding.
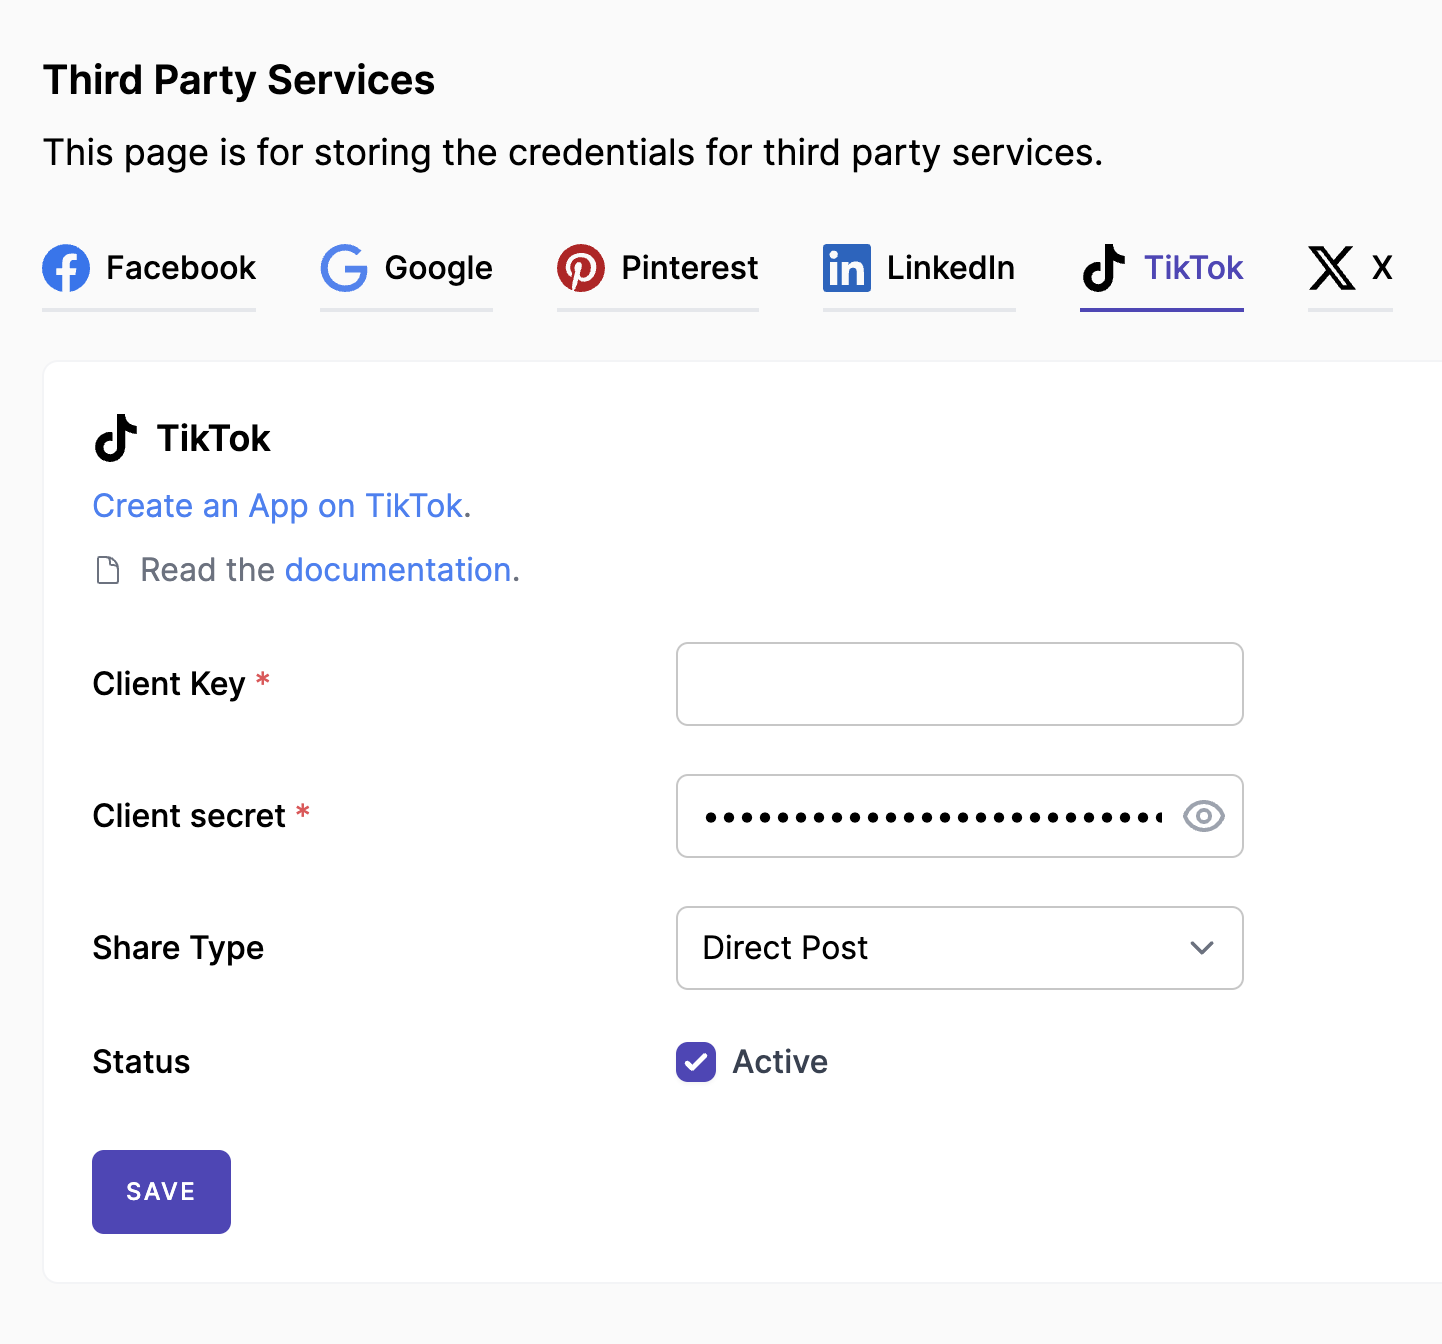
Copy Client key and Client secret from App details -> Credentials section, then navigate to your Mixpost dashboard and paste them into the TikTok service form. Additionally, in the Share Type field, select the Direct Post option if you have enabled it; otherwise, choose the Inbox option.
- Pro and Enterprise
- Lite
Navigate to the User Menu at the bottom left, click Admin Console, and then click on Services from the left sidebar.
Click on Services from the left sidebar.
Screenshots:

6. Done
Once you have added a Sandbox or your application has been reviewed by the TikTok team, you can test the integration by connecting a TikTok account to Mixpost and scheduling posts.
- Pro and Enterprise
- Lite
Navigate to a workspace, then select Social Accounts from the left sidebar and click Add Account.
Lite package does not support this social platform. Unlock Pro features