Paystack Integration Guide
Paystack is a modern payment platform for Africa. Here's a step-by-step guide to help you integrate Paystack with Mixpost Enterprise and get started with processing payments.
1. Create an account
If you haven't already, head to Paystack's website and sign up for an account.
2. Configure webhooks
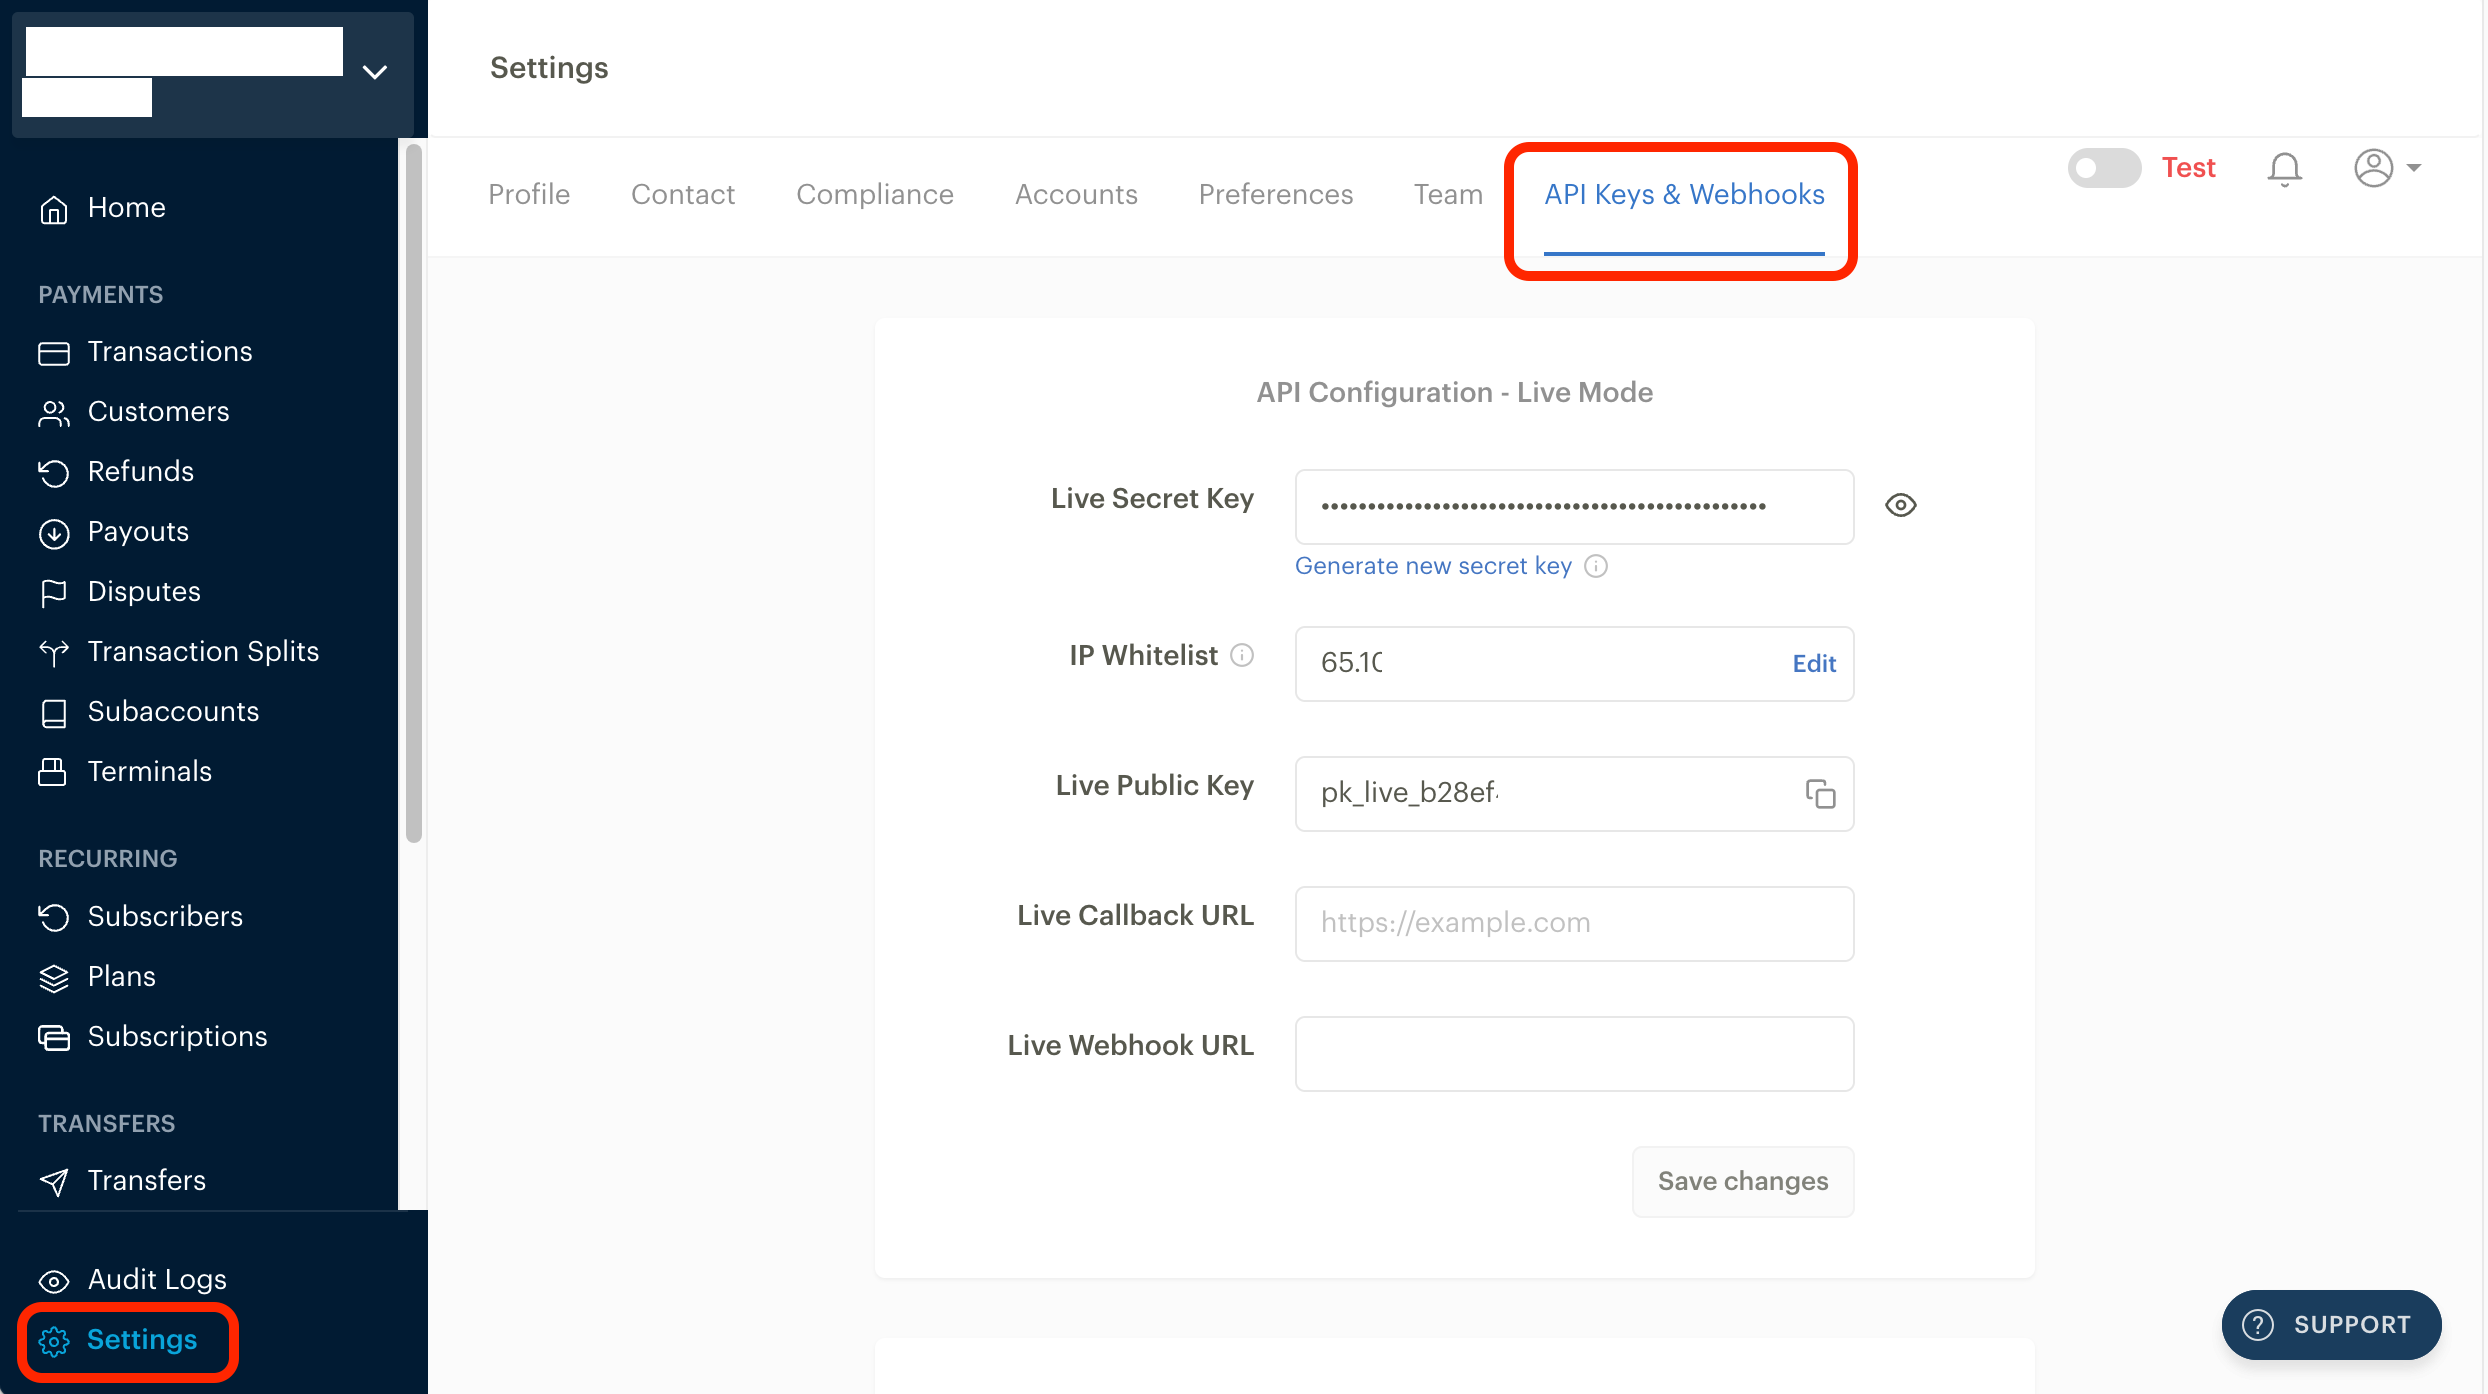
From Paystack's dashboard, go to Settings page and click on API Keys & Webhooks.
Enter the Live Webhook URL in the provided field:
https://example.com/<MIXPOST_CORE_PATH>/payment-webhook
Replace <MIXPOST_CORE_PATH> with your specified MIXPOST_CORE_PATH. If you have not altered the MIXPOST_CORE_PATH environment variable, use the default value: mixpost.
Note: For the Lite package, use the value mixpost, if this integration is supported in Lite.
Save changes.
Screenshots:
3. Get credentials
From Paystack's dashboard, go to Settings page and click on API Keys & Webhooks.
You will find Live Secret Key and Live Public Key. Both are necessary for integration.
Always keep your credentials confidential.
4. Copy the credentials to Mixpost
Once you have Live Secret Key and Live Public Key, navigate to your Mixpost dashboard and enter these credentials into the Paystack payment platform section. Make sure to select the Enabled option.
Navigate to the User Menu at the bottom left, click on Enterprise Console, then select Settings from the left sidebar, and finally click on Payment Platforms.
5. Add pricing plans
We are adding all the necessary pricing plans in both Paystack and Mixpost dashboard.
5.1 Add plans in Paystack
- Navigate to the Plans section in your Paystack Dashboard.
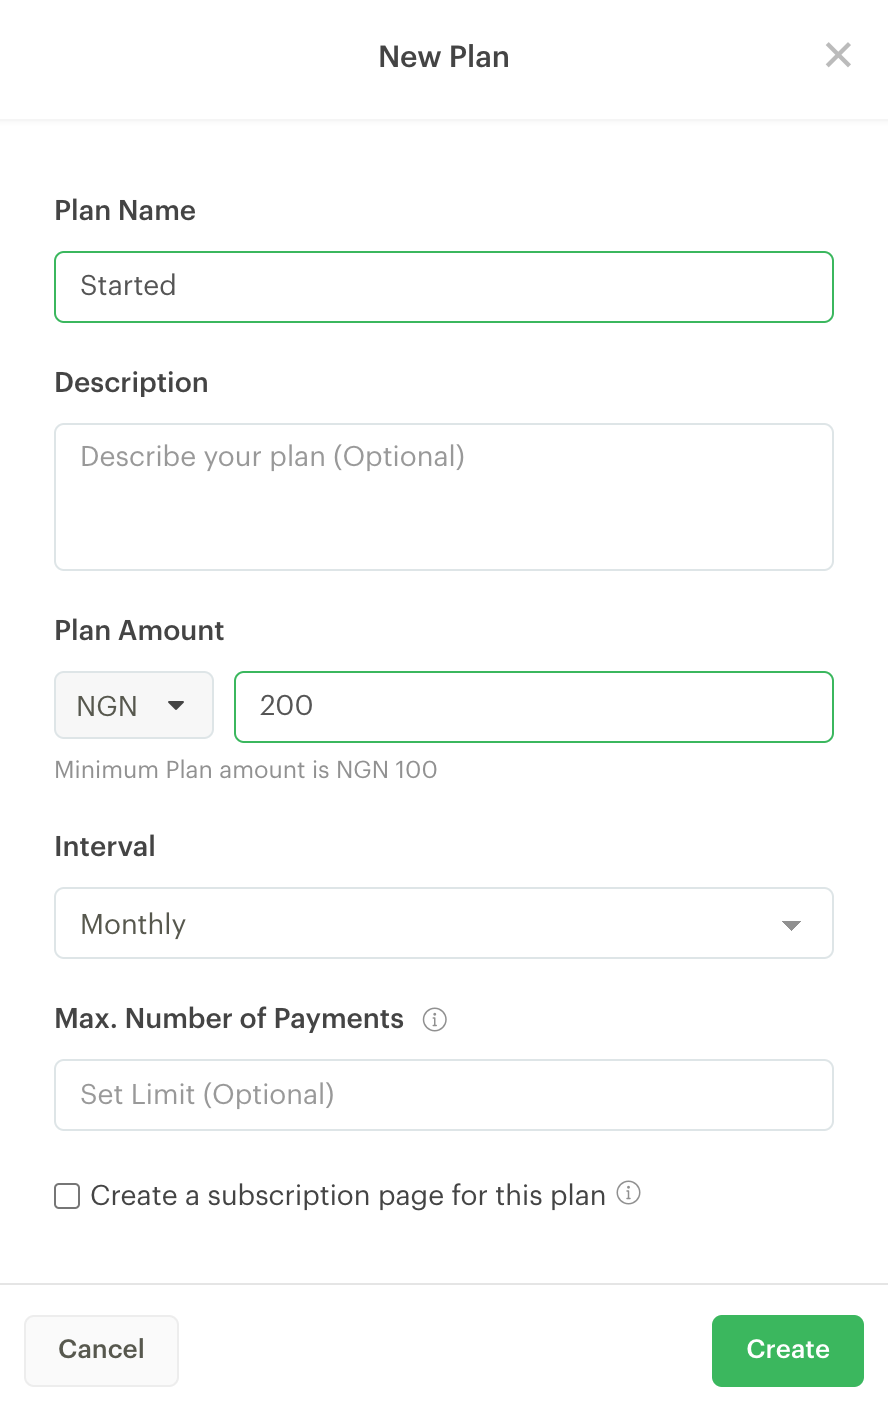
- Click on New Plan.
- Enter a plan name, e.g Starter.
- Taxable Category, select Standard Digital Goods.
- Set the plan price, for example, NGN 200.
- Select the Interval. Mixpost supports only Monthly or Yearly billing periods.
- Save the plan.
If you want to support Monthly and Yearly billing periods for plans, you should add the same Plan twice, first select Billing Interval under Monthly and then select Yearly.
Screenshots:
5.2 Sync Paystack plans with Mixpost plans
After the plan has been created in your Paytack dashboard. You should copy the Plan Code of each plan to your created plans in the Mixpost Dashboard. See the instructions.
Screenshots:

6. Testing
- Switch to Test mode from your Paystack dashboard.
- Back to step 4 and input your Test Secret Key to the Secret Key field and Test Public Key to the Public Key field.
- Try to register a user and subscribe to a plan.
7. Go live
If you skipped step 6. Mixpost is ready to receive payments.
If you did not skip step 6 and did tests in the Test mode, back to step 4 and make sure you input your Live Secret Key to the Secret Key field and Live Public Key to the Public Key field.
Paystack’s payment platform does not support card-based trials for subscriptions. You must enable generic trial, which does not collect the user’s card details, when offering trial periods.