Facebook App Review
Users without an assigned role in the Facebook application cannot add their Facebook or Instagram accounts. This capability requires Facebook's approval of your application.
This step is mandatory for users providing Software as a Service (SaaS) through Mixpost Enterprise. However, if you are using Mixpost internally, this step is not required.
Facebook Business Verification is required.
1. Create a test user
1.1 Mixpost test user
Create a non-admin test user account through the Mixpost dashboard and assign it to a workspace. This account will allow the Meta team to test your application. Ensure that you thoroughly test the authentication process to confirm that Meta can manage it seamlessly.
1.2 Facebook test account
You should create new facebook account for testing. Considering that the account you created can only be accessed from the country of registration, the Meta team based in the Philippines will be unable to log into the Facebook test account.
Here is a workaround:
- Connect to a VPN server located in the Philippines.
- Create a new Gmail account while connected to the VPN.
- Create a new Facebook account while connected to the VPN.
- Register the new Facebook account as a developer account and note its user ID.
- Add this new Facebook account as a Tester to your original developer's account.
Ensure that you only access the test Facebook account while connected to the VPN and avoid logging in outside the VPN.
2. Request advanced permissions
You must request advanced permissions, which can vary depending on the version of the Facebook app you are using.
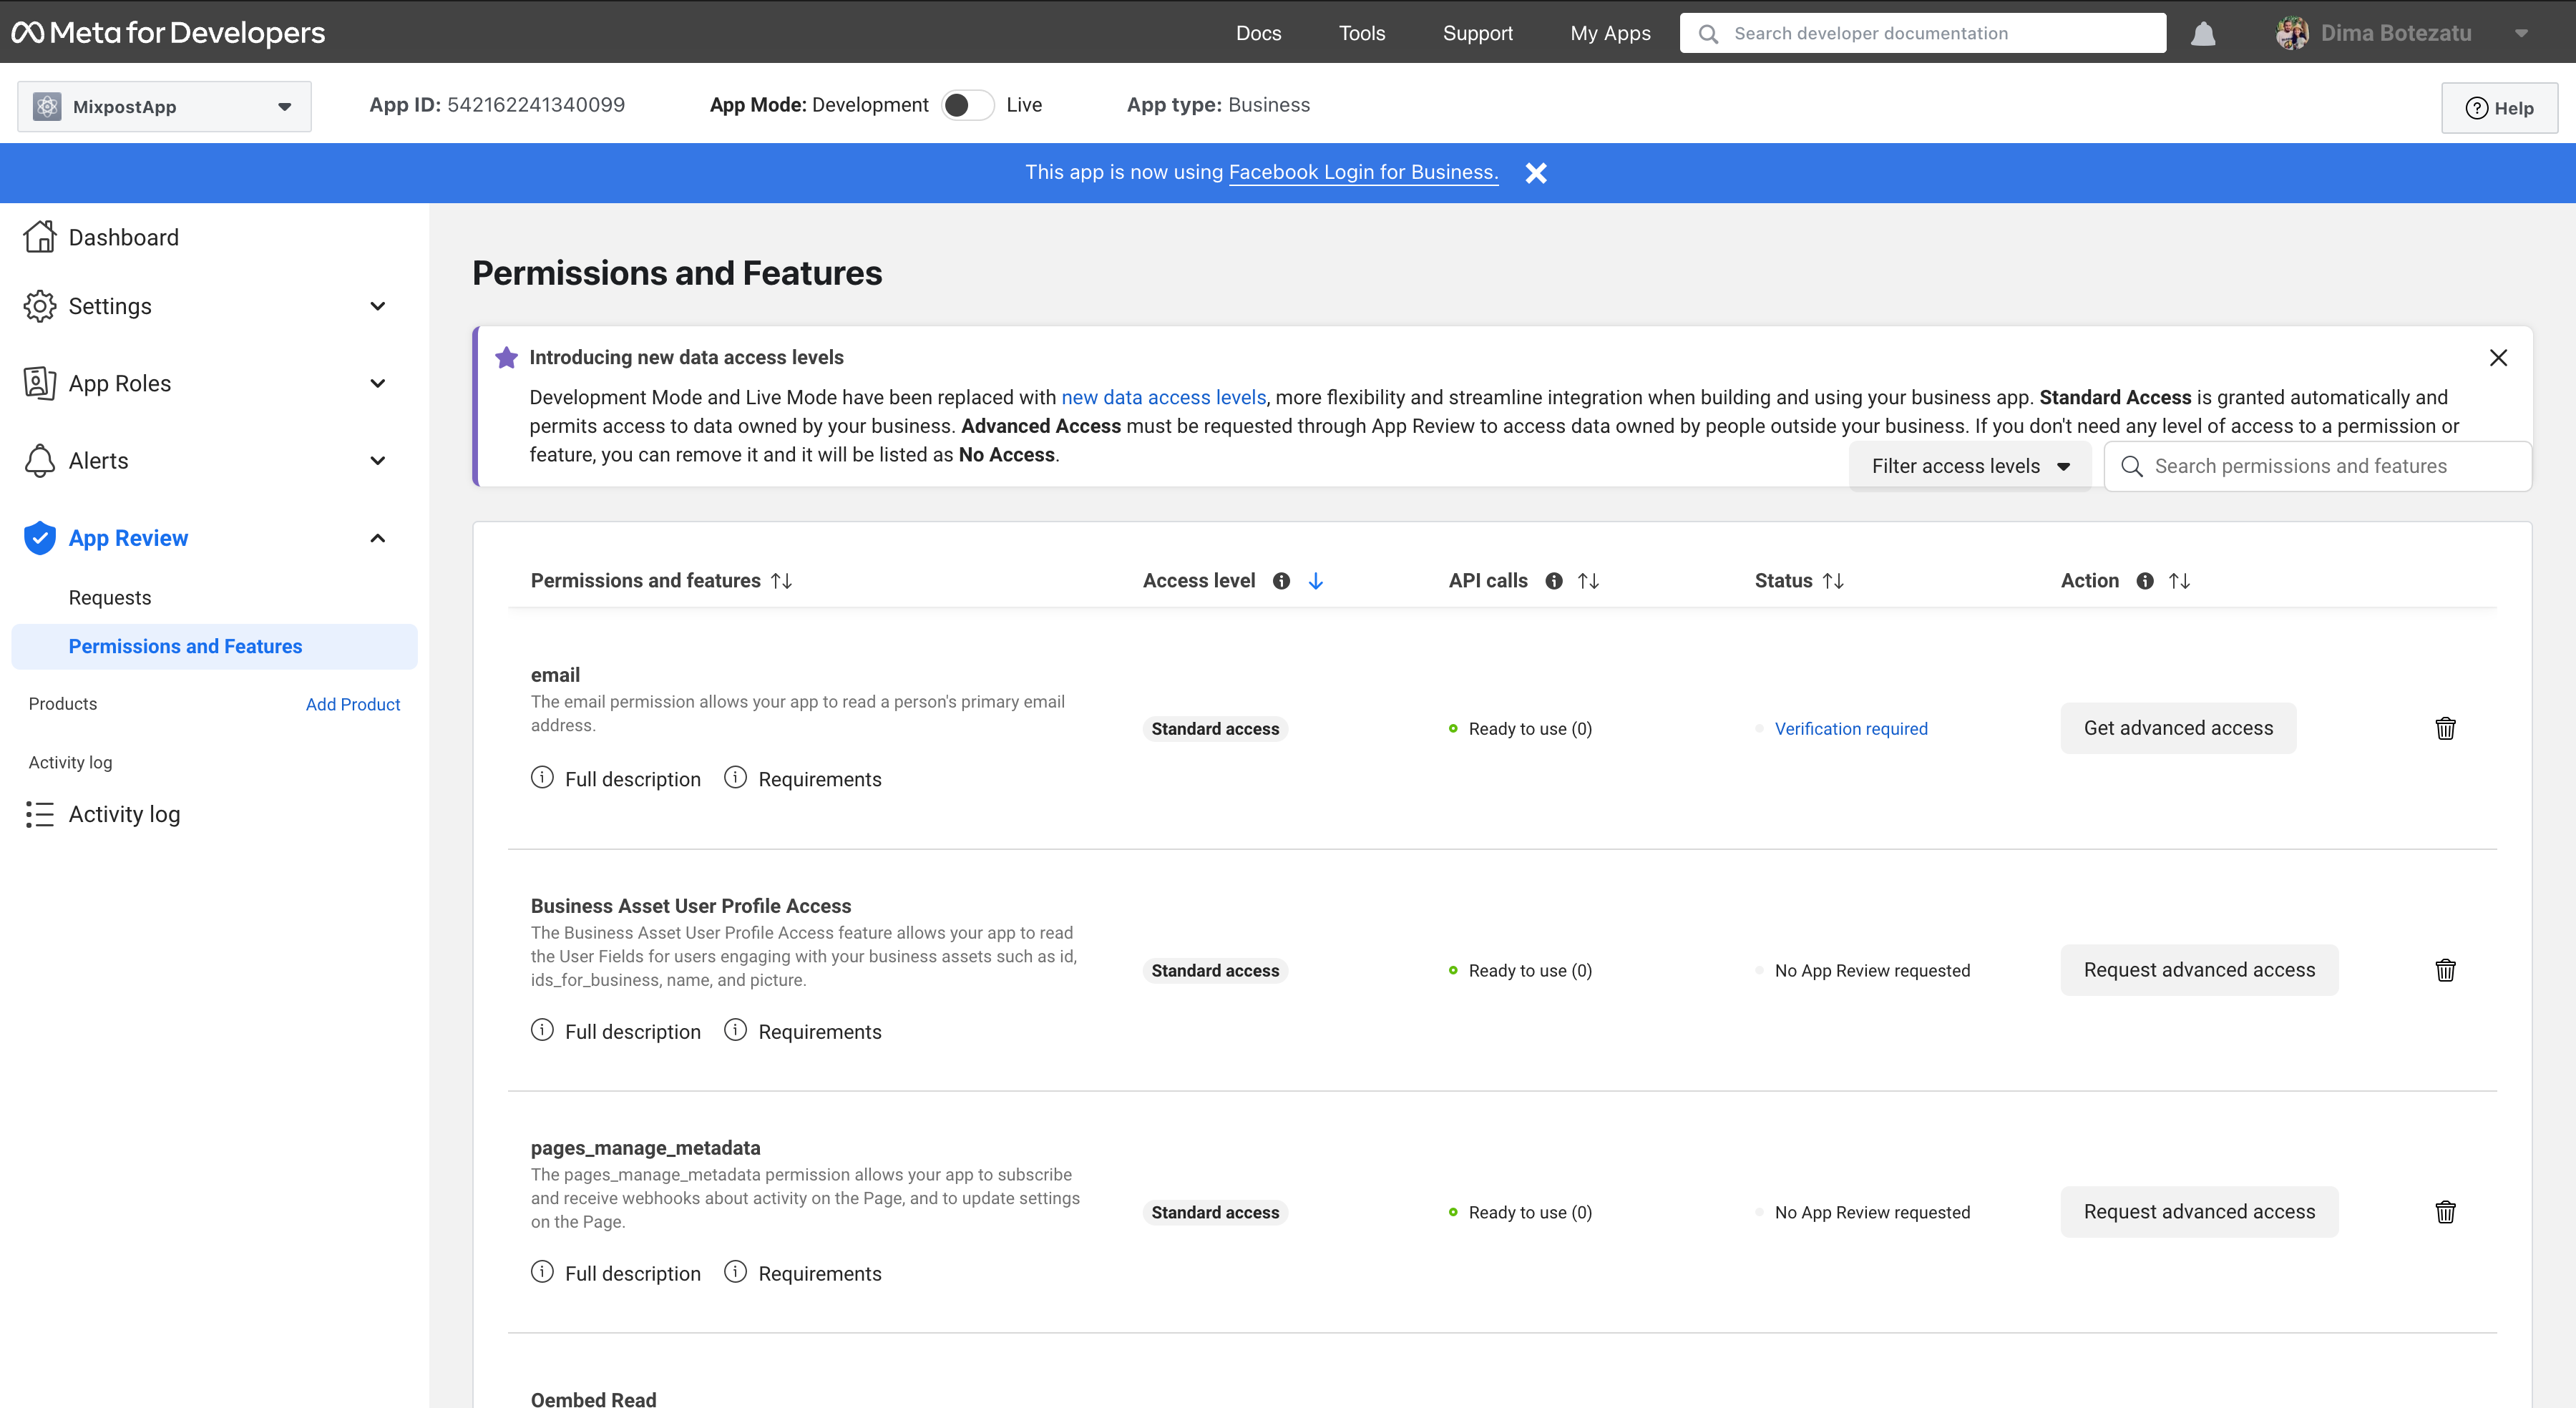
2.1. Permissions and Features
Navigate to App Review -> Permissions and Features in your Facebook developer account, and request permissions depending on the version of your Facebook app you are using, one by one by clicking on each permission the button Request advanced access.
- From v17.0 to v19.0
- v16
- business_management
- pages_show_list
- read_insights
- pages_manage_posts
- instagram_basic
- instagram_content_publish
- instagram_manage_insights
- pages_show_list
- read_insights
- pages_manage_posts
- instagram_basic
- instagram_content_publish
- instagram_manage_insights
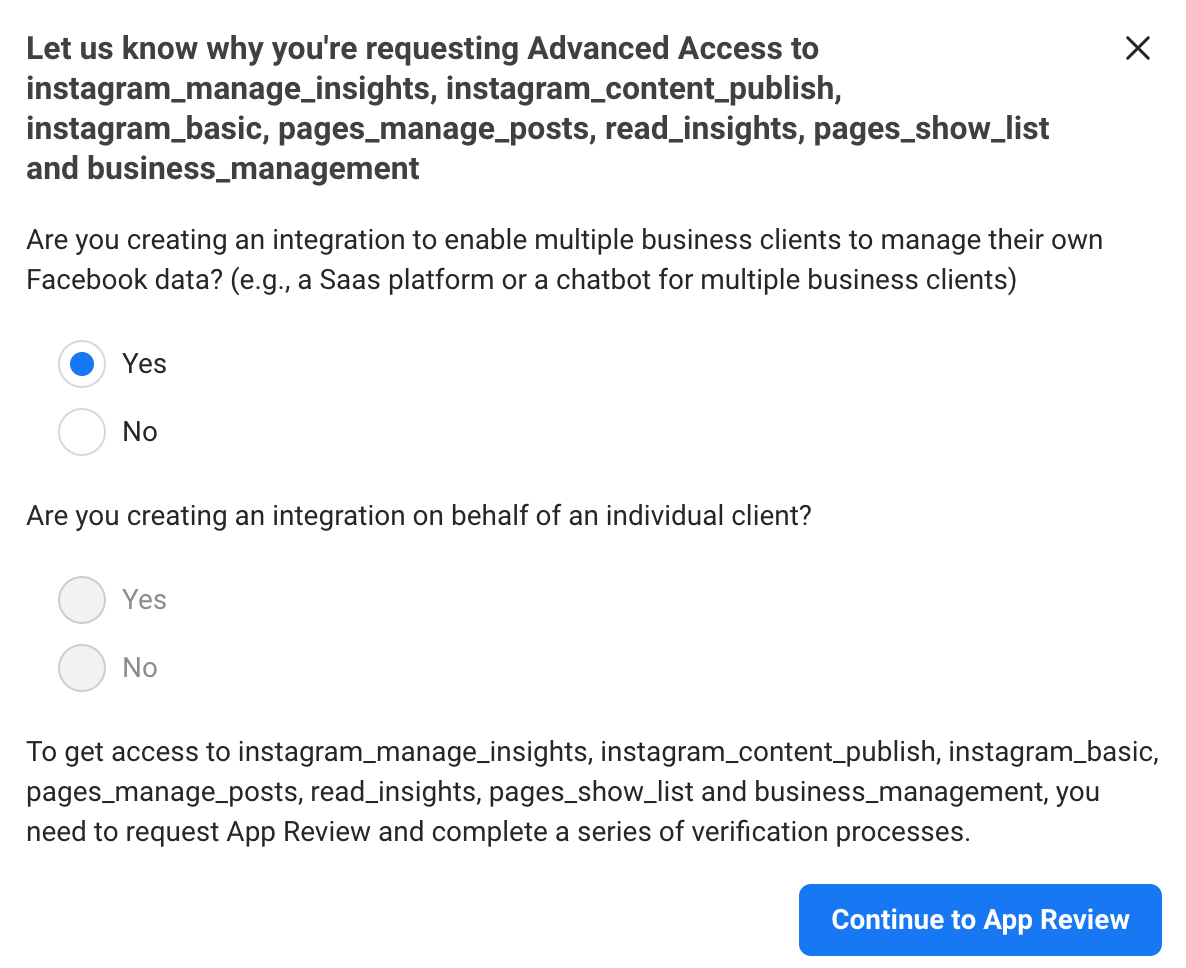
After requesting the necessary permissions, click the Continue request button at the bottom right, then select Yes for the first option, and finally click the Continue to App Review button.
Screenshots:
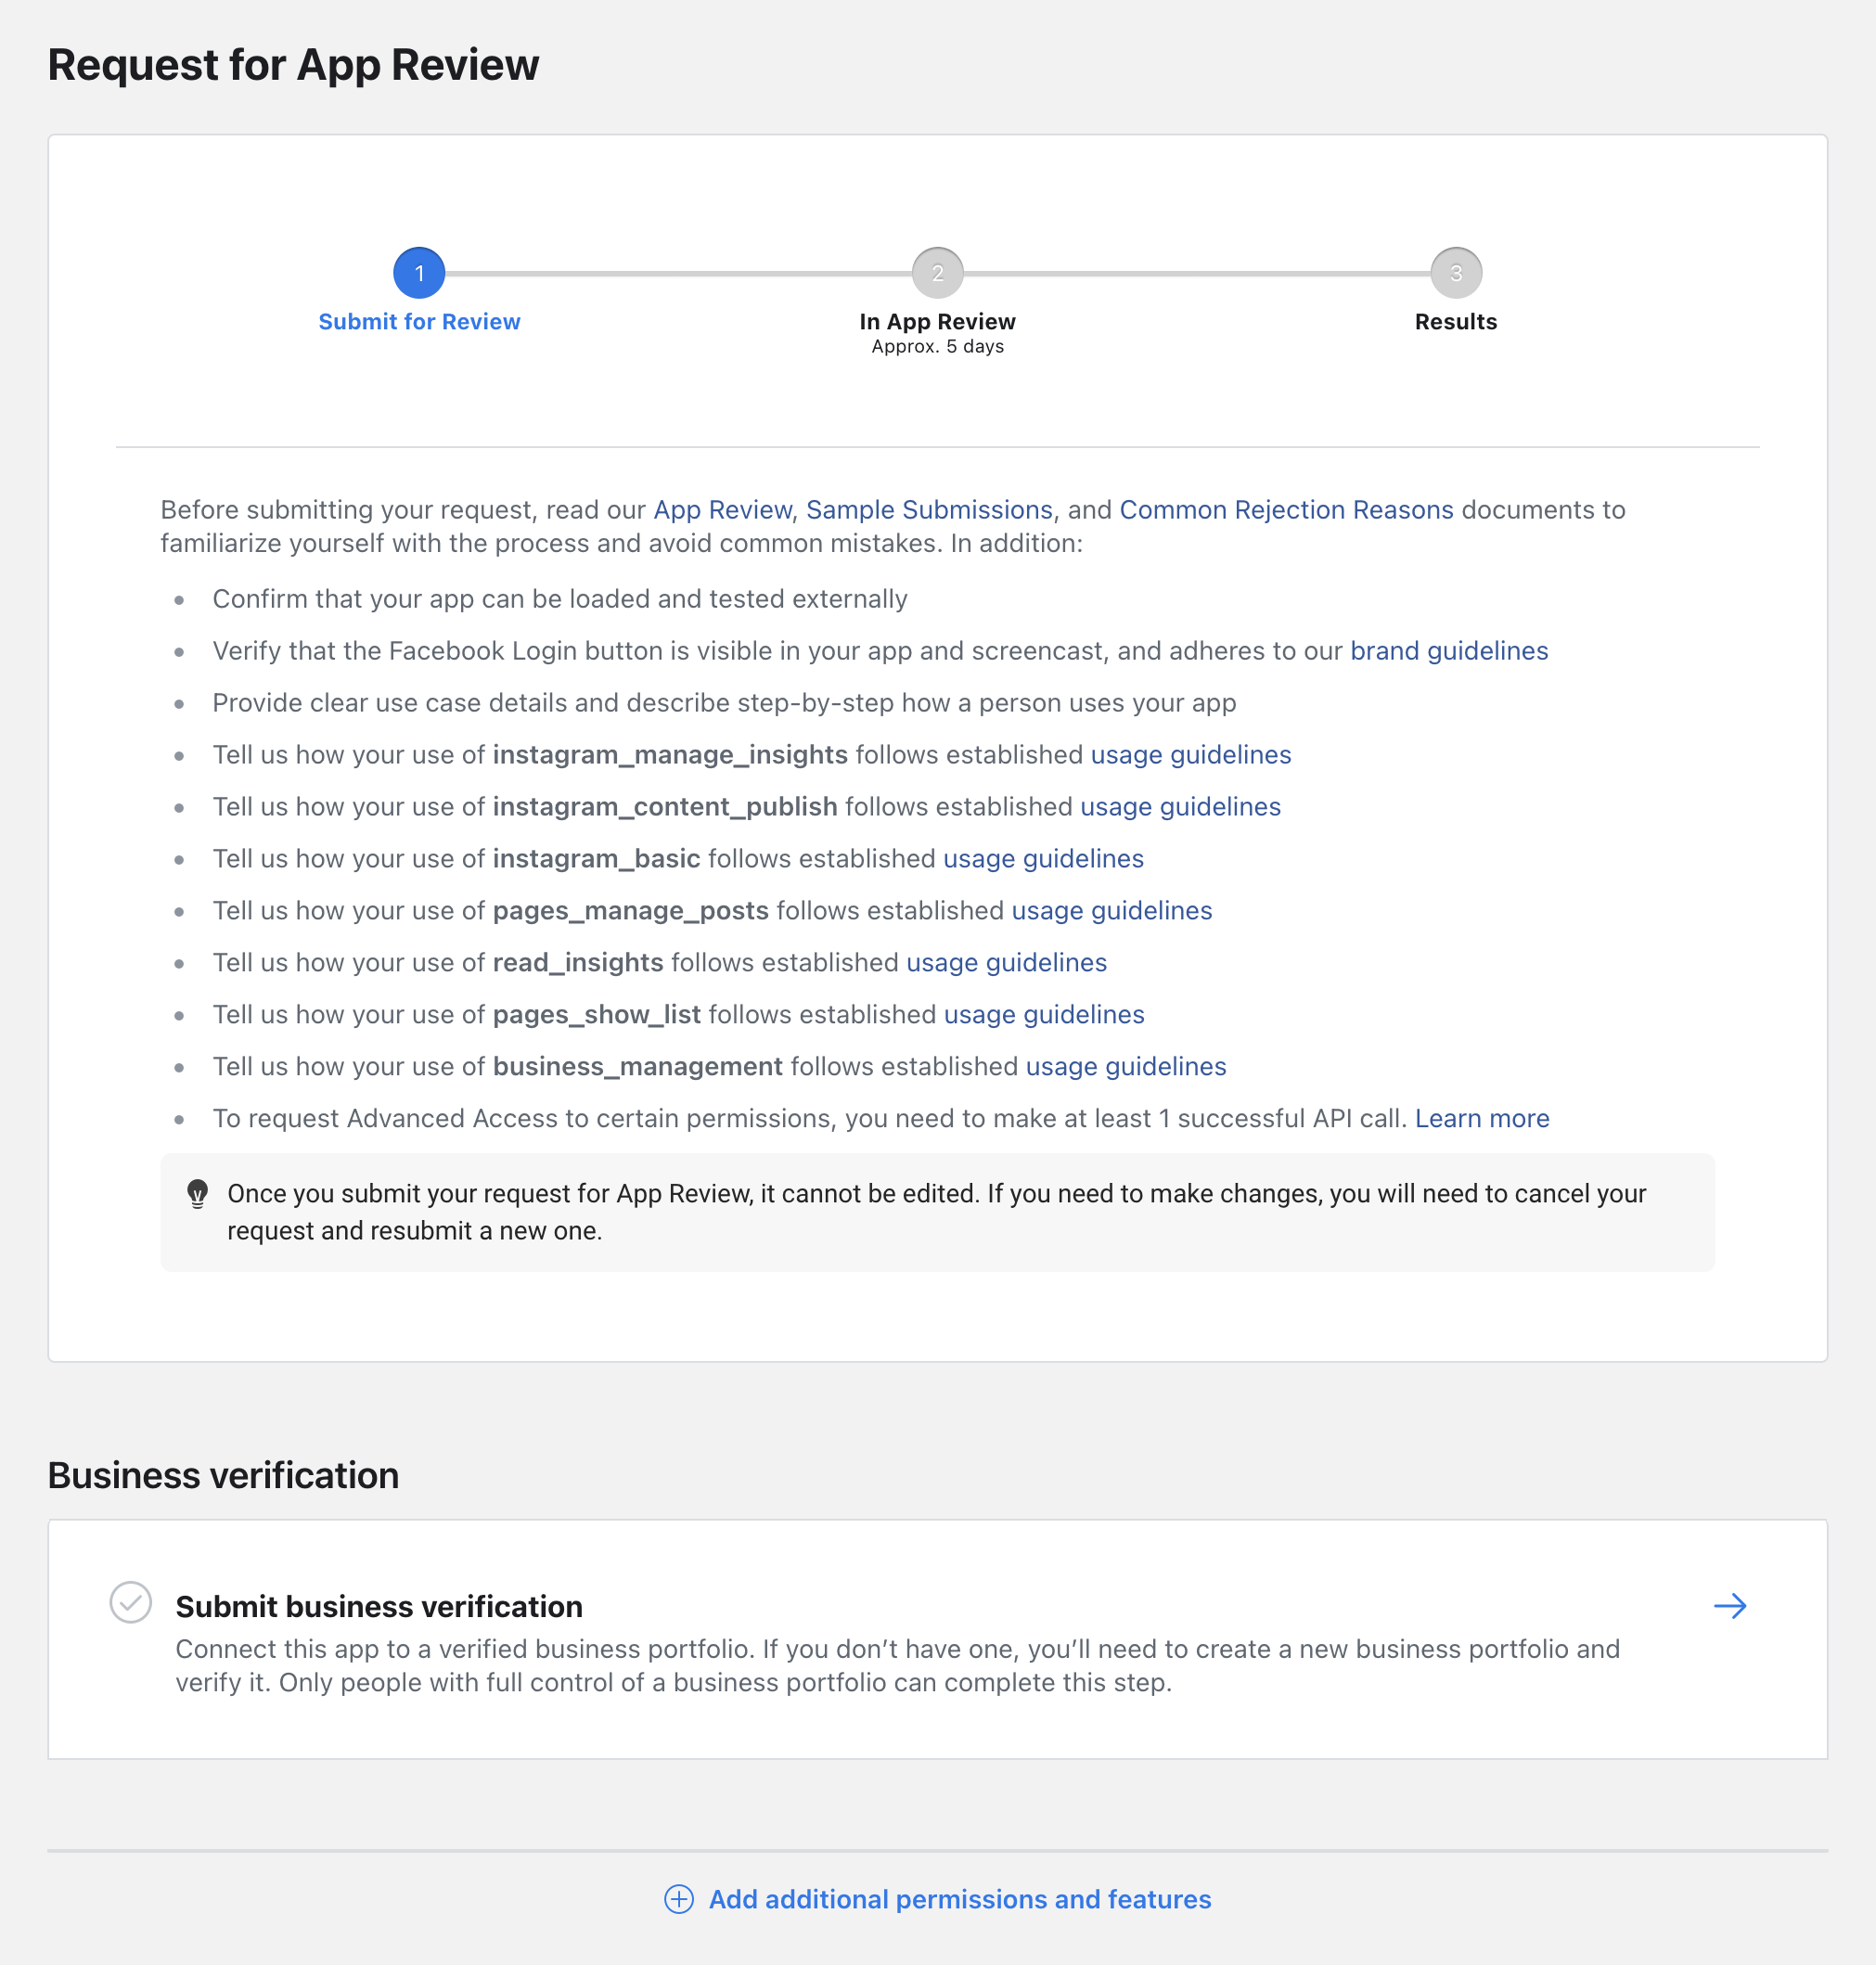
2.2 Business Verification
If you haven't completed Business Verification, you can select the Submit business verification section.
Screenshots:
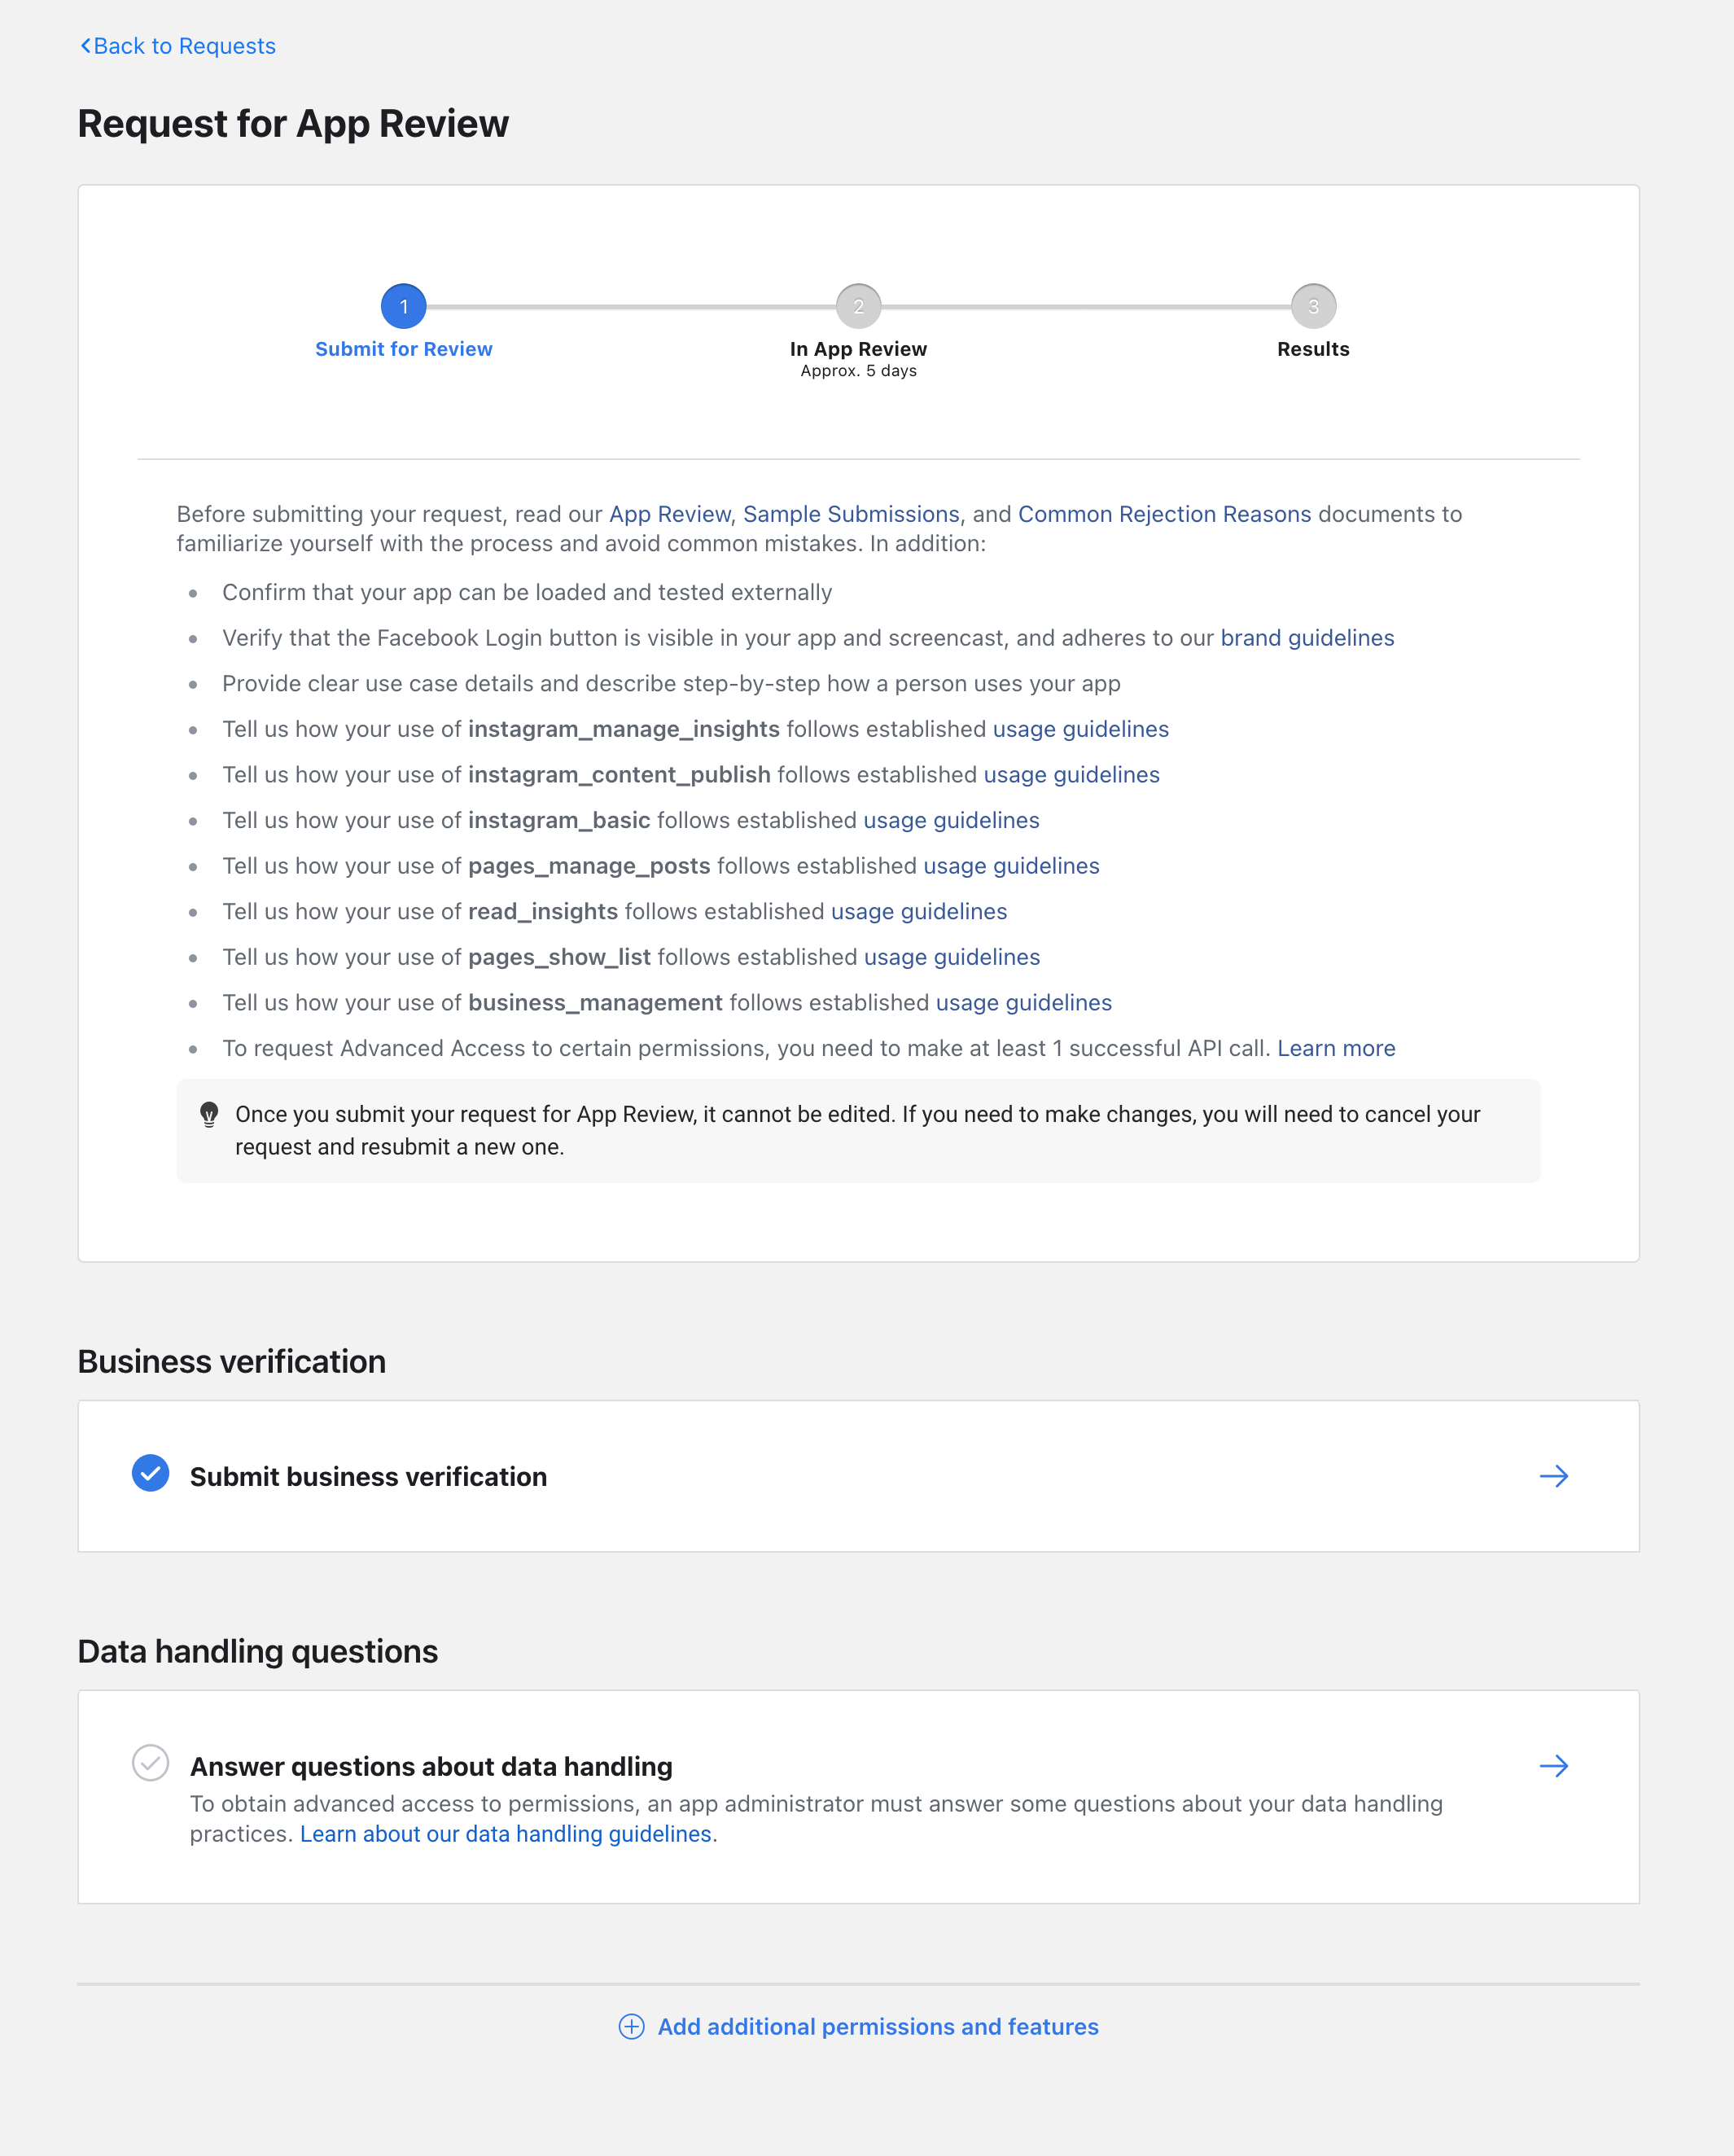
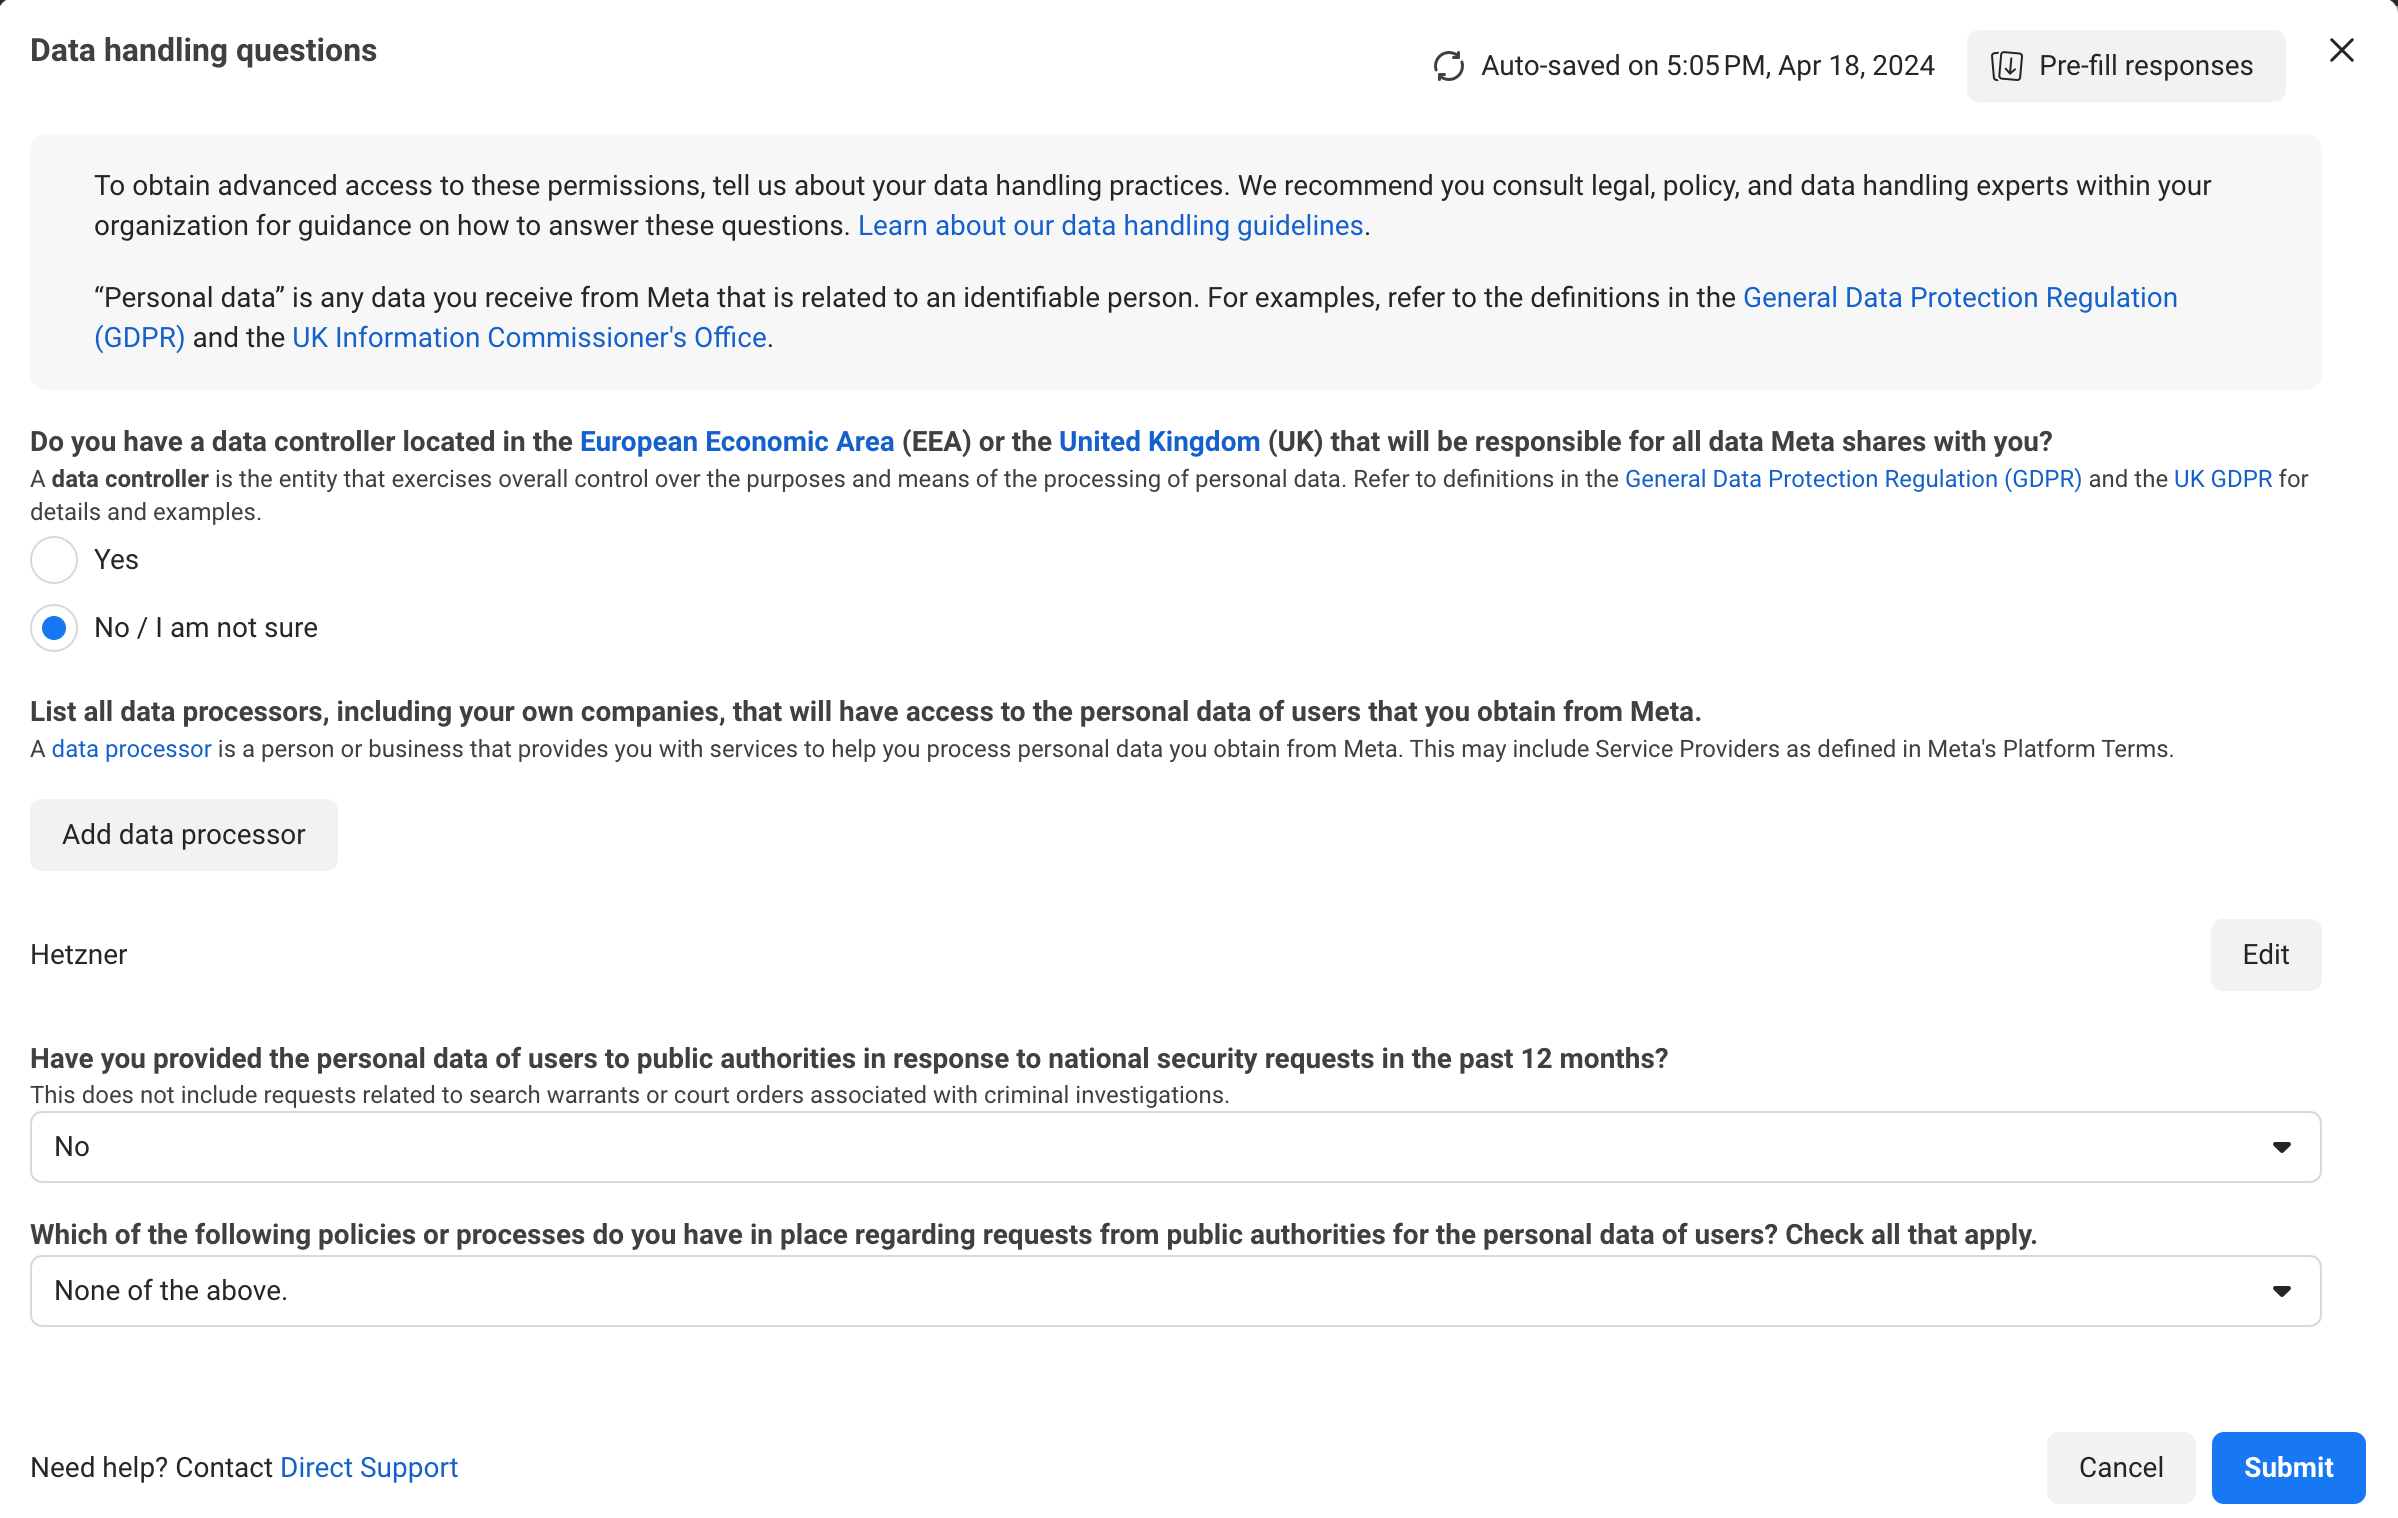
2.3. Data handling questions
Click on the Answer questions about data handling section to respond to inquiries regarding your data handling practices. More information is available here.
Answers to the questions:
Do you have a data controller located in the European Economic Area (EEA) or the United Kingdom (UK) that will be responsible for all data Meta shares with you?
Choose the option based on where your company is registered. If you are unsure, select No/I'm not sure.
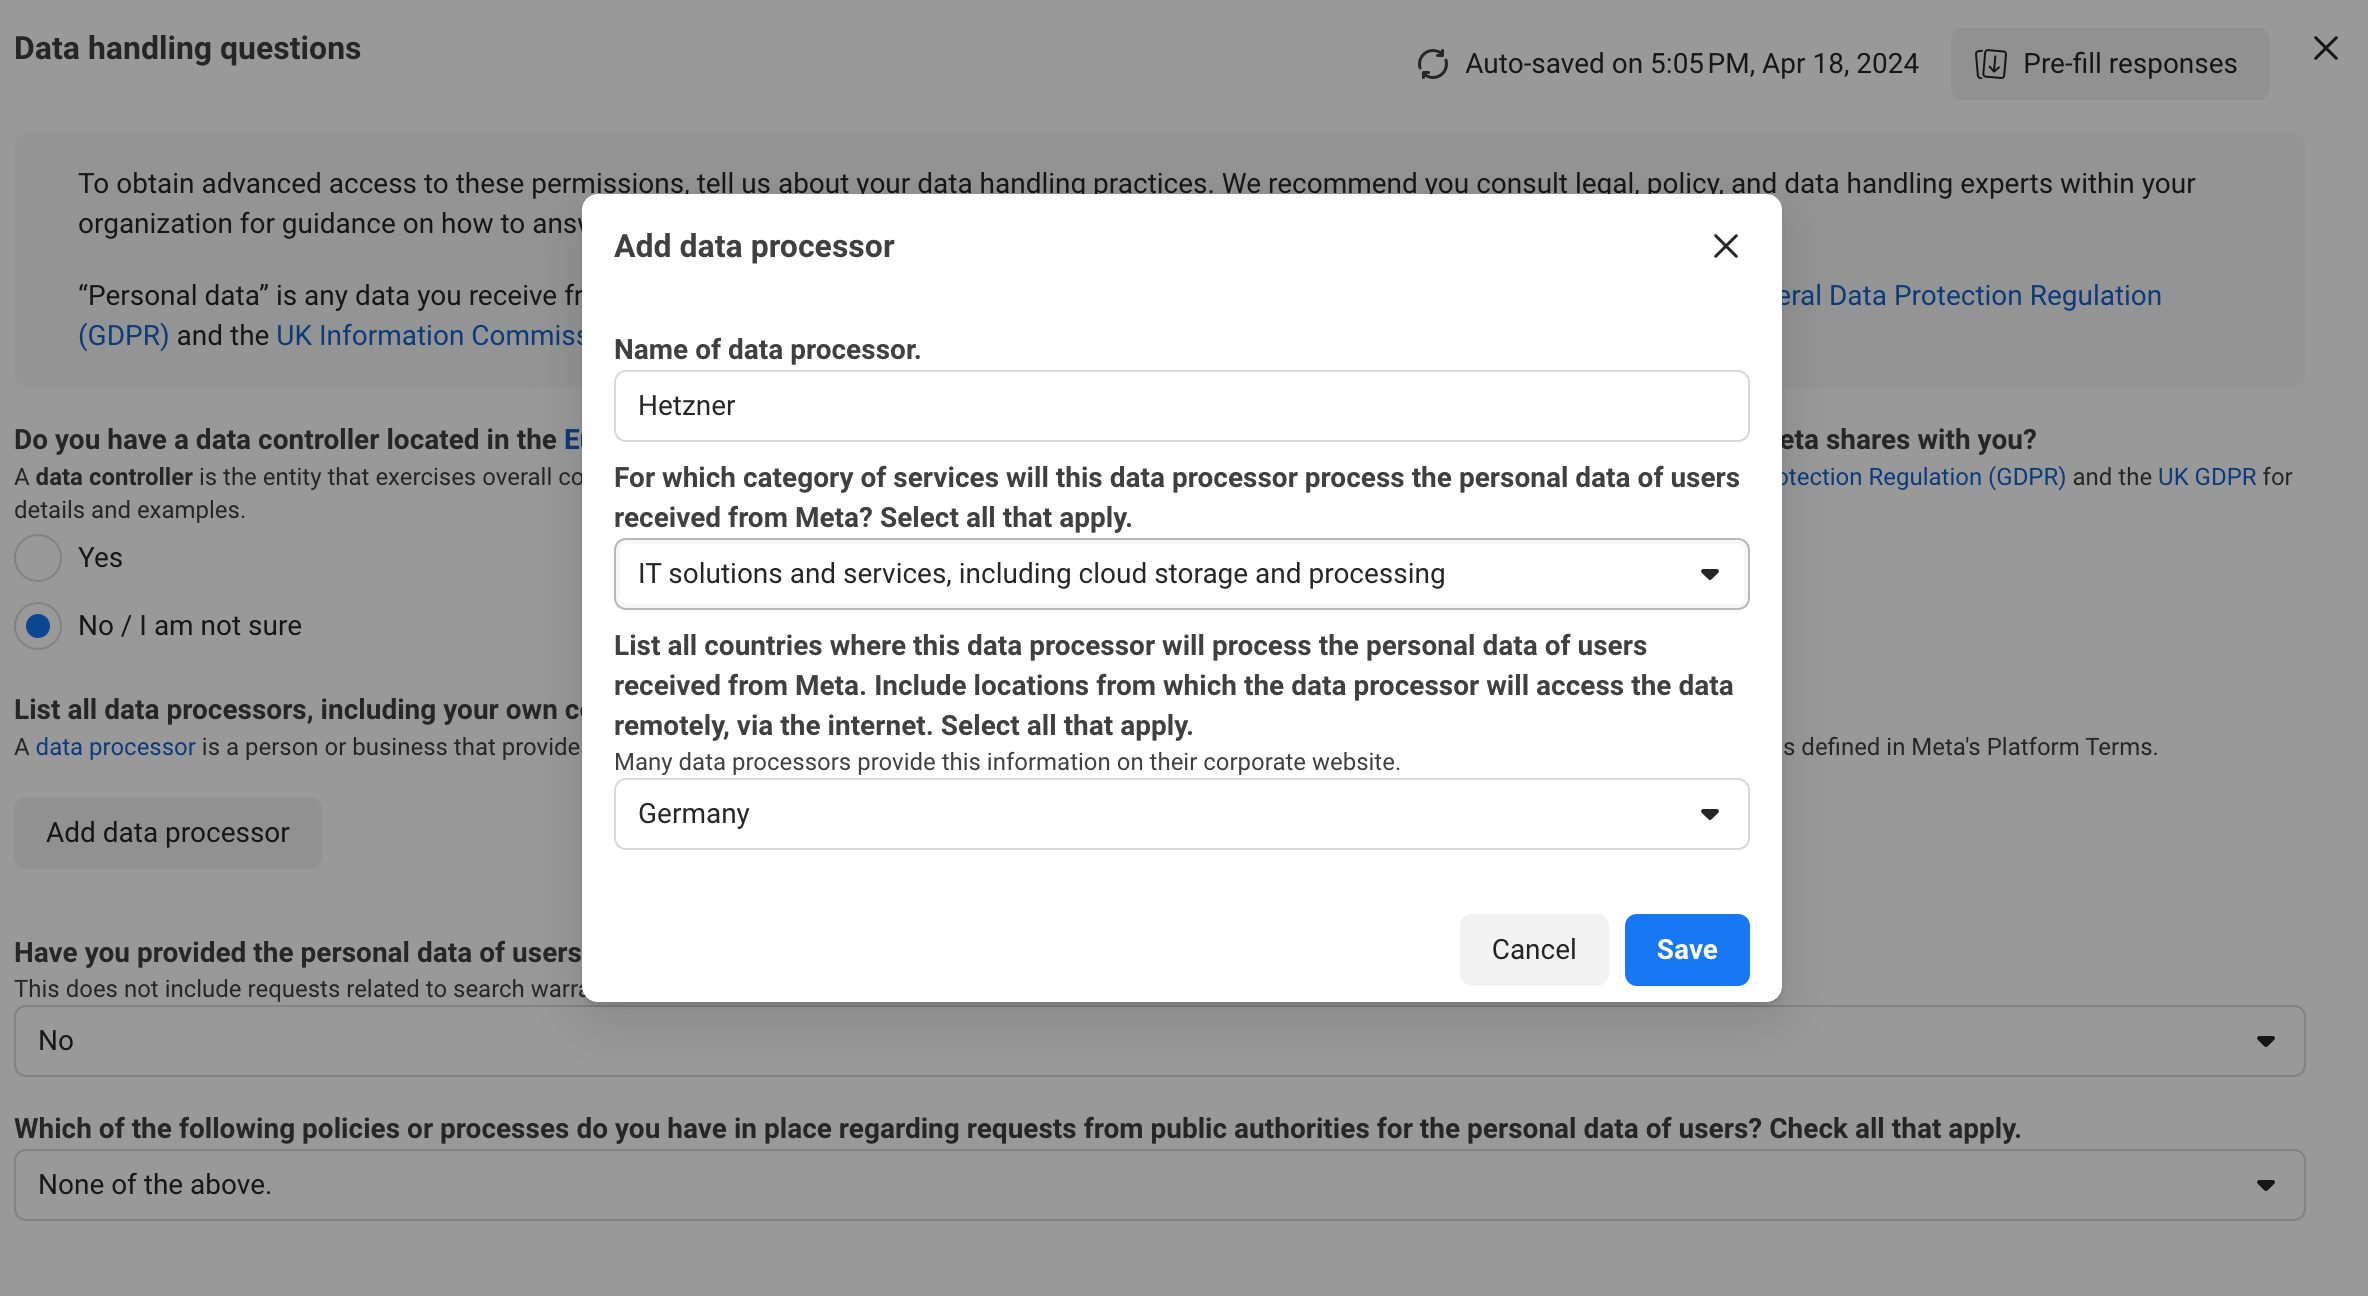
List all data processors, including your own companies, that will have access to the personal data of users that you obtain from Meta.
Enter the details of your server provider as the data processor. For instance, we use Hetzner for our VPS servers.:
- Name: Hetzner Online
- Category: IT solutions and services, including cloud storage and processing
Server providers typically list this information on their websites.
List all countries where this data processor will process the personal data of users received from Meta.
Select the country where your server provider is based and the location of your server. For example, our server provider, Hetzner Online, is a German company, and we purchased a VPS located in Germany from them.
Server providers typically list this information on their websites.
Have you provided the personal data of users to public authorities in response to national security requests in the past 12 months?
Select No if you are unsure about what to choose.
Which of the following policies or processes do you have in place regarding requests from public authorities for the personal data of users? Check all that apply.
Select None of the above if you are unsure about what to choose.
Screenshots:
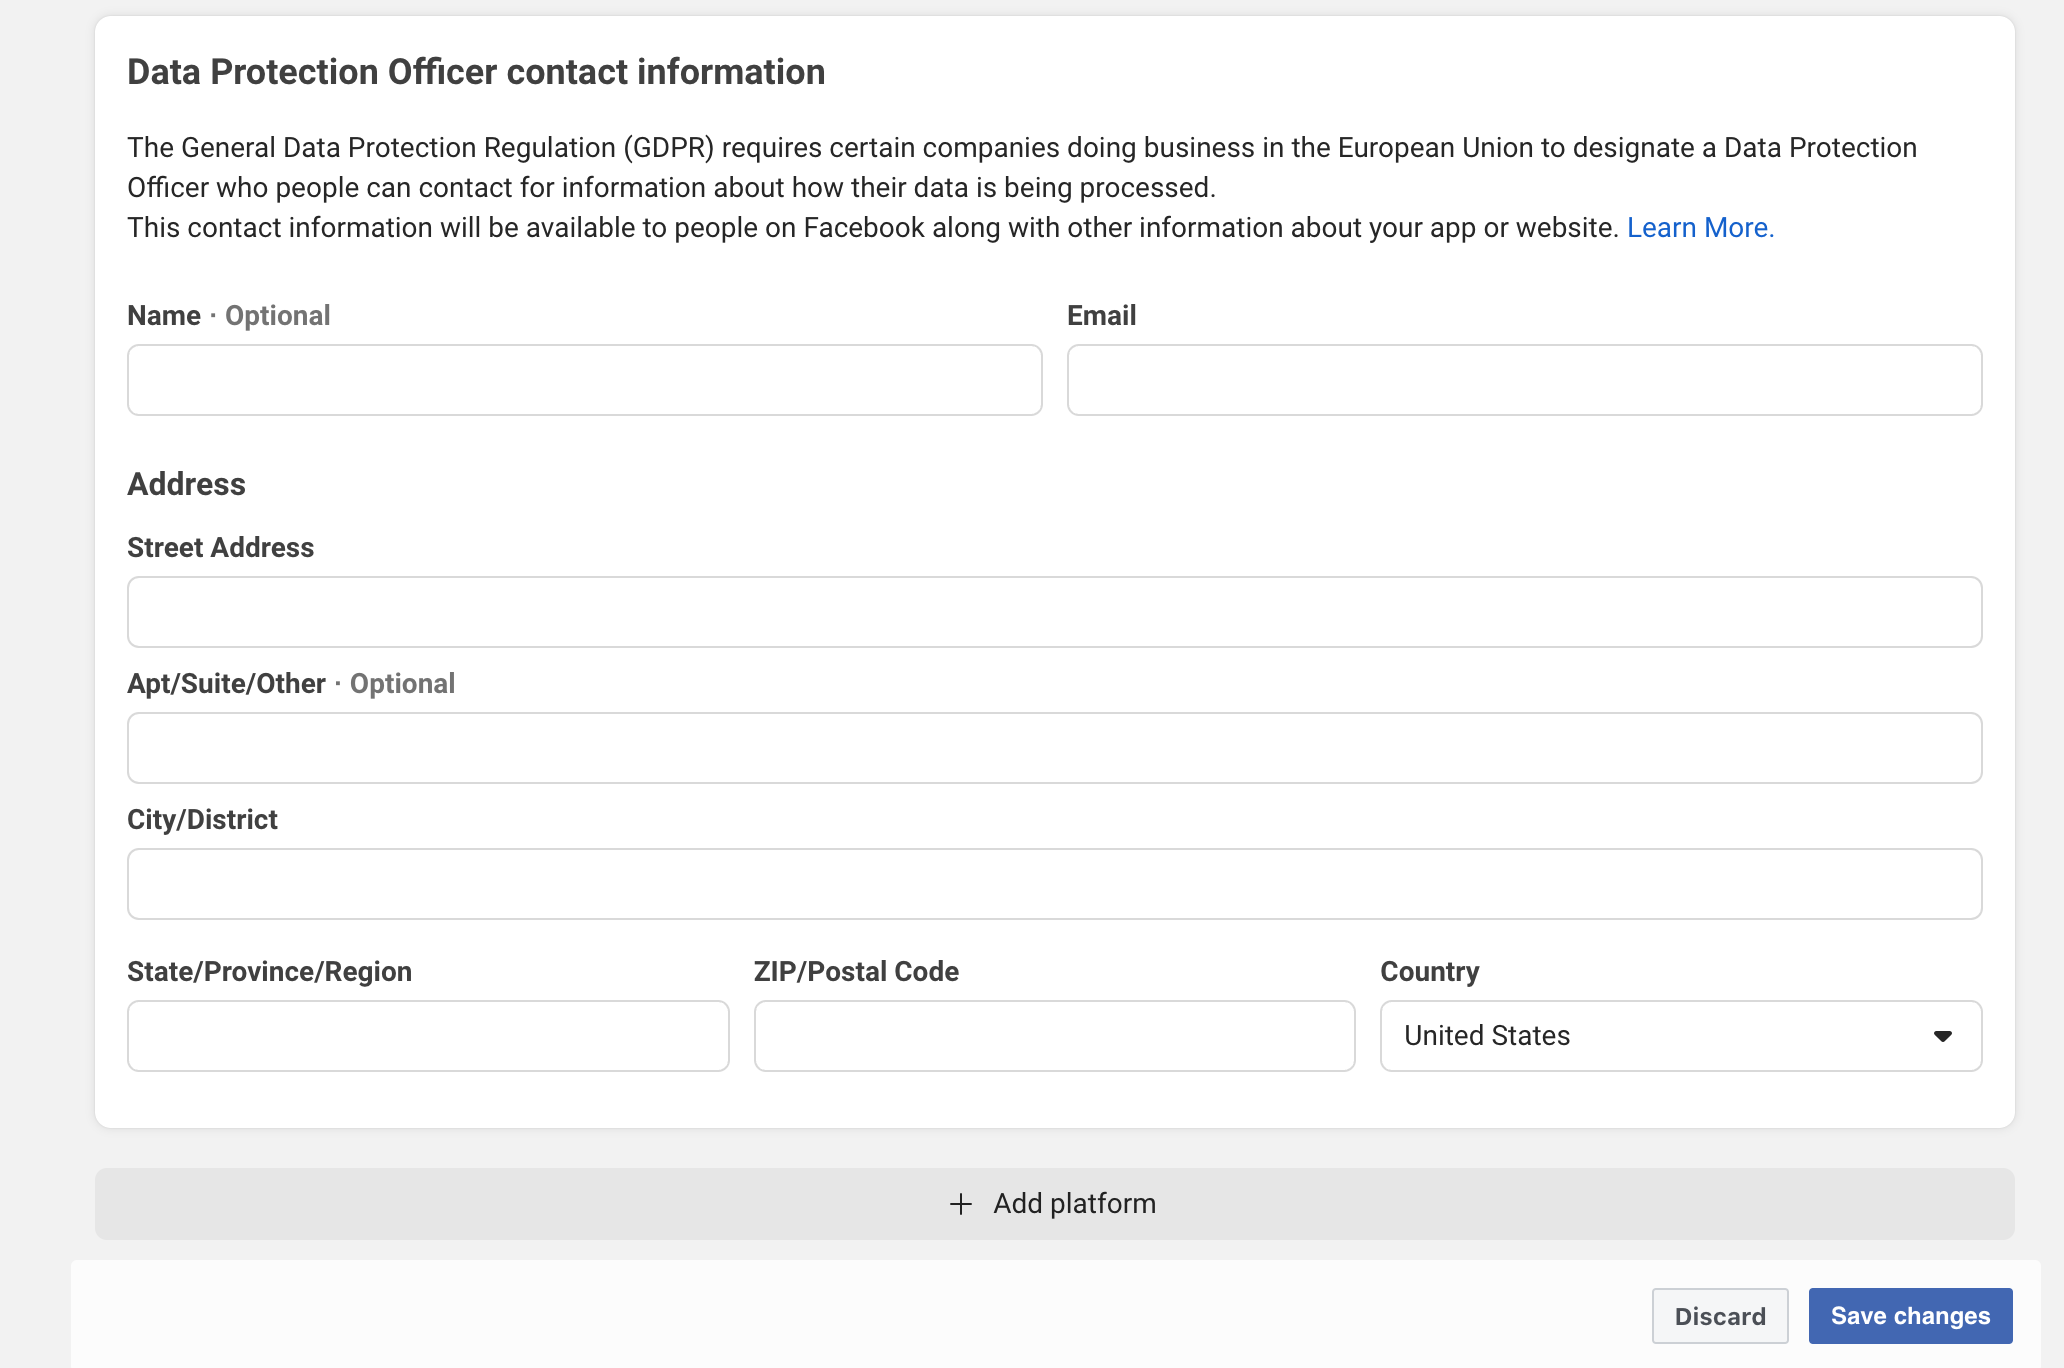
2.4 Complete App Settings
If you haven't filled out the basic details of your Facebook application, you'll need to do so in the Complete App Settings section. You will need to provide:
- App icon
- Privacy Policy URL
- App Category
With Mixpost you can generate Terms of use and Privacy policy pages in seconds. More details
Screenshots:

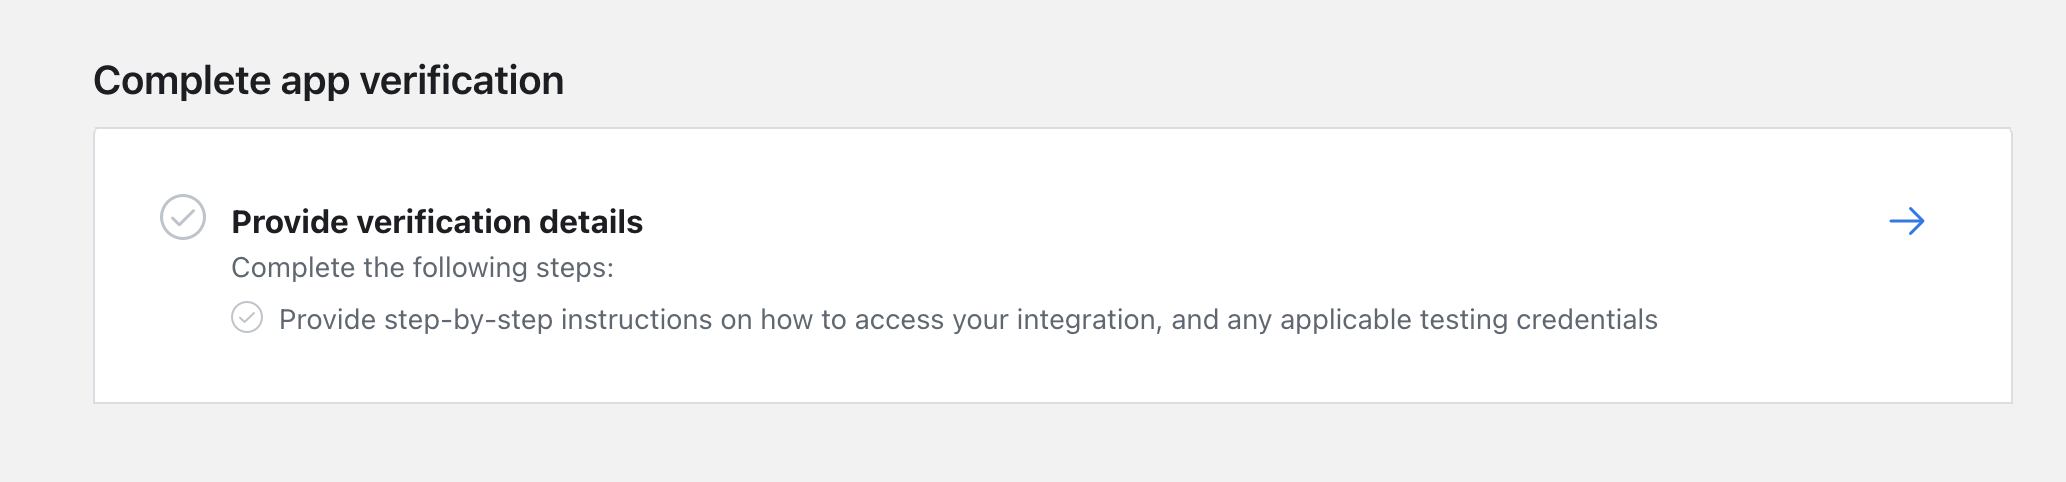
2.5. Provide verification details
Here, Facebook will display a list of permissions you have requested.
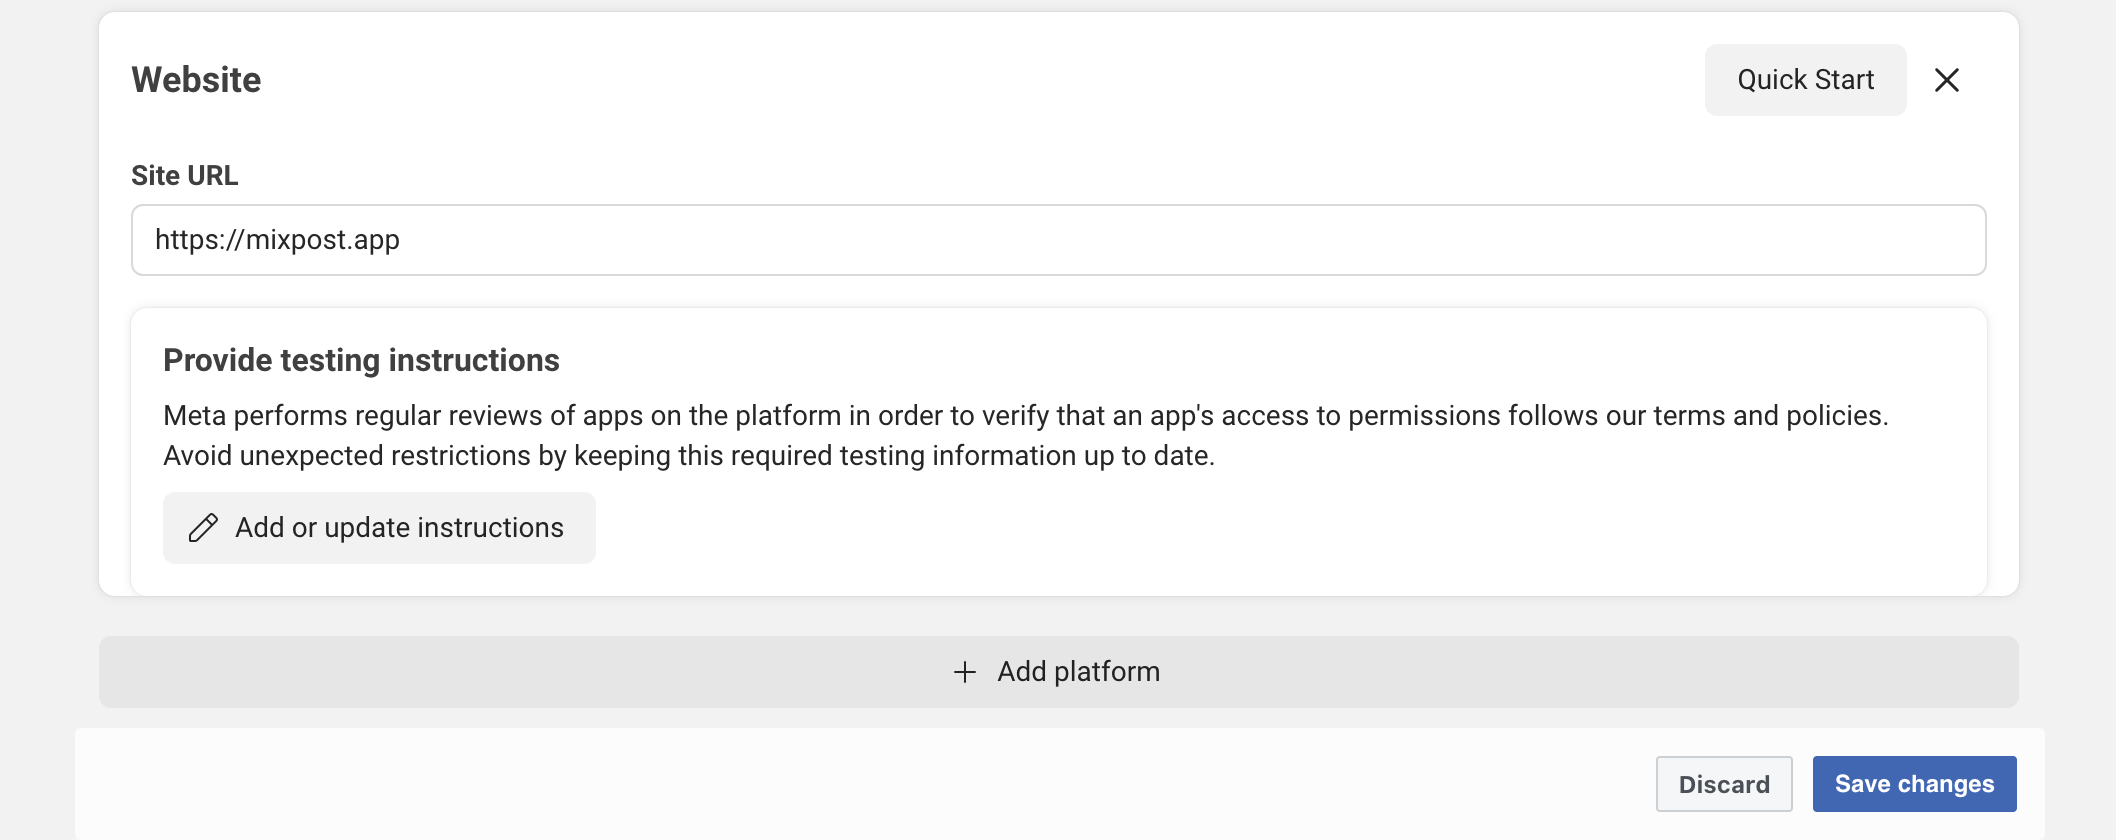
If you haven't previously added a Platform, you can do so now from the Provide verification details section. Click on the Add Platform button, and a new page will open. Here, click on Add platform, select Website, and enter your website URL.
https://example.com
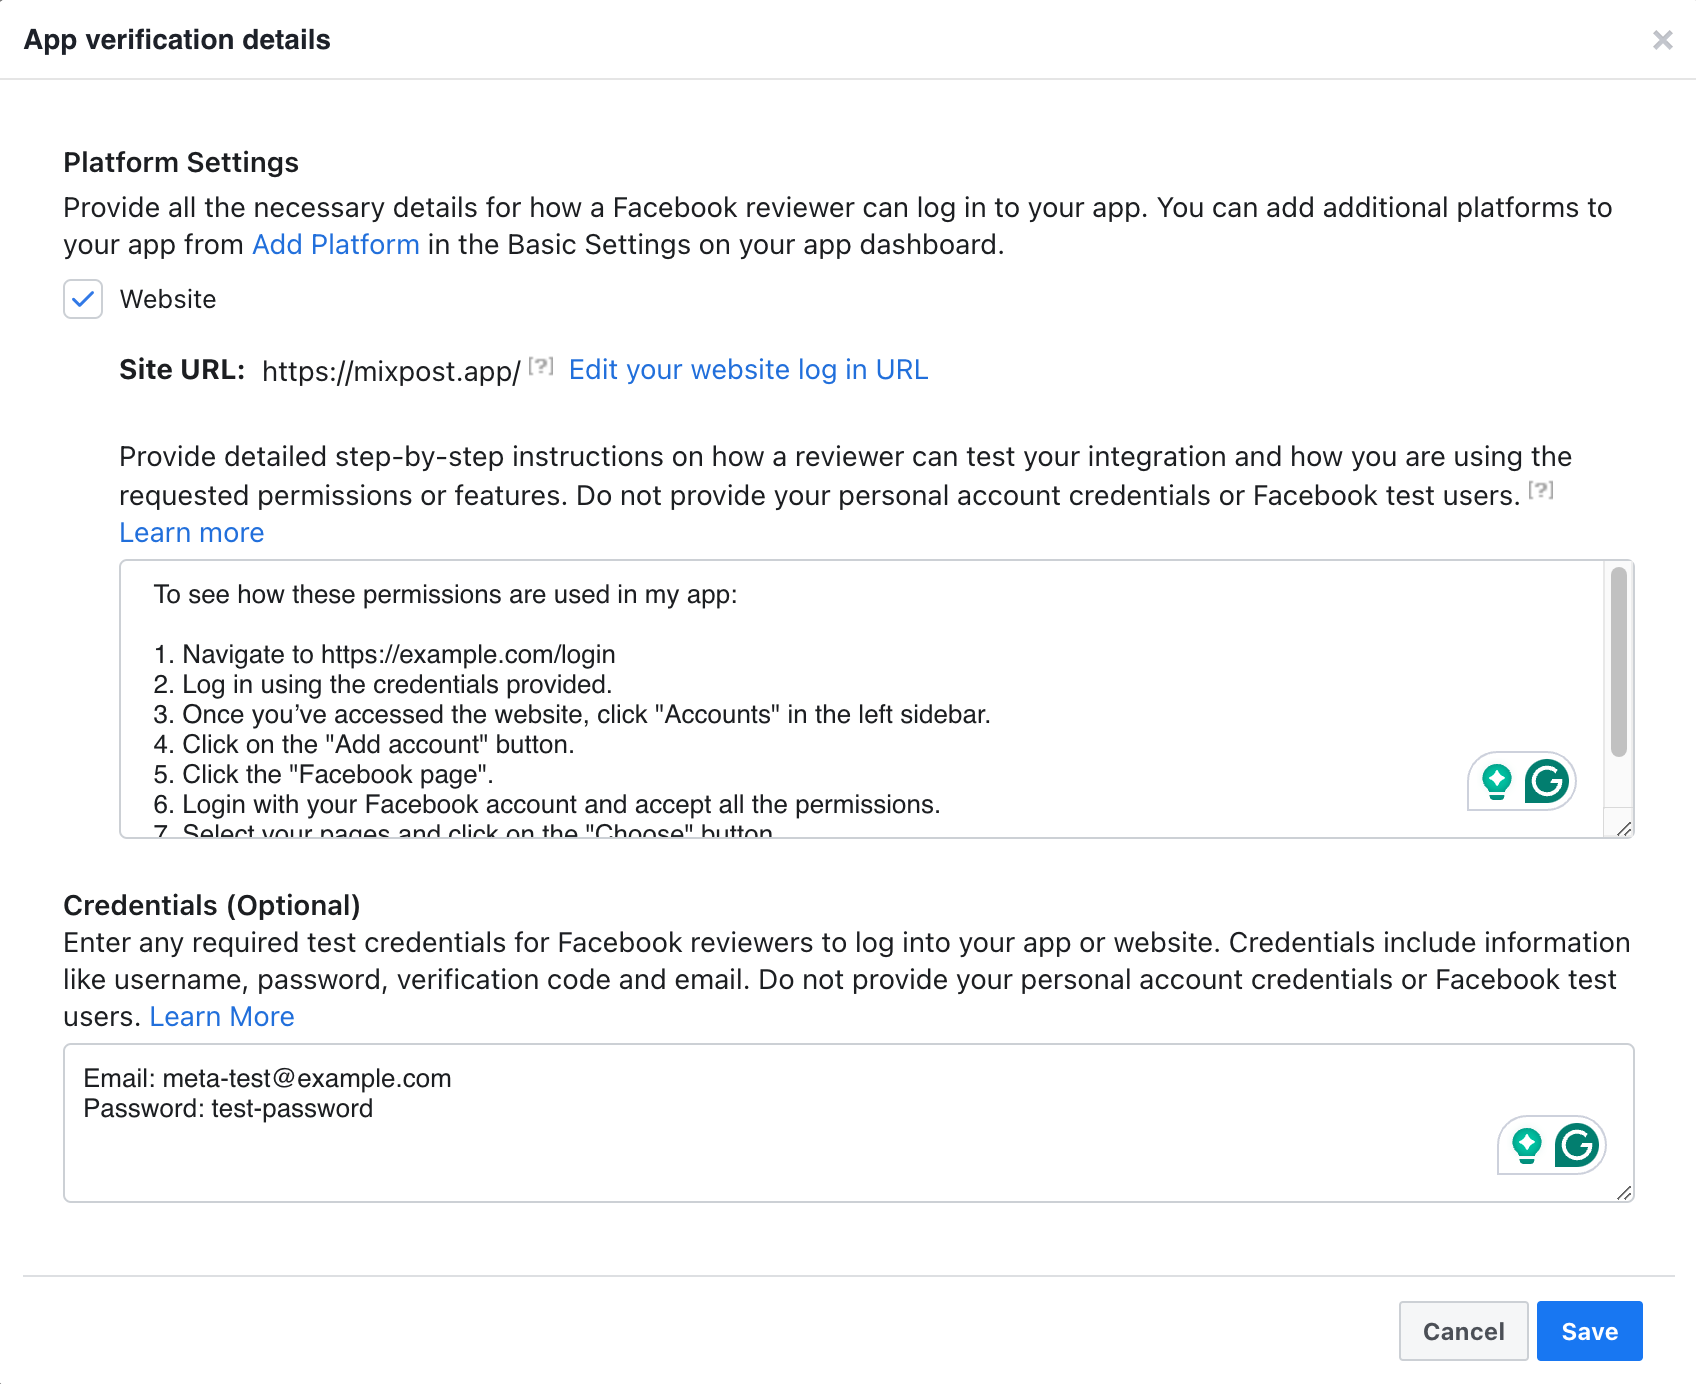
Save the changes, then return to the app verification page and refresh it. Click on the Provide verification details section and fill out the form:
Text for Instructions:
  To see how these permissions are used in my app:

  1. Navigate to https://example.com
  2. Log in using the credentials provided.
  3. Once you’ve accessed the website, click "Accounts" in the left sidebar.
  4. Click on the "Add account" button.
  5. Click the "Facebook page".
  6. Login with your Facebook account and accept all the permissions.
  7. Select your pages and click on the "Choose" button.
  8. Your Facebook pages have been added to my app. This way you can connect a Facebook page or an Instagram profile.
Text for Credentials:
Facebook login credentials:

Email: meta-test-fb@example.com
Password: test-password

-----------------------

You can access my app:

URL: https://example.com
Email: meta-test@example.com
Password: test-password
After filling the form save it.
- Enter the correct email and password for the user account you created in the first step.
- Replace
https://example.comwith your app's URL, ensuring it points to your Mixpost instance rather than your marketing page.
Screenshots:
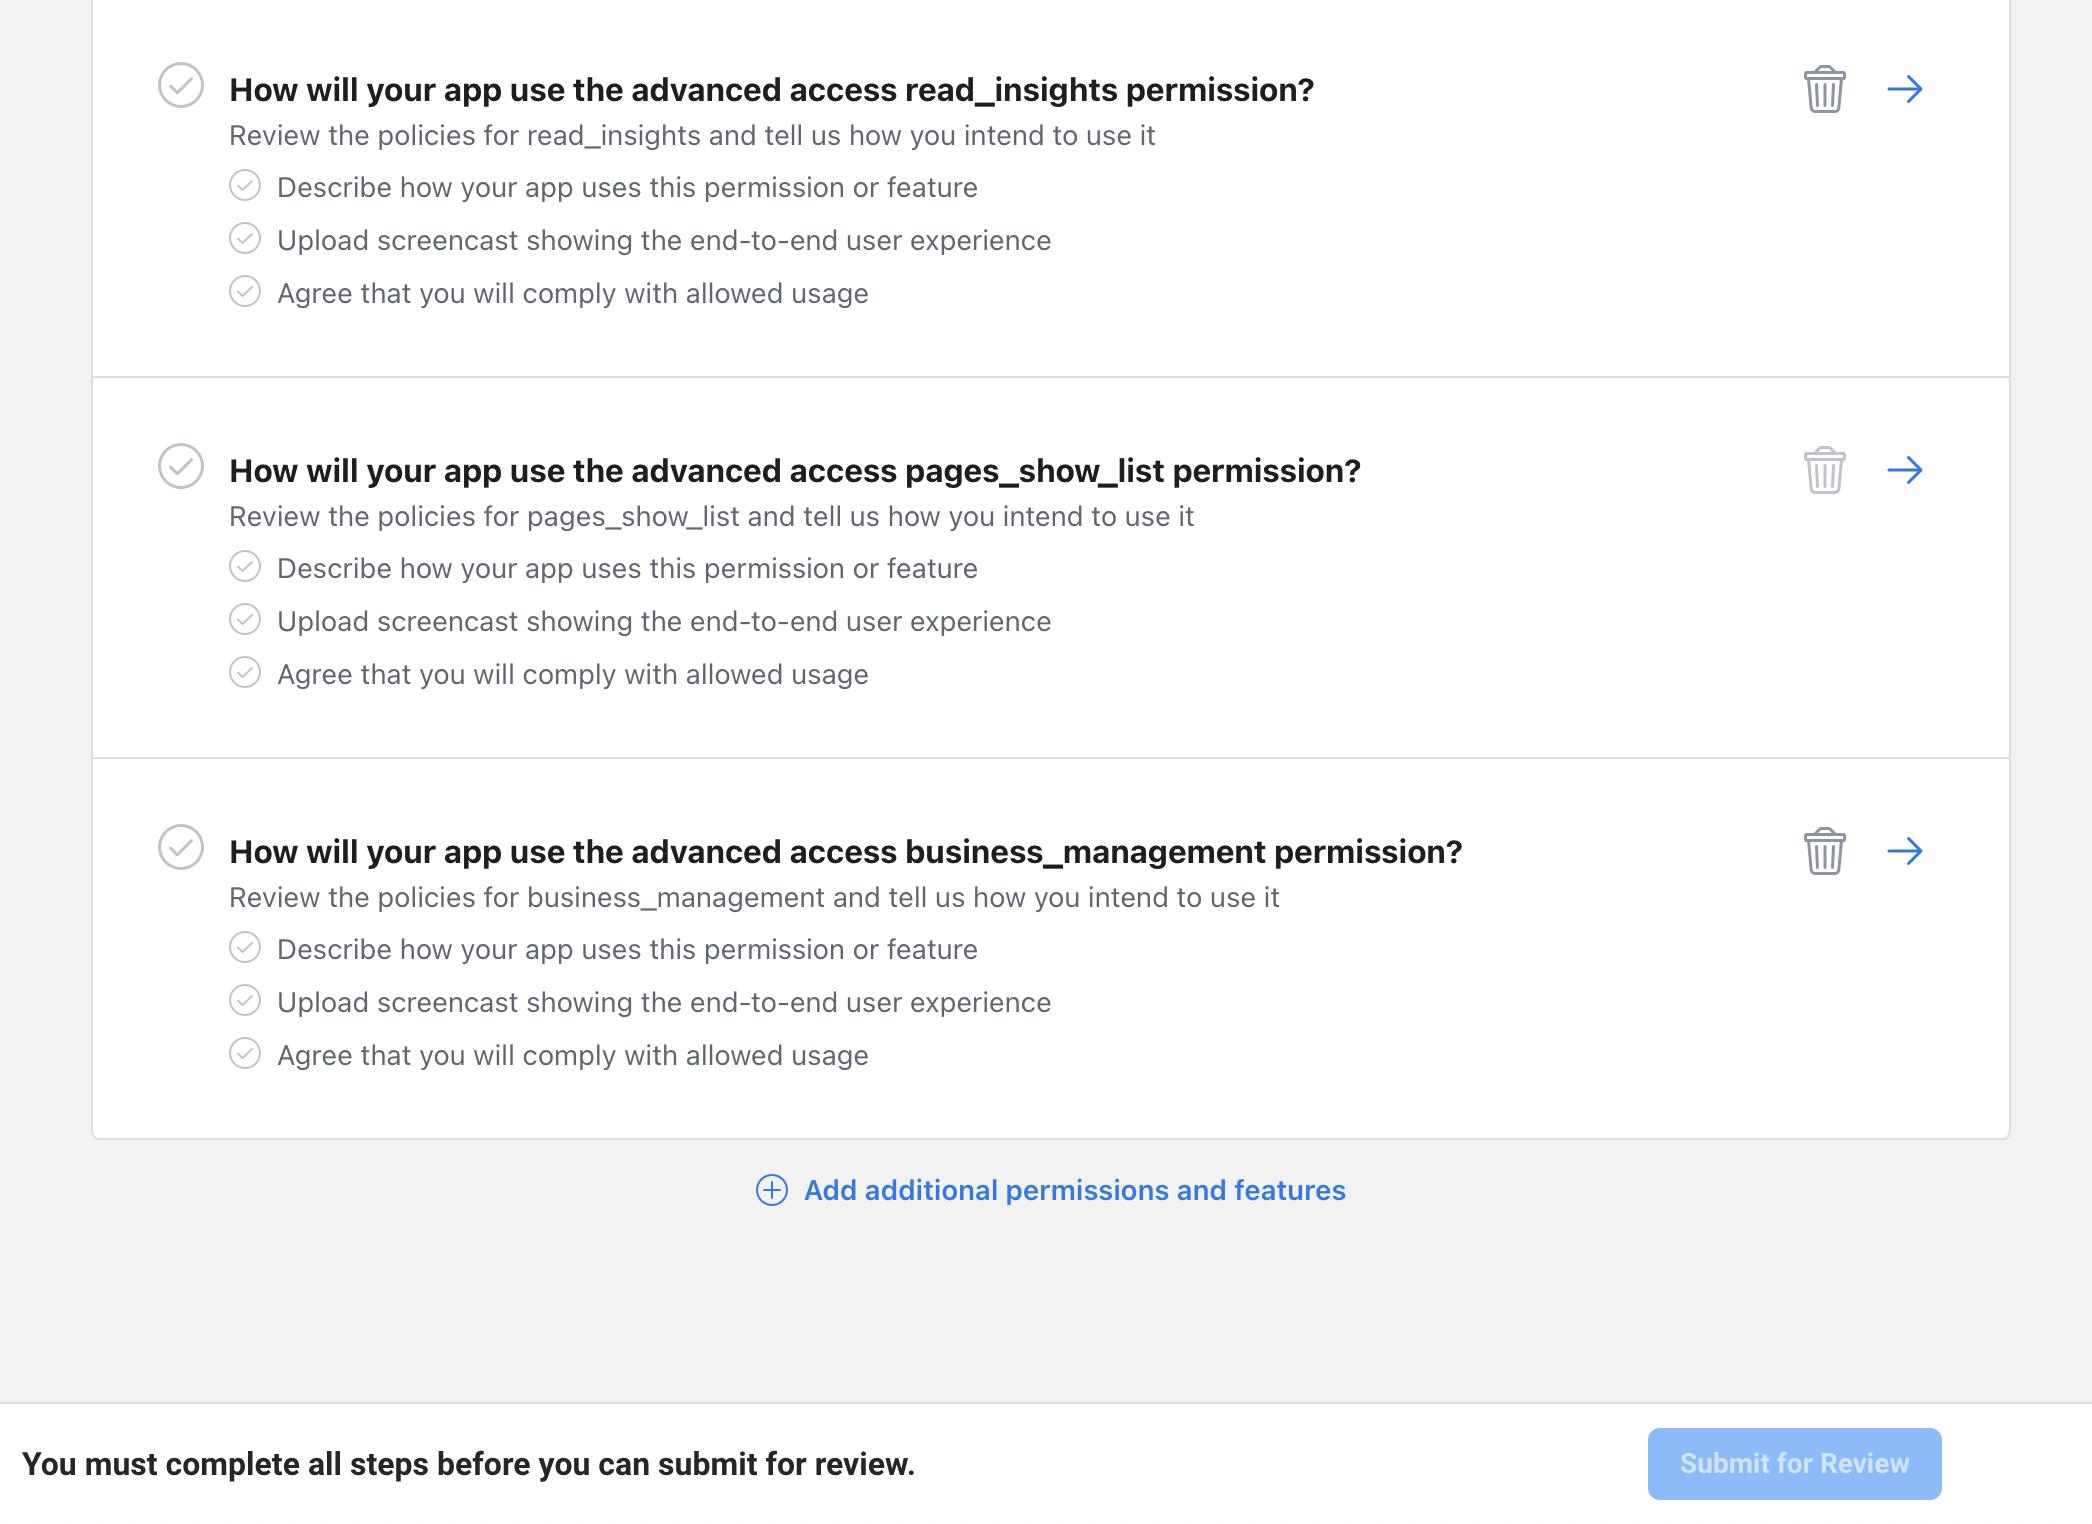
2.6. Explain the permissions
After reviewing the details you provided, Facebook may request explanations for each permission. You will need to provide a detailed description and a screen recording for each permission. Refer to the Screen Recordings guide for assistance.
Before recording your application, you may need to disconnect Mixpost from your Facebook account.
Below, we have listed all the explanations you need to provide:
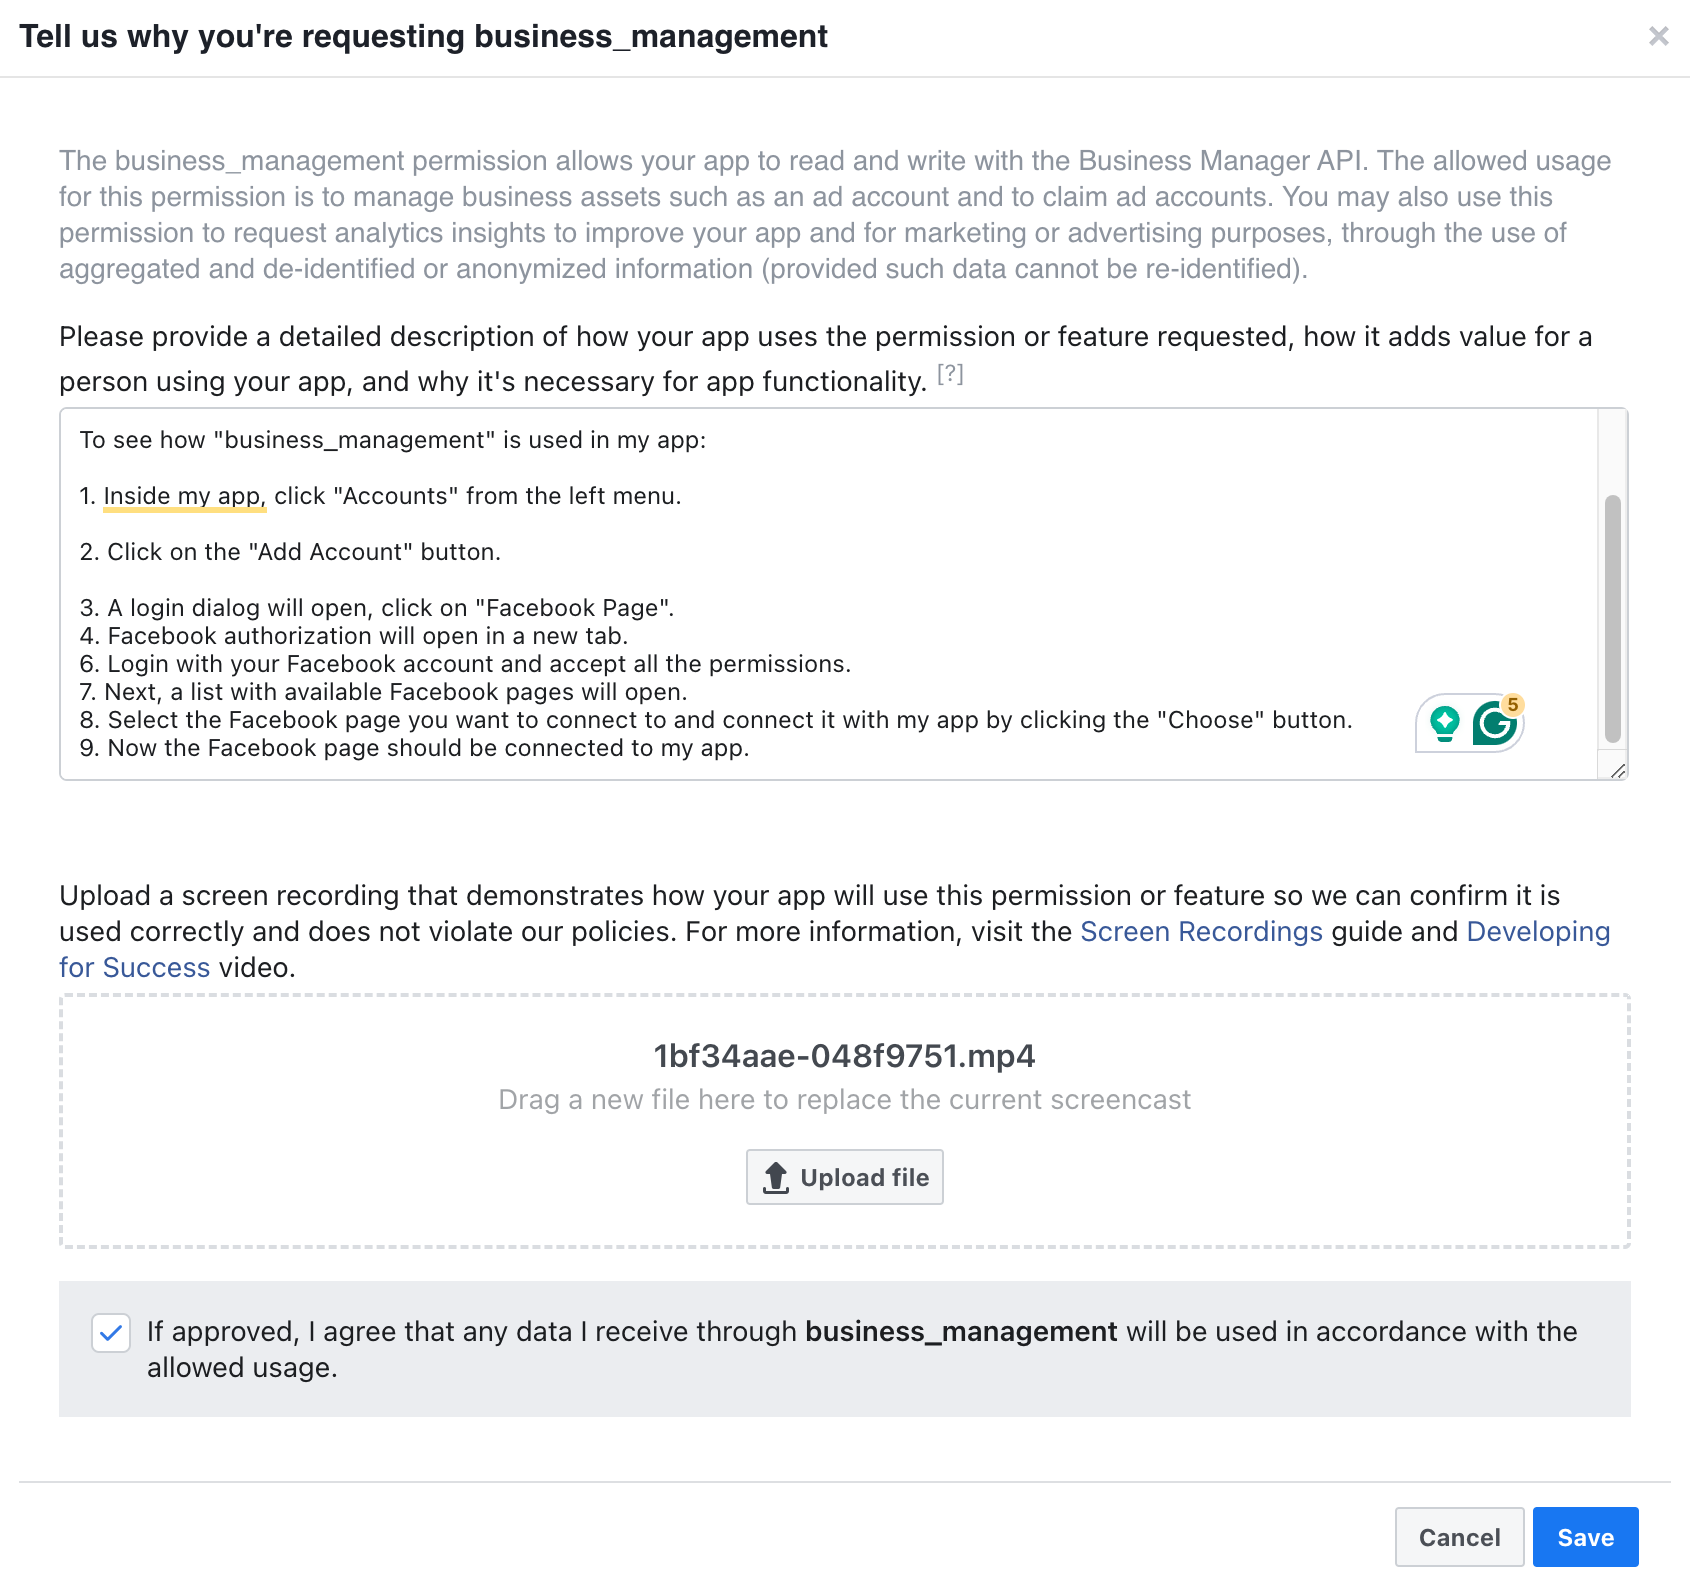
business_management
We need this permission to receive access to the business admin pages and display them to connect the chosen one to my app.

To see how "business_management" is used in my app:

1. Inside my app, click "Accounts" from the left menu.
2. Click on the "Add Account" button.
3. A login dialog will open, click on "Facebook Page".
4. Facebook authorization will open in a new tab.
6. Login with your Facebook account and accept all the permissions.
7. Next, a list with available Facebook pages will open.
8. Select the Facebook page you want to connect to and connect it with my app by clicking the "Choose" button.
9. Now the Facebook page should be connected to my app.
In your screen recording, demonstrate how a user can add a Facebook page, accept permissions, choose pages from a list, and display the connected pages on the Accounts page.
pages_show_list
We need this permission to read and display the list of Pages a person manages to connect the chosen one to my app.

To see how "pages_show_list" is used in my app:

1. Inside my app, click "Accounts" from the left menu.
2. A login dialog will open, click on "Facebook Page".
3. Facebook authorization will open in a new tab.
4. A login dialog to Facebook will open in a new window.
5. Login with your Facebook account and accept all the permissions.
6. Next, a list with available Facebook pages will open.
7. Select the Facebook page you want to connect to and connect it with my app by clicking the "Choose" button.
8. Now the Facebook page should be connected to my app.
In your screen recording, please show how a user can add a Facebook page, accept permissions, select pages from a list, and view the connected pages on the Accounts page.
read_insights
We need this permission to read the insights data for Pages:

- Daily Total Impressions of page posts.
- Daily Post Engagements of page.

This permission helps our users to understand what content is resonating with their audience and what to post to maximize their audience engagement.

To see how "read_insights" is used in my app:

1. Inside my app, click "Accounts" from the left menu.
2. Click on the "Add Account" button.
3. A login dialog will open, click on "Facebook Page".
4. Facebook authorization will open in a new tab.
5. Login with your Facebook account and accept all the permissions.
6. Next, a list with available Facebook pages will open.
7. Select the Facebook page you want to connect to and connect it with my app by clicking the "Choose" button.
8. Now the Facebook page should be connected to my app.
9. Click on the "Dashboard" button from the left menu and select the page you added. Here you will see all metrics. The data is collected by my app every 2 hours.
In your screen recording, please show how a user can add a Facebook page, accept permissions, select pages from a list, and view the connected pages on the Accounts page. Finally, demonstrate the analytics page of added Facebook page.
pages_manage_posts
We need this permission to create content posted on the page (posts, videos, photos).

This permission is required for my app to provide users with the benefit of scheduling and publishing posts on their pages.

To see how "pages_manage_posts" are used in my app:

1. Inside my app, click "Accounts" from the left menu.
2. Click on the "Add Account" button.
3. A login dialog will open, click on "Facebook Page".
4. Facebook authorization will open in a new tab.
5. Login with your Facebook account and accept all the permissions.
6. Next, a list of available pages will open.
7. Select the Facebook page you want to connect to and connect it with my app by clicking the "Choose" button.
8. Now the Facebook page should be connected to my app.
9. Click on the top "CREATE POST" button from the left menu.
10. Select which page you want to post on.
11. Write whatever you want to share with your audience.
12. On the right bottom, click on the "Post now" button or you can pick a time to schedule. If you click "Post now" the post should be published in a minute to the selected page.
In your screen recording, please show how a user can add a Facebook page, accept permissions, select pages from a list, and view the connected pages on the Accounts page. Additionally, demonstrate how to create and publish a post. Finally, show that you can access the published post on the Facebook website by opening the original post.
pages_read_engagement
We need this permission because it is required by "pages_manage_posts" permission. We need this permission to read content(posts, photos, videos) posted by the Page.

To see how "pages_read_engagement" is used in my app:

1. Inside my app, click "Accounts" from the left menu.
2. Click on the "Add Account" button.
3. A login dialog will open, click on "Facebook Page".
4. Facebook authorization will open in a new tab.
5. Login with your Facebook account and accept all the permissions.
6. Next, a list of available pages will open.
7. Select the Facebook page you want to connect to and connect it with my app by clicking the "Choose" button.
8. Now the Facebook page should be connected to my app.
9. Click on the top "CREATE POST" button from the left menu.
10. Select which page you want to post on.
11. Write whatever you want to share with your audience.
12. On the right bottom, click on the "Post now" button or you can pick a time to schedule. If you click "Post now" the post should be published in a minute to the selected page.
In your screen recording, please show how a user can add a Facebook page, accept permissions, select pages from a list, and view the connected pages on the Accounts page. Additionally, demonstrate how to create and publish a post. Finally, show that you can access the published post on the Facebook website by opening the original post.
instagram_basic
We need this permission to read an Instagram Business account profile's info. We need to get the basic metadata of an Instagram Business account profile: ID, Username, Profile Picture, and number of followers.

To see how "instagram_basic" is used in my app:

1. Inside my app, click "Accounts" from the left menu.
2. Click on the "Add Account" button.
3. A login dialog will open, click on "Instagram".
4. Facebook authorization will open in a new tab.
5. Login with your Facebook account and accept all the permissions.
6. Next, a list of available Instagram accounts will open.
7. Select the Instagram account you want to connect to and connect it with my app by clicking the "Choose" button.
8. Now the Instagram account should be connected to my app.
9. Also, you can see the number of followers of your Instagram account by visiting the "Dashboard" page, from the left menu, then select your Instagram Account. Here you will see the Audience graph. Our app collects the number of followers every 3 hours.
In your screen recording, please show how a user can add an Instagram profile, accept permissions, select the instagram profiles from the list, and view the connected instagram profiles on the Accounts page. Finally, show the Audience graph from the Analytics page.
instagram_content_publish
After the user adds an Instagram profile to my app, we need this permission to allow users to publish photo and video posts on behalf of a connected Creator/Business Instagram account profile.

This permission is required for my app to provide users with the benefit of scheduling and publishing posts on Instagram.

To see how "instagram_content_publish" is used in my app:

1. Inside my app, click "Accounts" from the left menu.

2. Click on the "Add Account" button.

3. A login dialog will open, click on "Instagram".
4. Facebook authorization will open in a new tab.
5. Login with your Facebook account and accept all the permissions.
6. Next, a list of available Instagram accounts will open.
7. Select the Instagram account you want to connect to and connect it with my app by clicking the "Choose" button.
8. Now the Instagram account should be connected to my app.
9. Click on the top "CREATE POST" button from the left menu.
10. Select which Instagram account you want to post on.
11. Write whatever you want to share with your audience.
12. Upload an image or a video from the editor menu. (the second button)
13. On the right bottom, click on the "Post now" button or you can pick a time to schedule. If you click "Post now" the post should be posted in a minute to the selected Instagram account.
In your screen recording, please show how a user can add an Instagram profile, accept permissions, select the instagram profiles from the list, and view the connected instagram profiles on the Accounts page. Additionally, demonstrate how to create and publish a post. Finally, show that you can access the published post on the Instagram website by opening the original post.
instagram_manage_insights
We need this permission to access insights for the Instagram Business account profile. By accessing these insights, we can provide our users with metrics like reach, impressions, profile views, phone call clicks, and more. It helps users to understand what content is resonating with their audience and what to post to maximize their audience engagement.

By being granted the 'instagram_manage_insights' permission, our app can offer users a comprehensive, detailed, and valuable view of their Instagram Business account performance.

To see how "instagram_manage_insights" are used in my app:

1. Inside my app, click "Accounts" from the left menu.
2. Click on the "Add Account" button.
3. A login dialog will open, click on "Instagram".
4. Facebook authorization will open in a new tab.
5. Login with your Facebook account and accept all the permissions.
6. Next, a list of available Instagram accounts will open.
7. Select the Instagram account you want to connect to and connect it with my app by clicking the "Choose" button.
8. Now the Instagram account should be connected to my app.
9. Click on the "Dashboard" button from the left menu and select the Instagram account you added. Here you will see all metrics. The data is collected by my app every 2 hours.
In your screen recording, please show how a user can add an Instagram profile, accept permissions, select the instagram profiles from the list, and view the connected instagram profiles on the Accounts page. Finally, demonstrate the analytics page of added Instagram profile.
After you have provided explanations and videos for each permission, click the Submit for Review button. This button is located at the bottom of the page and will only become active once all review requirements, indicated by blue checkmarks, are fulfilled.
Screenshots:

3. Done
It may take several days to receive a response from Facebook team. You can monitor your pending request under the App Review -> Requests section in your Facebook developer account.
Useful information: