Create a webhook
Allow external services to be notified when certain events happen.
1. Enter the Workspace
Navigate to your workspace. Once inside, look for the sidebar menu and click on Webhooks.
2. Initiate Creation
Within the Webhooks section, click on the Create Webhook button.
This action will take you to the form where you can define the details of your new webhook.
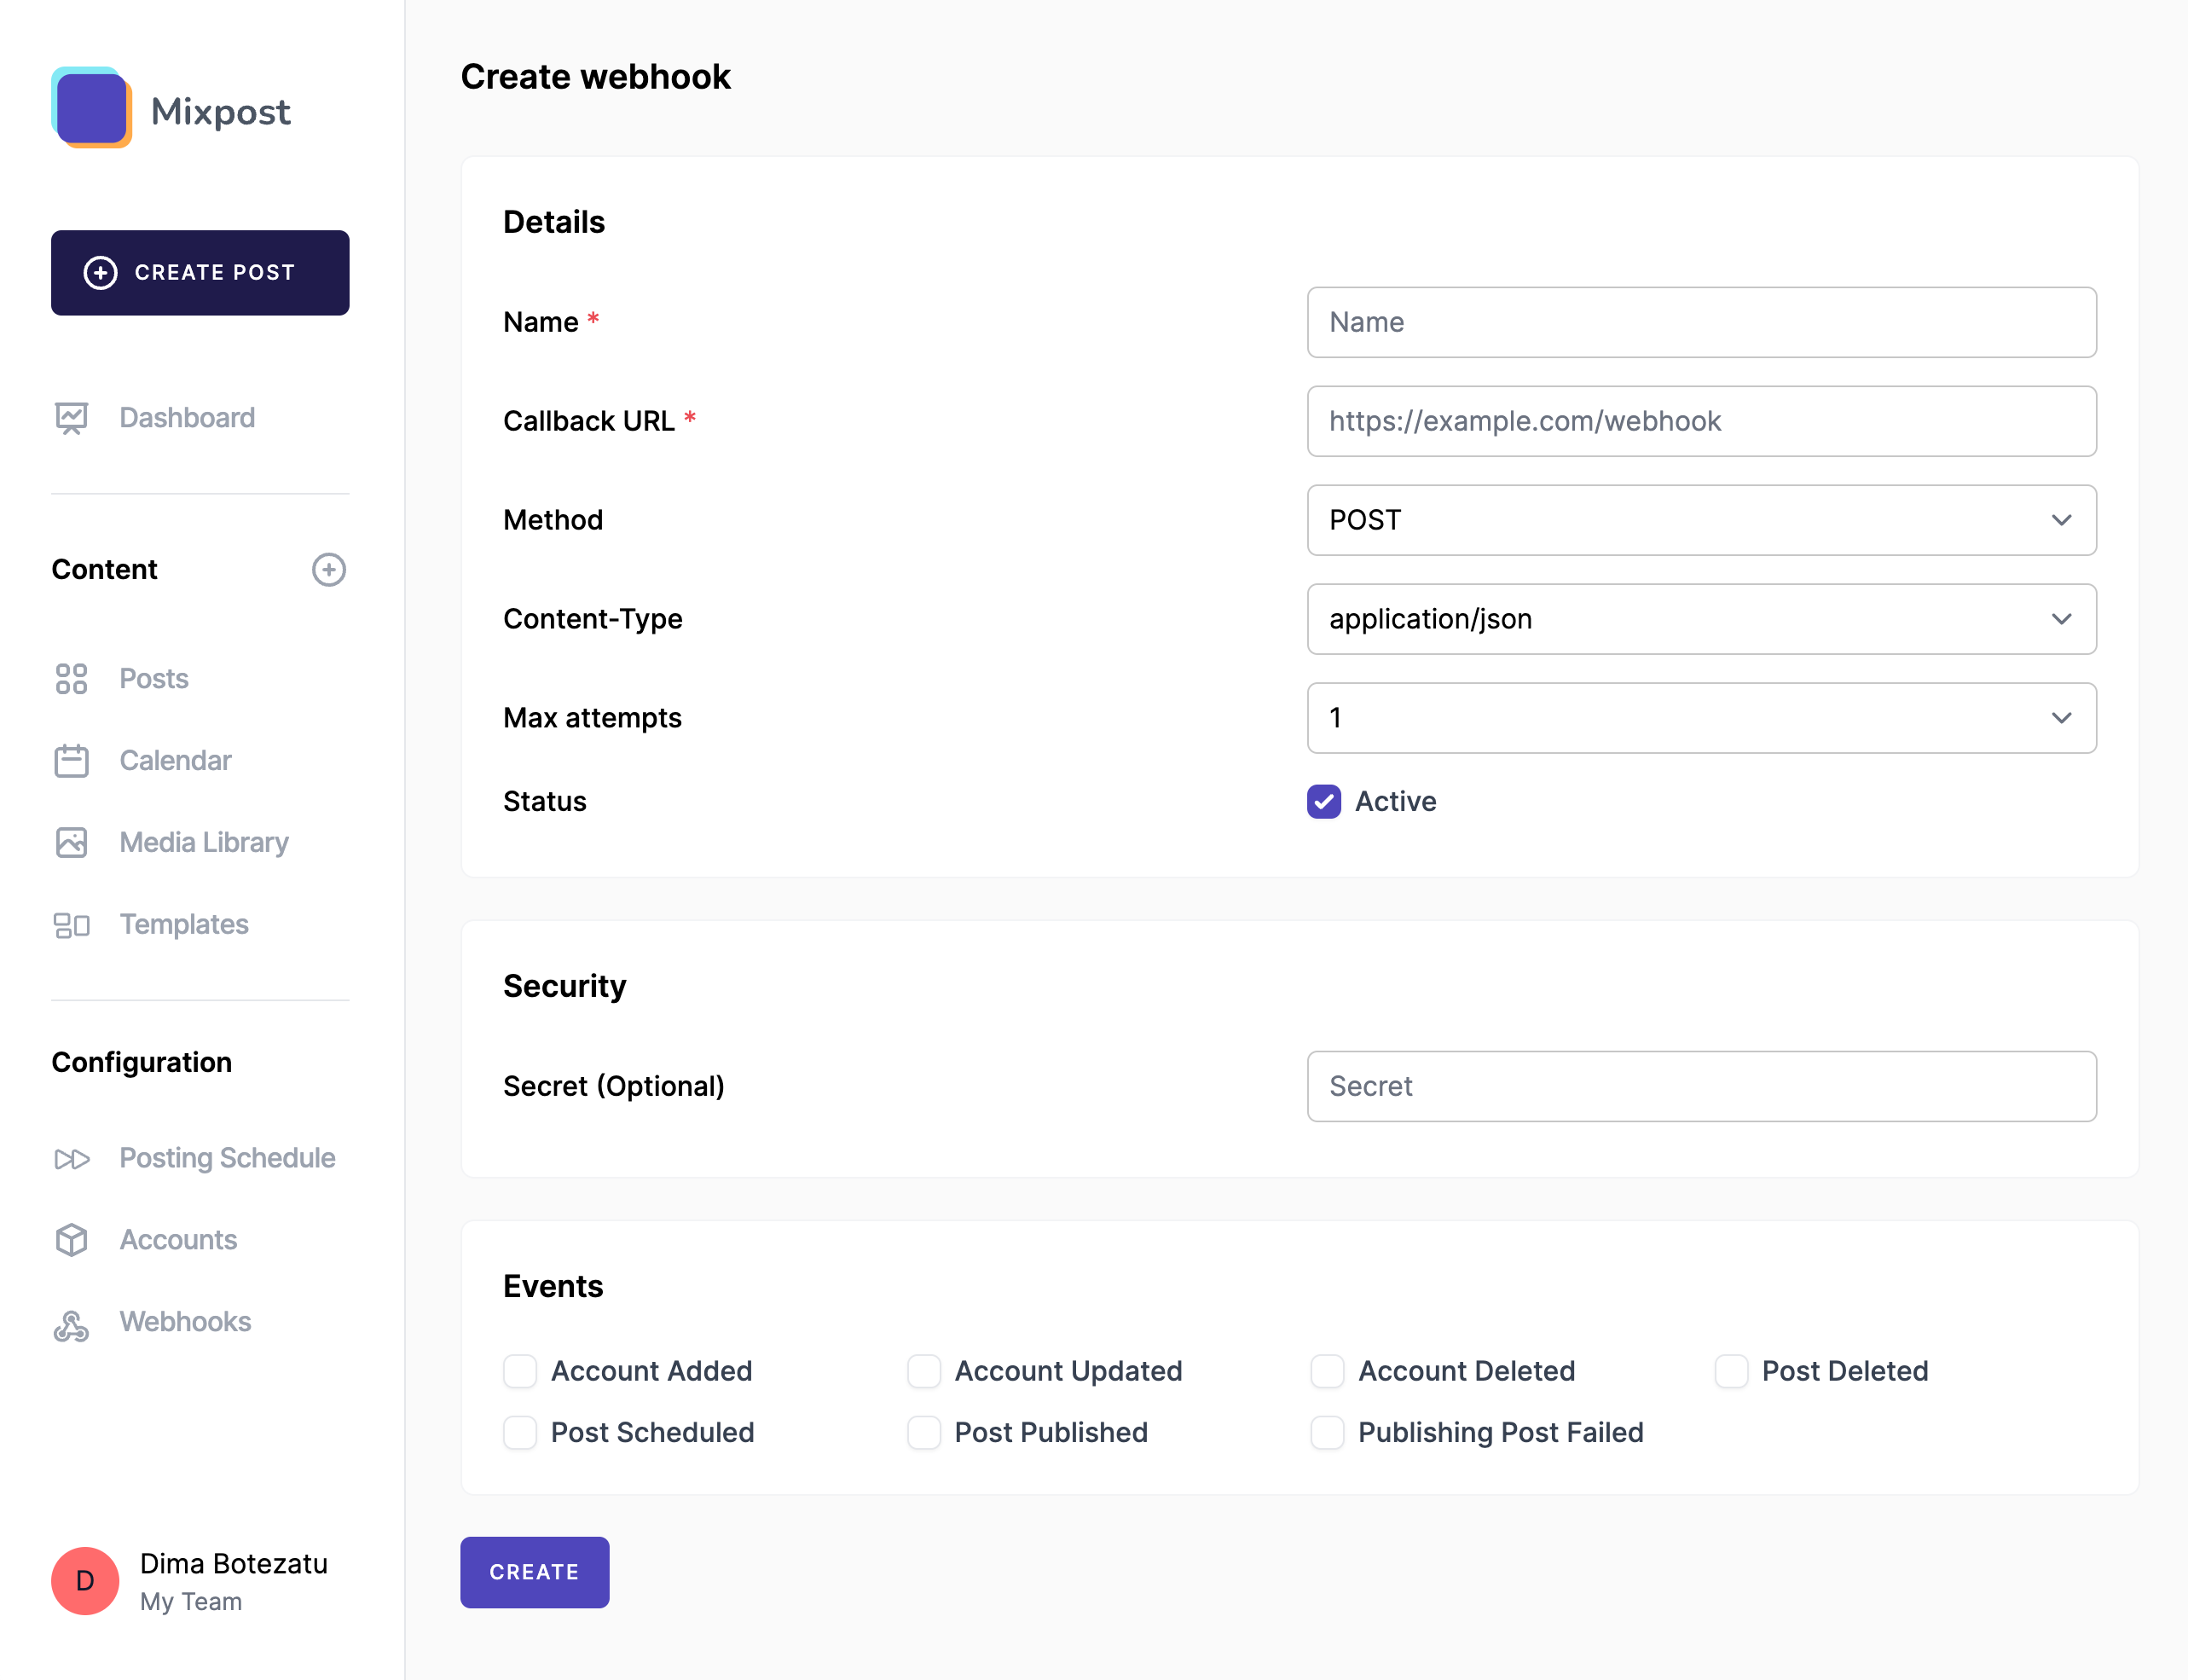
3. Fill out form
Now, you'll need to provide information about your webhook:
- Name: Give your webhook a unique and descriptive name that helps you identify its purpose.
- Callback URL: Enter the URL where you want the webhook events to be sent. This should be a URL on your server ready to handle incoming HTTP requests.
- Method: Choose the HTTP method (typically POST) that the webhook should use to send data to your callback URL.
- Content-Type: Specify the content type of the data being sent. Commonly, this is application/json, but you might have other requirements based on your server setup.
- Max attempts: Decide how many times the webhook should attempt to send the event data if the first try fails.
- Status: Check this box to activate/deactivate the webhook.
- Secret (Optional): Enter a secret key for securing your webhook. This will be used to generate a signature for each request, helping you verify that requests to your callback URL are legitimate.
- Events: Choose the specific events you want this webhook to listen to. Your selection here defines what actions will trigger the webhook to send data to your Callback URL.
4. Save
After filling out the form and reviewing your data, click the Create button to finalize the webhook creation process.
Conclusion
Your webhook is now set up and will start listening to the events you selected, and sending data to your specified Callback URL as those events occur.
Screenshots: