Install Mixpost Pro with Docker
Installation Mixpost Pro with Docker offers the following advantages:
- Install Mixpost in a clean environment.
- Simplify the setup process.
- Avoid compatibility issues across different operating systems with Docker's consistent environment.
In order to install Mixpost Pro, you’ll need to get a license first.
If your domain/subdomain is already pointed to the server, start at step 2.
If you have already installed Docker and Docker-Compose, start at step 3.
1. DNS setup
Point your domain/subdomain to the server. Add A record to route the domain/subdomain accordingly:
Type: A
Name: the desired domain/subdomain
IP address: <IP_OF_YOUR_SERVER>
2. Install Docker
This can vary depending on the Linux distribution used. You can find detailed instructions in the Docker documentation. The following example is for Ubuntu:
Set up Docker's apt repository
# Add Docker's official GPG key:
sudo apt-get update
sudo apt-get install ca-certificates curl
sudo install -m 0755 -d /etc/apt/keyrings
sudo curl -fsSL https://download.docker.com/linux/ubuntu/gpg -o /etc/apt/keyrings/docker.asc
sudo chmod a+r /etc/apt/keyrings/docker.asc

# Add the repository to Apt sources:
echo \
"deb [arch=$(dpkg --print-architecture) signed-by=/etc/apt/keyrings/docker.asc] https://download.docker.com/linux/ubuntu \
$(. /etc/os-release && echo "$VERSION_CODENAME") stable" | \
sudo tee /etc/apt/sources.list.d/docker.list > /dev/null
sudo apt-get update
Install the Docker packages
sudo apt-get install docker-ce docker-ce-cli containerd.io docker-buildx-plugin docker-compose-plugin
3. Create Docker Compose file
Create a docker-compose.yml file. Paste the following in the file:
- With SSL Support
- Without SSL Support
Enables SSL/TLS for secure, encrypted communications. Ideal for those wanting a hands-off approach to SSL setup.
services:
    traefik:
      image: "traefik"
      restart: unless-stopped
      command:
        - "--api=true"
        - "--api.insecure=true"
        - "--providers.docker=true"
        - "--providers.docker.exposedbydefault=false"
        - "--entrypoints.web.address=:80"
        - "--entrypoints.web.http.redirections.entryPoint.to=websecure"
        - "--entrypoints.web.http.redirections.entrypoint.scheme=https"
        - "--entrypoints.websecure.address=:443"
        - "--certificatesresolvers.mytlschallenge.acme.tlschallenge=true"
        - "--certificatesresolvers.mytlschallenge.acme.email=${SSL_EMAIL}"
        - "--certificatesresolvers.mytlschallenge.acme.storage=/letsencrypt/acme.json"
      ports:
        - "80:80"
        - "443:443"
      volumes:
        - traefik_data:/letsencrypt
        - /var/run/docker.sock:/var/run/docker.sock:ro
    mixpost:
        image: inovector/mixpost-pro-team:latest
        env_file:
            - .env
        labels:
          - traefik.enable=true
          - traefik.http.routers.mixpost.rule=Host(`${APP_DOMAIN}`)
          - traefik.http.routers.mixpost.tls=true
          - traefik.http.routers.mixpost.entrypoints=web,websecure
          - traefik.http.routers.mixpost.tls.certresolver=mytlschallenge
          - traefik.http.middlewares.mixpost.headers.SSLRedirect=true
          - traefik.http.middlewares.mixpost.headers.STSSeconds=315360000
          - traefik.http.middlewares.mixpost.headers.browserXSSFilter=true
          - traefik.http.middlewares.mixpost.headers.contentTypeNosniff=true
          - traefik.http.middlewares.mixpost.headers.forceSTSHeader=true
          - traefik.http.middlewares.mixpost.headers.SSLHost=`${APP_DOMAIN}`
          - traefik.http.middlewares.mixpost.headers.STSIncludeSubdomains=true
          - traefik.http.middlewares.mixpost.headers.STSPreload=true
          - traefik.http.routers.mixpost.middlewares=mixpost@docker
        volumes:
            - storage:/var/www/html/storage/app
        depends_on:
            - mysql
            - redis
        restart: unless-stopped
    mysql:
        image: 'mysql/mysql-server:8.0'
        environment:
            MYSQL_DATABASE: ${DB_DATABASE}
            MYSQL_USER: ${DB_USERNAME}
            MYSQL_PASSWORD: ${DB_PASSWORD}
        volumes:
            - 'mysql:/var/lib/mysql'
        healthcheck:
            test: ["CMD", "mysqladmin", "ping", "-p ${DB_PASSWORD}"]
            retries: 3
            timeout: 5s
        restart: unless-stopped
    redis:
        image: 'redis:latest'
        command: redis-server --appendonly yes --replica-read-only no
        volumes:
            - 'redis:/data'
        healthcheck:
            test: ["CMD", "redis-cli", "ping"]
            retries: 3
            timeout: 5s
        restart: unless-stopped

volumes:
    traefik_data:
      driver: local
    mysql:
        driver: local
    redis:
        driver: local
    storage:
        driver: local
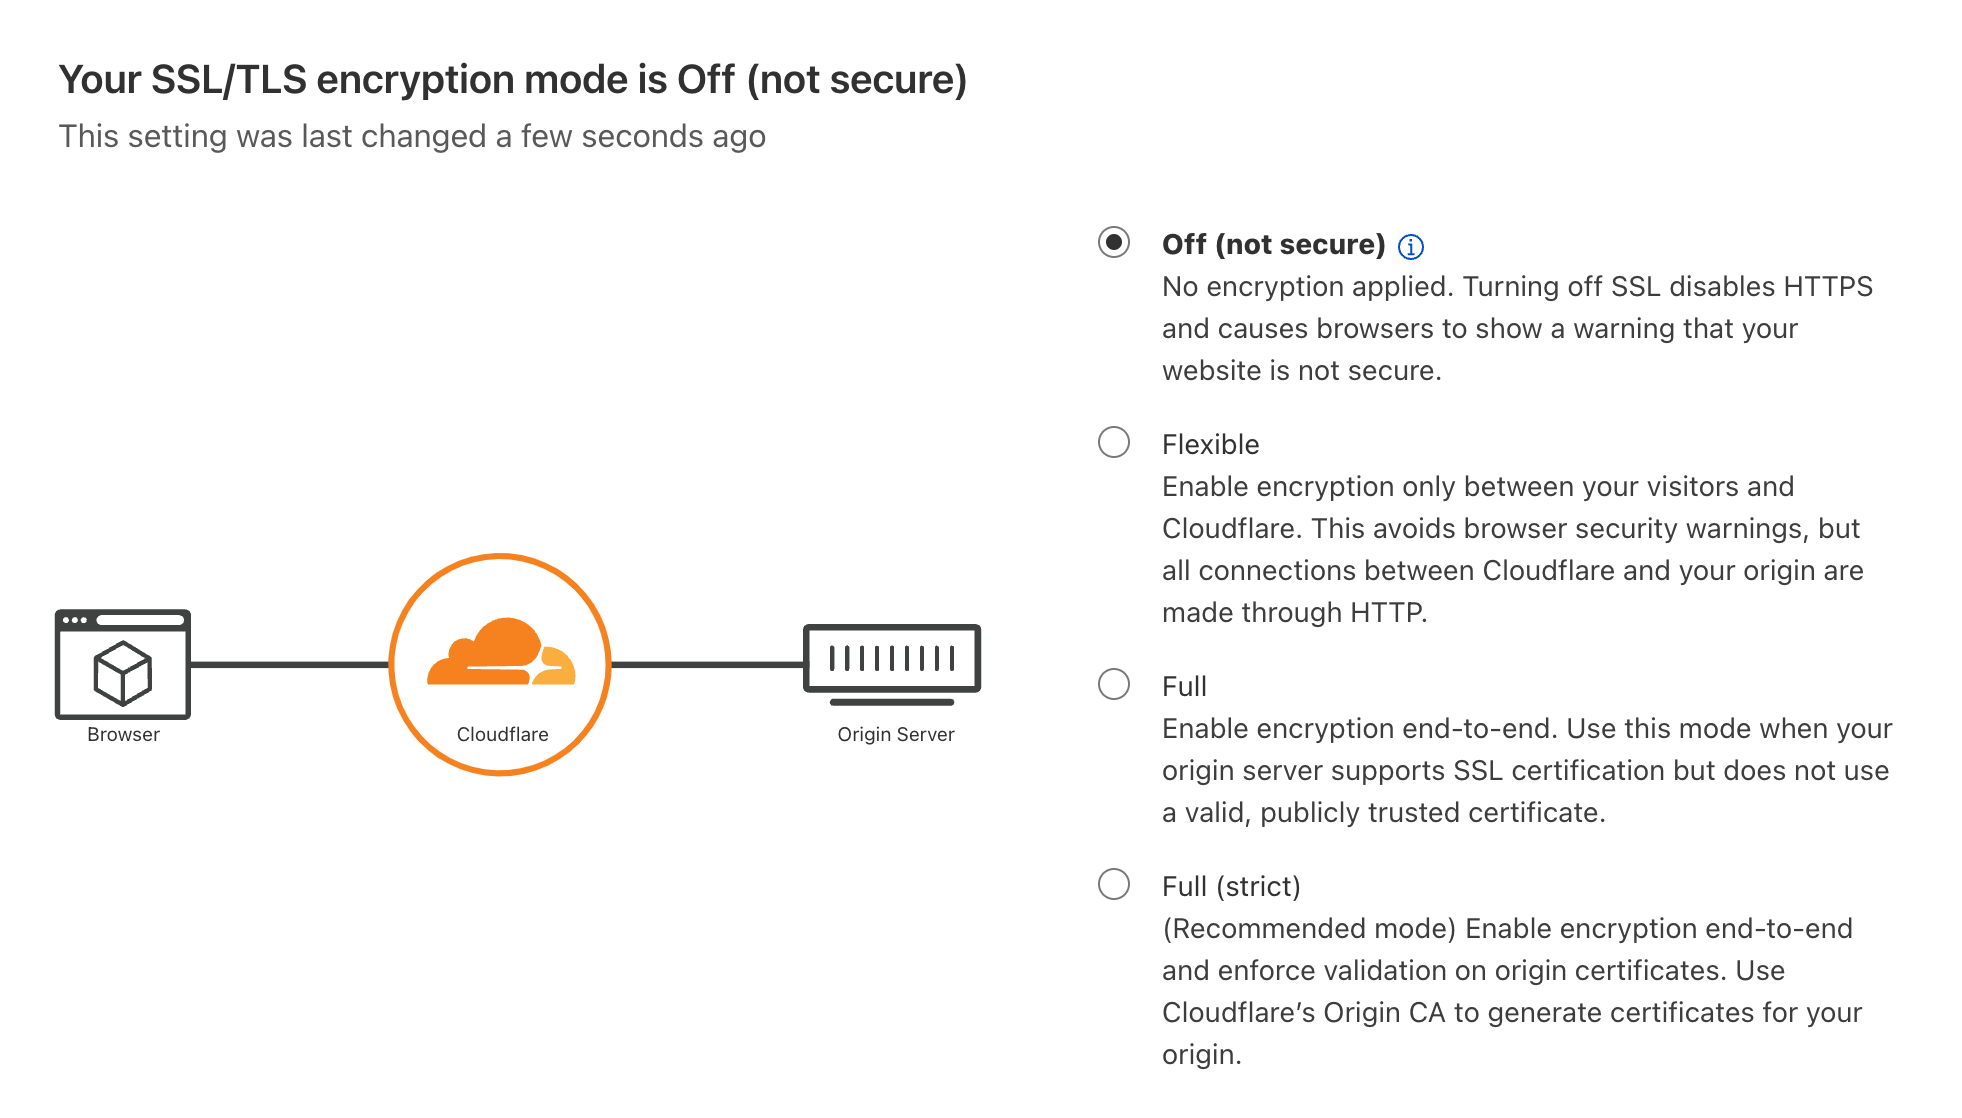
If you’re using Cloudflare, you might encounter issues with SSL connections or errors such as “Web server is down (521 Error)”. To prevent these problems, follow these steps:
- Under SSL/TLS, select "Off (not secure)".
- Ensure the DNS records for your domain/subdomain are proxied (orange cloud icon).
Screenshots:


Basic setup without SSL/TLS for users who manage SSL certificates independently.
services:
    mixpost:
        image: inovector/mixpost-pro-team:latest
        env_file:
            - .env
        ports:
            - 9000:80
            - 8080:8080
        volumes:
            - storage:/var/www/html/storage/app
        depends_on:
            - mysql
            - redis
        restart: unless-stopped
    mysql:
        image: 'mysql/mysql-server:8.0'
        environment:
            MYSQL_DATABASE: ${DB_DATABASE}
            MYSQL_USER: ${DB_USERNAME}
            MYSQL_PASSWORD: ${DB_PASSWORD}
        volumes:
            - 'mysql:/var/lib/mysql'
        healthcheck:
            test: ["CMD", "mysqladmin", "ping", "-p ${DB_PASSWORD}"]
            retries: 3
            timeout: 5s
        restart: unless-stopped
    redis:
        image: 'redis:latest'
        command: redis-server --appendonly yes --replica-read-only no
        volumes:
            - 'redis:/data'
        healthcheck:
            test: ["CMD", "redis-cli", "ping"]
            retries: 3
            timeout: 5s
        restart: unless-stopped

volumes:
    mysql:
        driver: local
    redis:
        driver: local
    storage:
        driver: local
4. Create .env file
Create an .env file and change it accordingly.
# The unique license key used to install and validate your Mixpost instance.
LICENSE_KEY=

# The name of your application.
APP_NAME=Mixpost

# Key used to encrypt and decrypt sensitive data. Generate this using the following tool:
# https://mixpost.app/tools/encryption-key-generator
APP_KEY=

# Debug mode setting. Set to `false` for production environments.
APP_DEBUG=false

# Your app's domain or subdomain, without the 'http://' or 'https://' prefix.
APP_DOMAIN=example.com

# Full application URL is automatically configured; no modification required.
APP_URL=https://${APP_DOMAIN}

# MySQL connection setup.
DB_DATABASE=mixpost_db
DB_USERNAME=mixpost_user
DB_PASSWORD=

# The path used by Mixpost to load its core routes.
MIXPOST_CORE_PATH=mixpost

# SMTP
MAIL_HOST=smtp.mailgun.org
MAIL_PORT=587
MAIL_USERNAME=
MAIL_PASSWORD=
MAIL_ENCRYPTION=tls
MAIL_FROM_ADDRESS="hello@example.com"
MAIL_FROM_NAME="${APP_NAME}"

# Broadcast
BROADCAST_DRIVER=reverb

REVERB_APP_ID=insert_unique_id
REVERB_APP_KEY=insert_random_key
REVERB_APP_SECRET=insert_random_key
REVERB_HOST="${APP_DOMAIN}" # use "localhost" for testing on your localhost
REVERB_PORT=80  # use 8080 for testing on your localhost
REVERB_SCHEME=https

# Specify the email address to be used for SSL certificate registration and notifications.
SSL_EMAIL=user@example.com
4. Start Docker Compose
Mixpost can now be started via:
docker compose up -d
Please note that the initial connection might take a moment.
To view the logs in real-time, use the following command:
docker compose logs -f
To stop the container:
docker compose stop
5. Done
Mixpost is now accessible through the previously specified APP_URL. Example:
https://example.com
There you can proceed to create the first admin user.
Next steps
- Integrate services